Jeep Parts Wiki | Ford Parts Wiki
Home | Search | Browse
|
Body Service Manual August 1964 |
|
Prev

 Next
Next
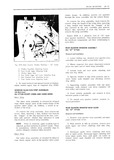
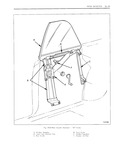
ZE 28 REAR QUARTER 4 To install reverse removal procedure Prior 3 Disengage wire harness split groinniet from to installation lubricate guide channel with 630AAW quarter inner panel Feed harness and connector Luliriplate or equivalent Adjust guide for proper through groinmet hole into opening between inner window operation as described under Rear Quar and outer panel ter Window Adjustments 4 Remove regulator attaching screws Fig 2E3l REAR QUARTER WINDOW FRONT GUIDE and remove regulator through access hole ALL 67 STYLES 5 To install window regulator assembly reverse Removal nd Installation removal procedure 1 Remove rear quarter window as previously NOTE The procedure for removing the electric I9SC1 ib d motor from the regulator is described under Door andior Quarter Window Regulator Electric 2 Remove front guide upper and lower adjusting Motor Assembly stud nuts Fig 2E31 3 Disengage guide adjusting studs from slots in quarter inner panel and remove through access REAR QUARTER WINDOW ADJUSTMENTS hOIE ALL 67 STYLES 4 To install reverse removal procedure Adjust L Remove m qu U tE tum S mb1Y 5 Pwr guide tor proper window operation as specified ViO S1Yd SC1 Ib d under Rear Quarter Window Adjustinents 2 To adjust window fore or aft loosen front and rear guide adjusting stud nuts Fig 2E31l REAR QUARTER WINDOW REGULATOR Position window and guides fore or aft as required IMANUAII then tighten adjusting stud nuts ALL 67 STYLES 3 To adjust window in or out at belt line Removchmd INSIUIIGIIM loosen front and rear guide upper adjusting stud nuts Fig 2E3l Adjust studs in or out as re 1 Remove rear quarter trim assembly and inner 1 iY d tI 1 Tiilht il Hdjustilig Stud MUS panel access hole cover NOTE Major adjustment at top of guides may 2 Lower window to full down position and require some adjustment at bottom remove sash channel cam attaching screws Fig ZEBUU Dlseugage mm mm mum On regulator 4 To adjust top of window in or out loosen UH arm md rcmove gash Chmmej C m front and rear guide lower adjusting stud nuts Fig 2E31 Adjust studs in or out as required then 3 Remove window regulator attaching screws tighten stud nuts Fig 2E31 and remove regulator through access Ir jQ 5 To relieve a fore and aft binding condition between front and rear guides loosen front and 4 To install reverse removal procedure rear guide adjusting stud nuts Fig 2E31 Operate window to fu1l up position and tighten front and REAR QUARTER WINDOW REGULATOR rear guide upper stud nuts Operate window to ELECTRIC fulle down and tighten remaining stud nuts ALL 67 STYLES 6 To limit forward and upward travel of window Rem v I ndInsr II II n adjust regulator lift arm stop as required Fig 2E3l 1 Remove rear quarter window and front guide SS mbH s as previously dgscribedl 7 To adjust front or rear of window in or out at belt line loosen either or both front and rear 2 Disconnect regukrtm motor Wire harness rrr guide upper adjusting stud nuts and adjust studs in line connector located on inboard side of quarter in OY Out 5 l q h d9 then Ughtm Stud tS 1Imwp mEI Figure ZE32 is a phantom view of 6 7 style V rear quarter hardware This illustration identifies NOTE Do not attempt to disengage permanent the hardware components and their relationship to connector at regulator motor each other

 Next
Next