Jeep Parts Wiki | Ford Parts Wiki
Home | Search | Browse
Prev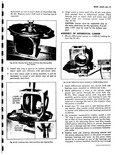
 Next
Next
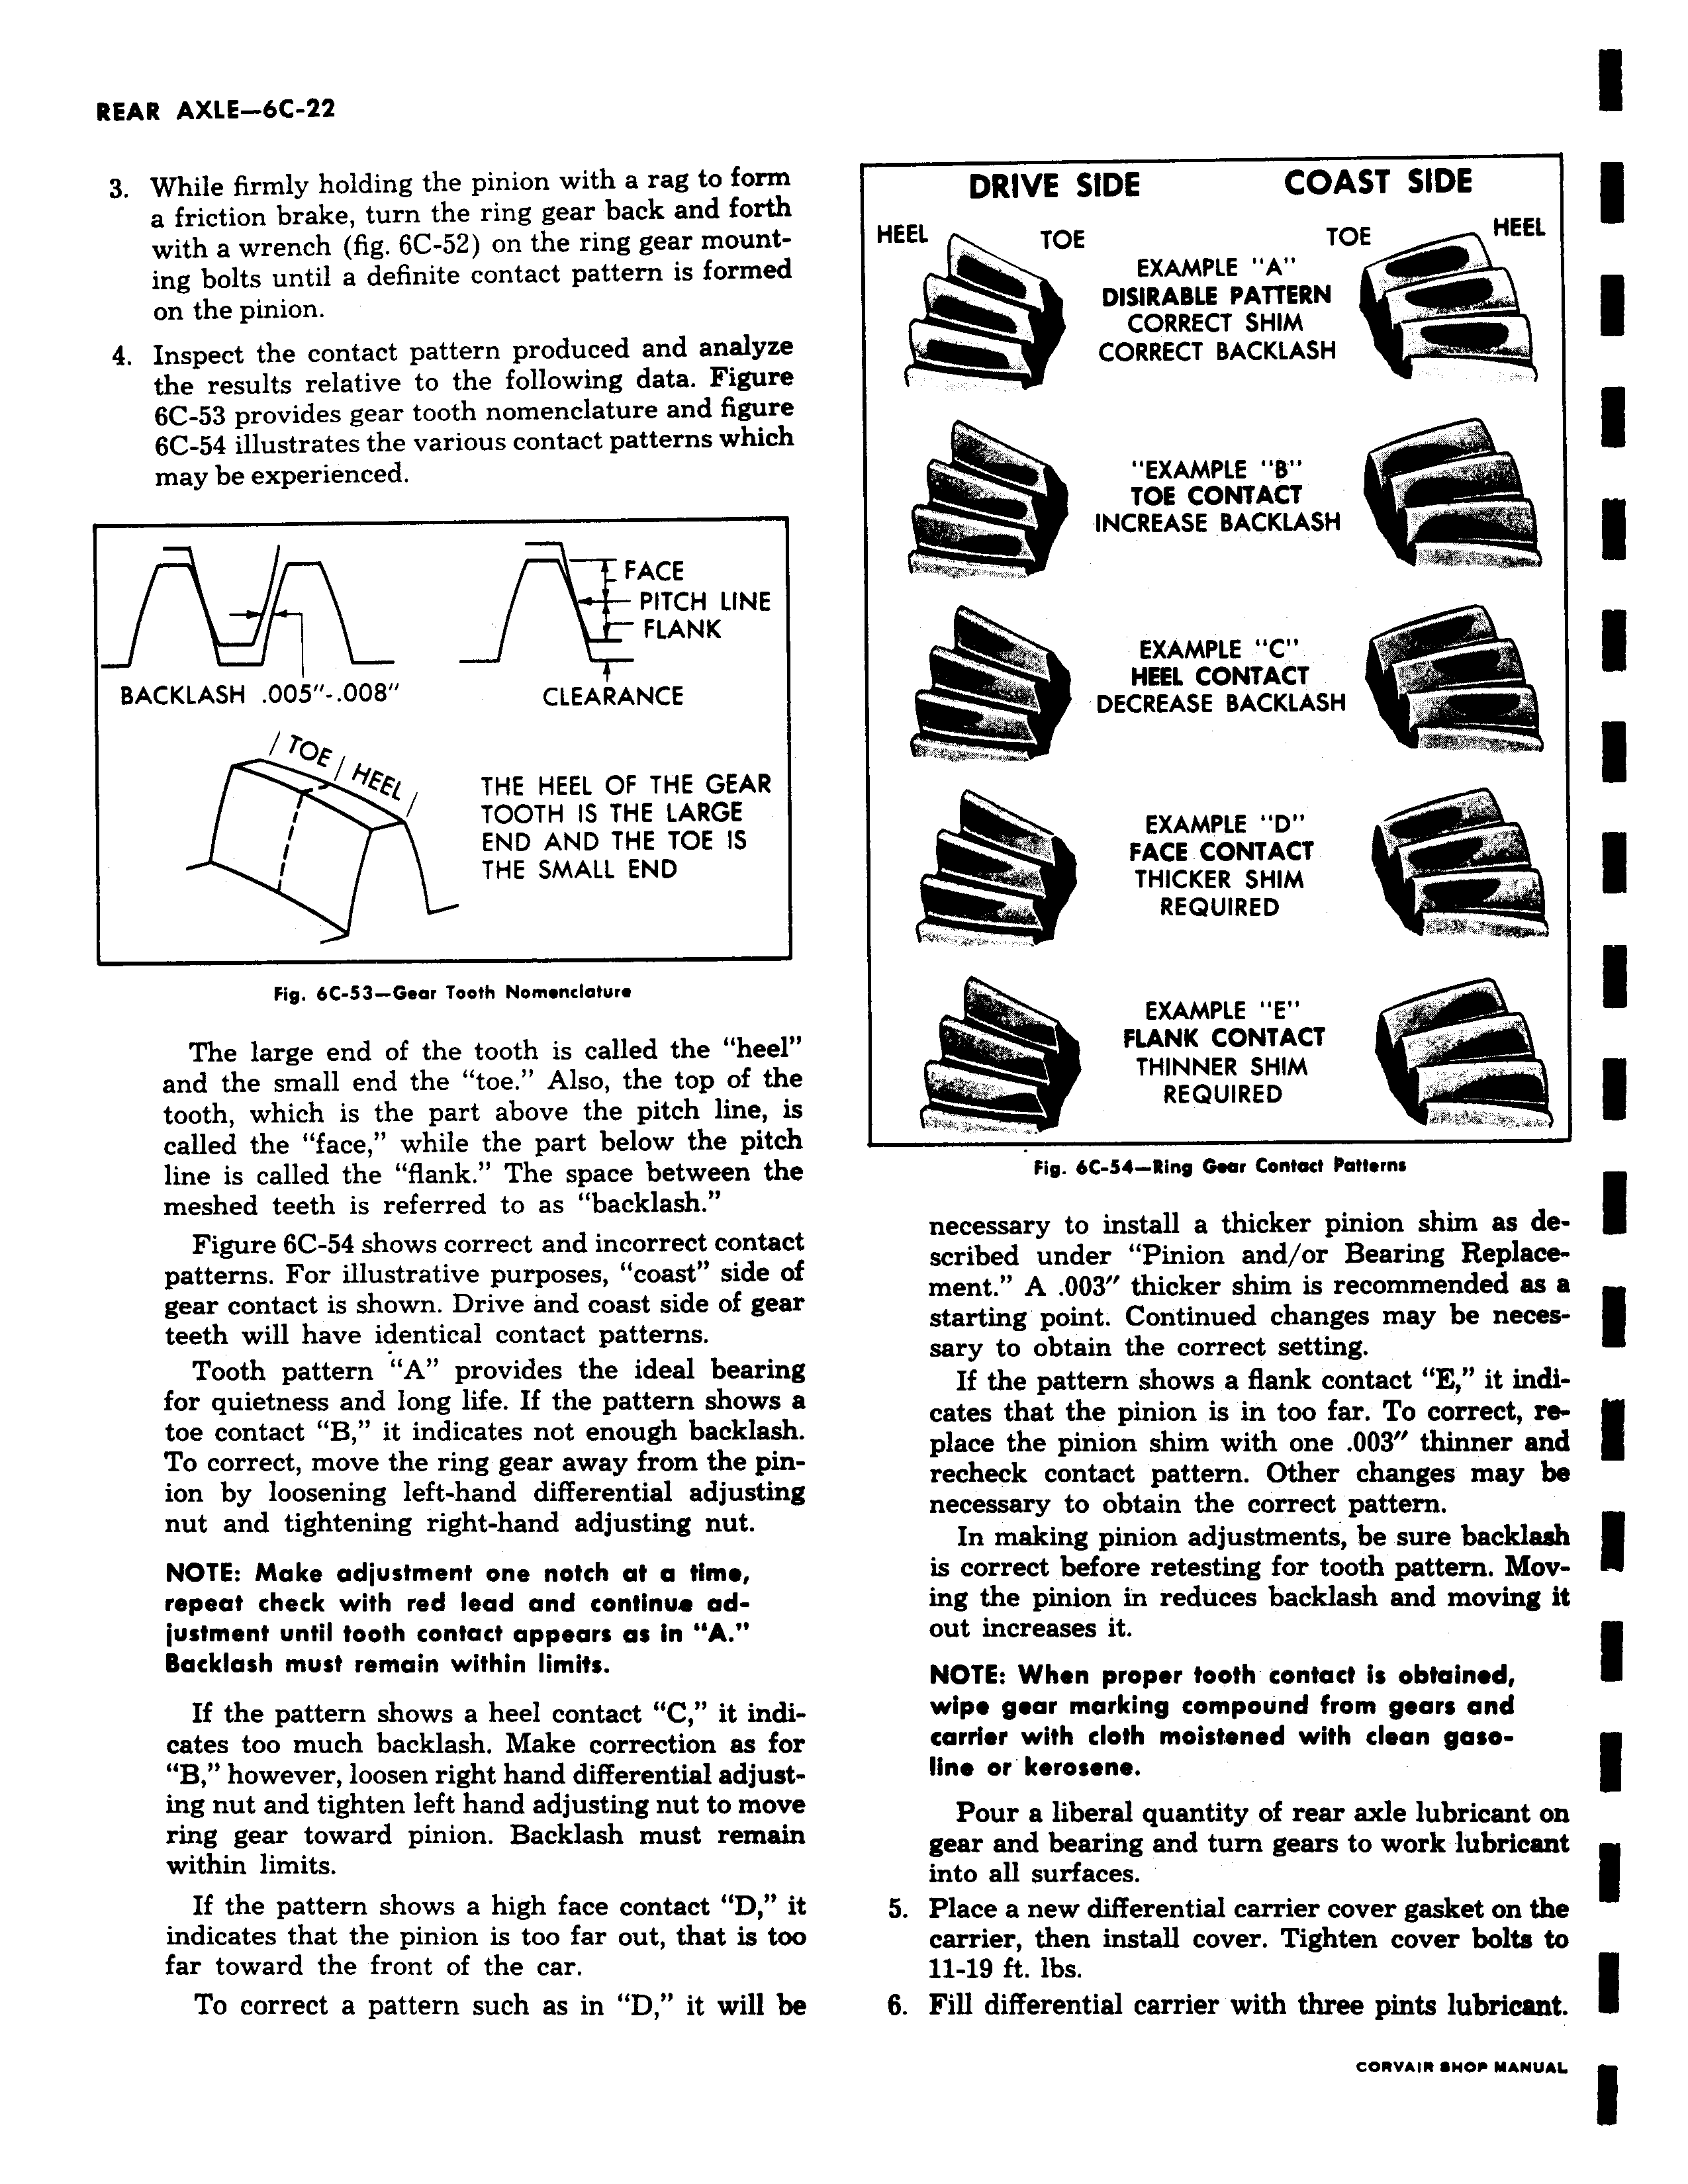
3 While firmly holding the pinion with a rag to form a friction brake turn the ring gear back and forth with a wrench fig 6C 52 on the ring gear mount ing bolts until a definite contact pattern is formed on the pinion 4 Inspect the contact pattern produced and analyze the results relative to the following data Figure 6C 53 provides gear tooth nomenclature and figure 6C 54 illustrates the various contact patterns which may be experienced FACE PITCH LINE JV FLANK BACKLASH 005 008 CLEARANCE OFl tiFFI THE HEEL OF THE GEAR TOOTH IS THE LARGE END AND THE TOE IS i THE SMALL END Fig 6C 53 Gear Tooth Nomenclature The large end of the tooth is called the heel and the small end the toe Also the top of the tooth which is the part above the pitch line is called the face while the part below the pitch line is called the flank The space between the meshed teeth is referred to as backlash Figure 6C 54 shows correct and incorrect contact patterns For illustrative purposes coast side of gear contact is shown Drive and coast side of gear teeth will have identical contact patterns Tooth pattern A provides the ideal bearing for quietness and long life If the pattern shows a toe contact B it indicates not enough backlash To correct move the ring gear away from the pinion by loosening left hand differential adjusting nut and tightening right hand adjusting nut NOTE Make adjustment one notch at a time repeat check with red lead and continue adjustment until tooth contact appears as in A Backlash must remain within limits If the pattern shows a heel contact C it indicates too much backlash Make correction as for B however loosen right hand differential adjusting nut and tighten left hand adjusting nut to move ring gear toward pinion Backlash must remain within limits If the pattern shows a high face contact D it indicates that the pinion is too far out that is too far toward the front of the car To correct a pattern such as in D it will be DRIVE SIDE COAST SIDE HEEL TOE TOE HEEL EXAMPLE A DISIRABLE PATTERN CORRECT SHIM CORRECT BACKLASH EXAMPLE B TOE CONTACT INCREASE BACKLASH EXAMPLE C HEEL CONTACT DECREASE BACKLASH EXAMPLE D FACE CONTACT THICKER SHIM REQUIRED EXAMPLE E FLANK CONTACT THINNER SHIM REQUIRED Fig 6C 54 king Gear Contact Patterns necessary to install a thicker pinion shim as described under Pinion and or Bearing Replacement A 003 thicker shim is recommended as a starting point Continued changes may be necessary to obtain the correct setting If the pattern shows a flank contact E it indicates that the pinion is in too far To correct replace the pinion shim with one 003 thinner and recheck contact pattern Other changes may be necessary to obtain the correct pattern In making pinion adjustments be sure backlash is correct before retesting for tooth pattern Moving the pinion in reduces backlash and moving it out increases it NOTE When proper tooth contact is obtained wipe gear marking compound from gears and carrier with cloth moistened with clean gasoline or kerosene Pour a liberal quantity of rear axle lubricant on gear and bearing and turn gears to work lubricant into all surfaces 5 Place a new differential carrier cover gasket on the carrier then install cover Tighten cover bolts to 11 19 ft lbs 6 Fill differential carrier with three pints lubricant