Jeep Parts Wiki | Ford Parts Wiki
Home | Search | Browse | Marketplace | Messages | FAQ | Guest
Prev

 Next
Next
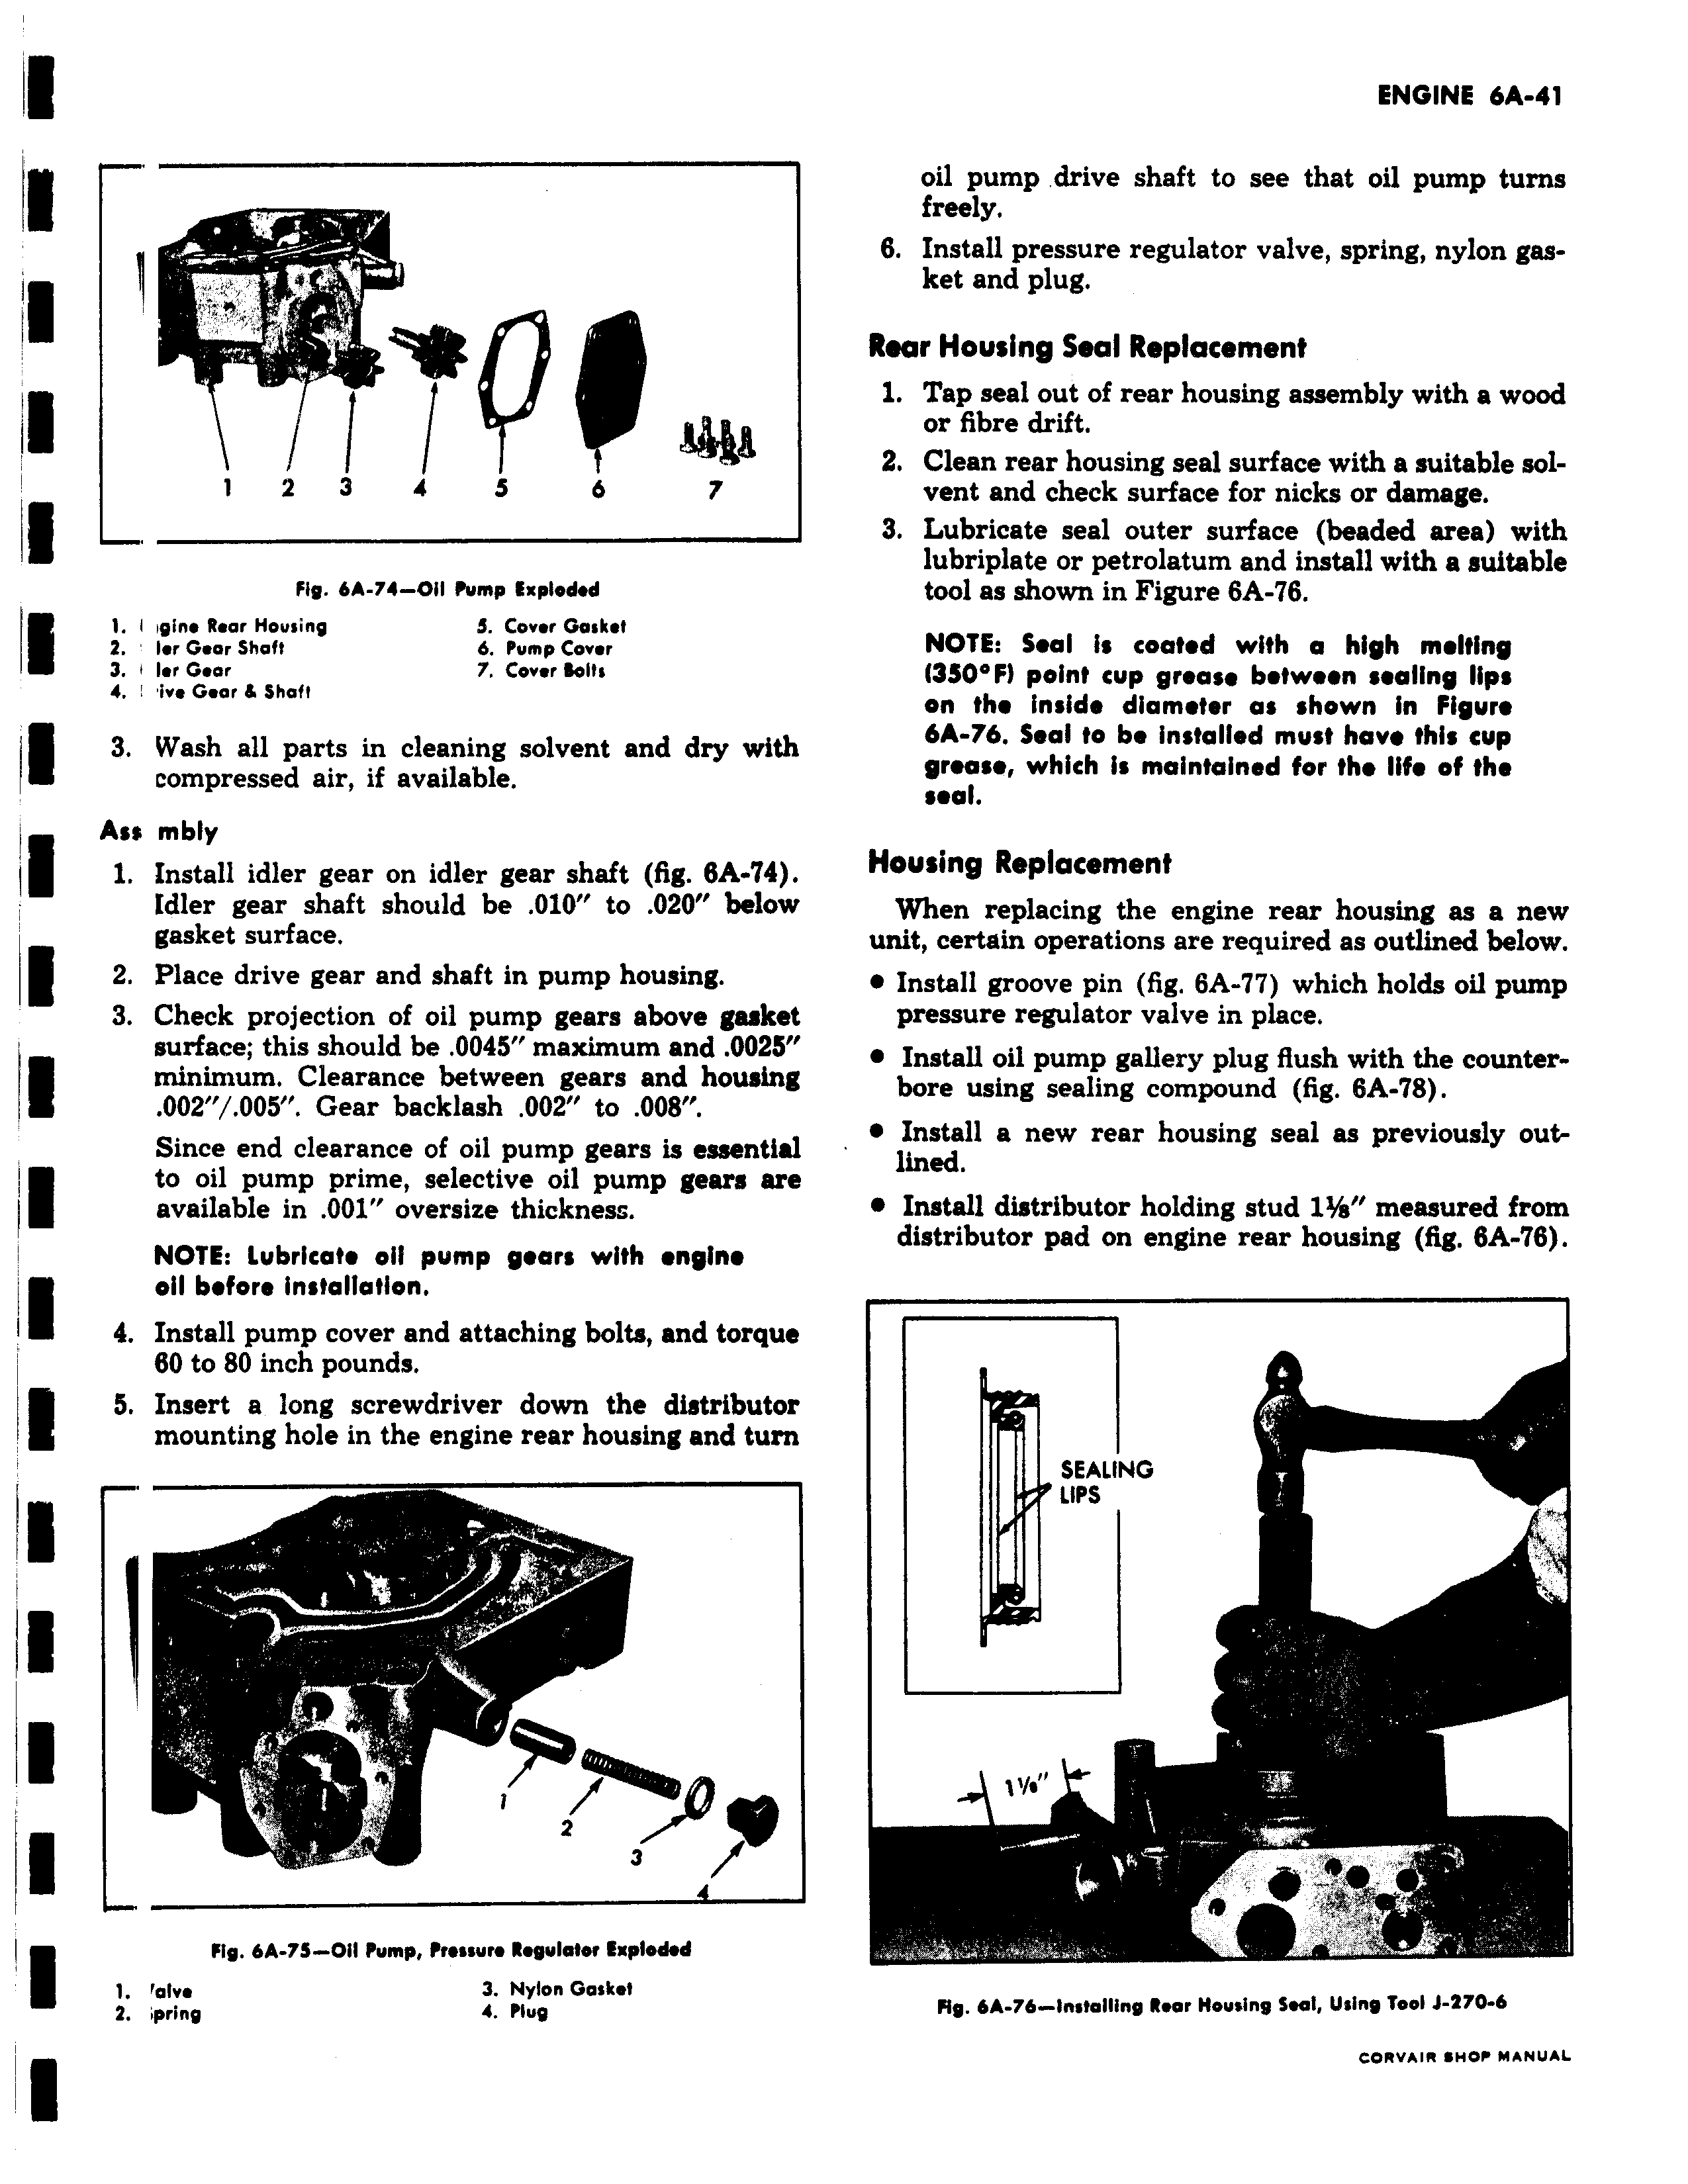
M MAA 1 2 3 4 S 6 7 Fig 6A 71 Oil Punnp Exploded i I iqine Rear Housing 5 Cover Gasket 2 ler Gear Shaft 6 Pump Cover 3 v Im Gear 7 Cover Bolts 4 I ive Gear Shaft 3 Wash all parts in cleaning solvent and dry with compressed air if available Ass mbly 1 Install idler gear on idler gear shaft fig 8A 74 Idler gear shaft should be 010 to 020 below gasket surface 2 Place drive gear and shaft in pump housing 3 Check projection of oil pump gears above gasket surface this should be 0045 maximum and 0025 minimum Clearance between gears and housing 002 005 Gear backlash 002 to 008 Since end clearance of oil pump gears is essential to oil pump prime selective oil pump gears are available in 001 oversize thickness NOTE Lubricate oil pump year with engine oil before installation 4 Install pump cover and attaching bolts and torque 80 to 80 inch pounds S Insert a long screwdriver down the distributor mounting hole in the engine rear housing and turn i 2 to Fig bA 7S Oil Pump Pressure Regulator Exploded 1 Falve 3 Nylon Gasket 2 pring 4 Plug oil pump drive shaft to see that oil pump turns freely 6 Install pressure regulator valve spring nylon gasket and plug Rear Housing Seal Replacement 1 Tap seal out of rear housing assembly with a wood or fibre drift 2 Clean rear housing seal surface with a suitable solvent and check surface for nicks or damage 3 Lubricate seal outer surface beaded area with lubriplate or petrolatum and install with a suitable tool as shown in Figure 6A 76 NOTE Seal i coated with a high melting 350 11 point cup grease between sealing lips on the inside diameter as shown in Figure 6A 76 Seal to be installed must have this cup grease which is maintained for the life of the seal Housing Replacement When replacing the engine rear housing as a new unit certain operations are required as outlined below e Install groove pin fig 6A 7 which holds oil pump pressure regulator valve in place e Install oil pump gallery plug flush with the counterbore using sealing compound fig 6A 78 e Install a new rear housing seal as previously outlined e Install distributor holding stud 1 measured from distributor pad on engine rear housing fig 6A 76 SEALING LIPS Fig 6A 76 imfollinq Roar Housing Seal Using Tool J 470 6 me aum r uuW

 Next
Next