Jeep Parts Wiki | Ford Parts Wiki
Home | Search | Browse
Prev

 Next
Next
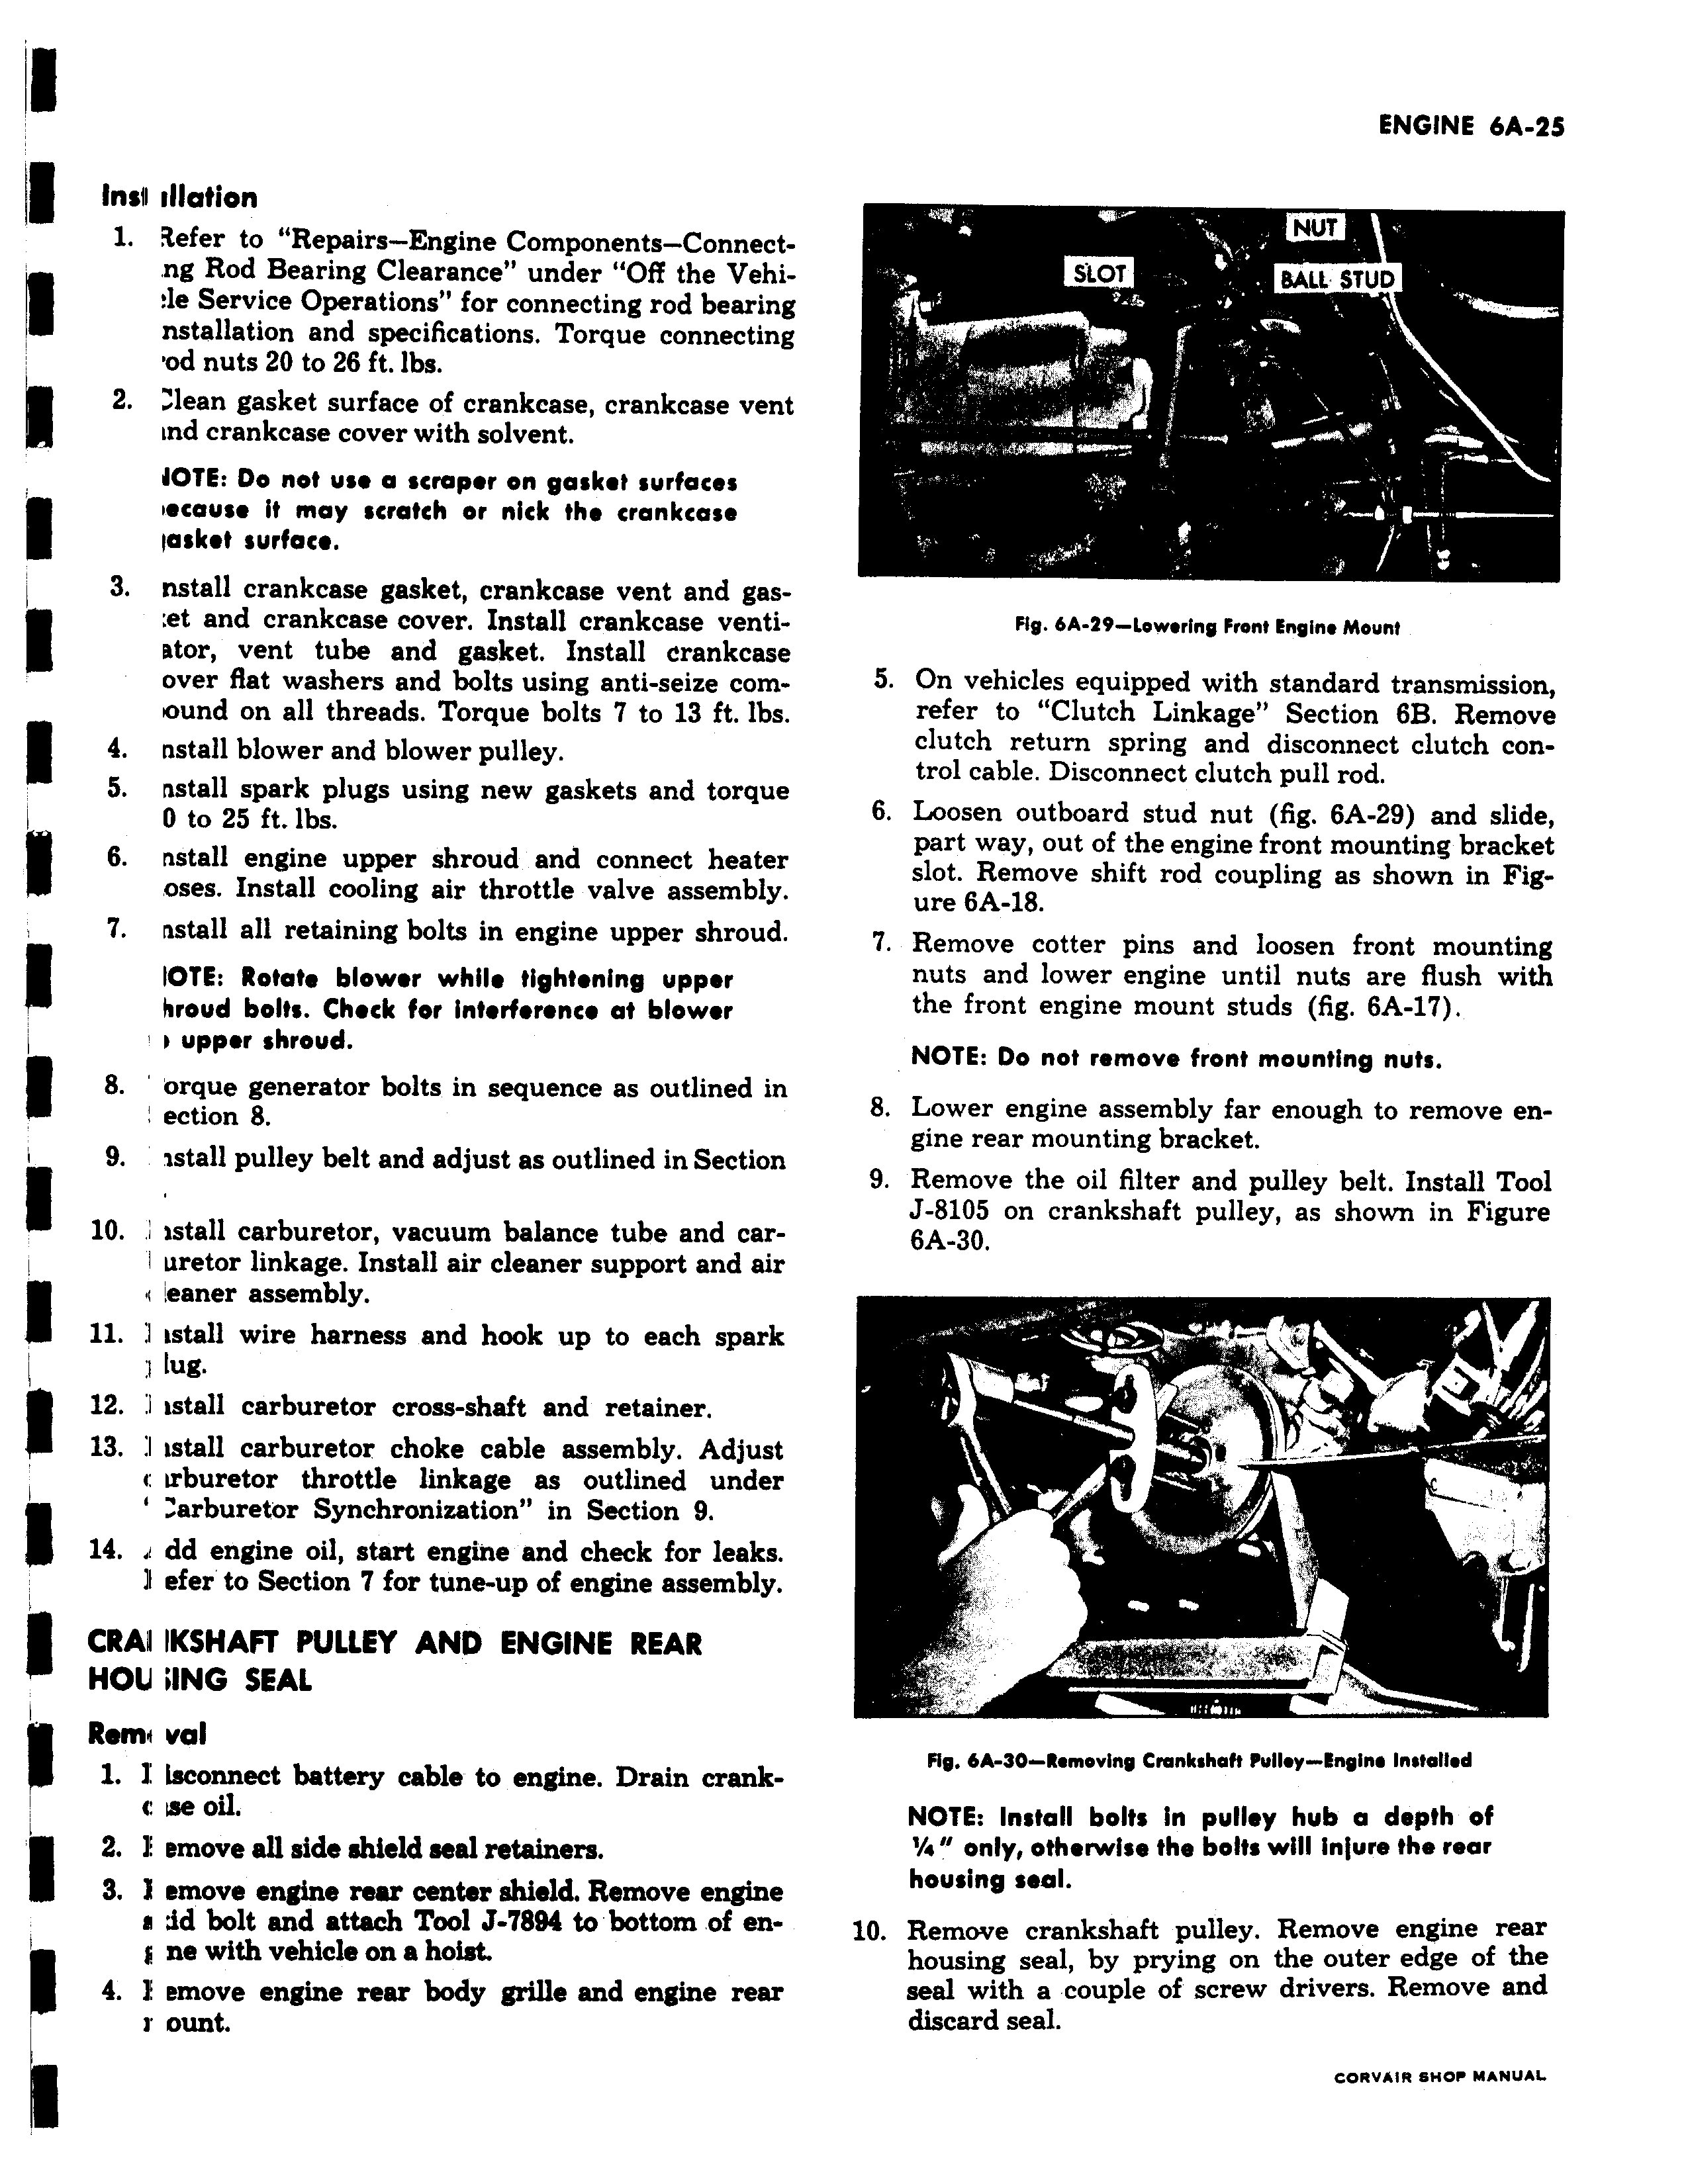
Insil illation 1 Refer to Repairs Engine Components Connectng Rod Bearing Clearance under Off the Vehiae Service Operations for connecting rod bearing nstallation and specifications Torque connecting od nuts 20 to 26 ft lbs 2 Mean gasket surface of crankcase crankcase vent Ind crankcase cover with solvent JOTE Do not use a scraper on gasket surfaces ecau e it may scratch or nick the crankcase a ket surface 3 nstall crankcase gasket crankcase vent and gas et and crankcase cover Install crankcase venti ator vent tube and gasket Install crankcase over fiat washers and bolts using anti seize combund on all threads Torque bolts 7 to 13 ft lbs 4 nstall blower and blower pulley 5 nstall spark plugs using new gaskets and torque 0 to 25 ft lbs 6 nstall engine upper shroud and connect heater oses Install cooling sir throttle valve assembly 7 nstall all retaining bolts in engine upper shroud IOTE Rotate blower while tightening upper hroud bolts Check for interference at blower r upper shroud 8 orque generator bolts in sequence as outlined in ection 8 9 zstall pulley belt and adjust as outlined in Section 10 istall carburetor vacuum balance tube and carl uretor linkage Install sir cleaner support and air a eaner assembly 11 kstall wire harness and hook up to each spark 1 lug 12 I istall carburetor cross shaft and retainer 13 I tstall carburetor choke cable assembly Adjust c Irburetor throttle linkage as outlined under arburetor Synchronization in Section 9 14 1 dd engine oil start engine and check for leaks ll efer to Section 7 for tune up of engine assembly CRAV IKSHAFT PULLEY AND ENGINE REAR HOU i1NG SEAL Rema val 1 I sconnect battery cable to engine Drain crank me oil 2 f emove all side shield seal retainers 3 I emove engine rear center shield Remove engine e 3d bolt and attach Tool J 7894 to bottom of en f ne with vehicle on a hoist 4 1 emove engine rear body grille and engine rear r ount Crvvirve oA s2 NUT SLOT SALL STUD Fig 6A 29 Lowering Front Engine Mount 5 On vehicles equipped with standard transmission refer to Clutch Linkage Section 6B Remove clutch return spring and disconnect clutch control cable Disconnect clutch pull rod 6 Loosen outboard stud nut fig 6A 29 and slide part way out of the engine front mounting bracket slot Remove shift rod coupling as shown in Figure 6A 18 7 Remove cotter pins and loosen front mounting nuts and lower engine until nuts are flush with the front engine mount studs fig 6A 17 NOTE Do not remove front mounting nuts 8 Lower engine assembly far enough to remove engine rear mounting bracket 9 Remove the oil filter and pulley belt Install Tool J 8105 on crankshaft pulley as shown in Figure 6A 30 4 i g Fig 6A 30 Romoviny crankshaft Fuiiey inglne Installed NOTE Install bolts in pulley hub a depth of 4 only otherwise the bolts will Injure the rear housing seal 10 Remove crankshaft pulley Remove engine rear housing seal by prying on the outer edge of the seal with a couple of screw drivers Remove and discard seal

 Next
Next