Jeep Parts Wiki | Ford Parts Wiki
Home | Search | Browse
Prev

 Next
Next
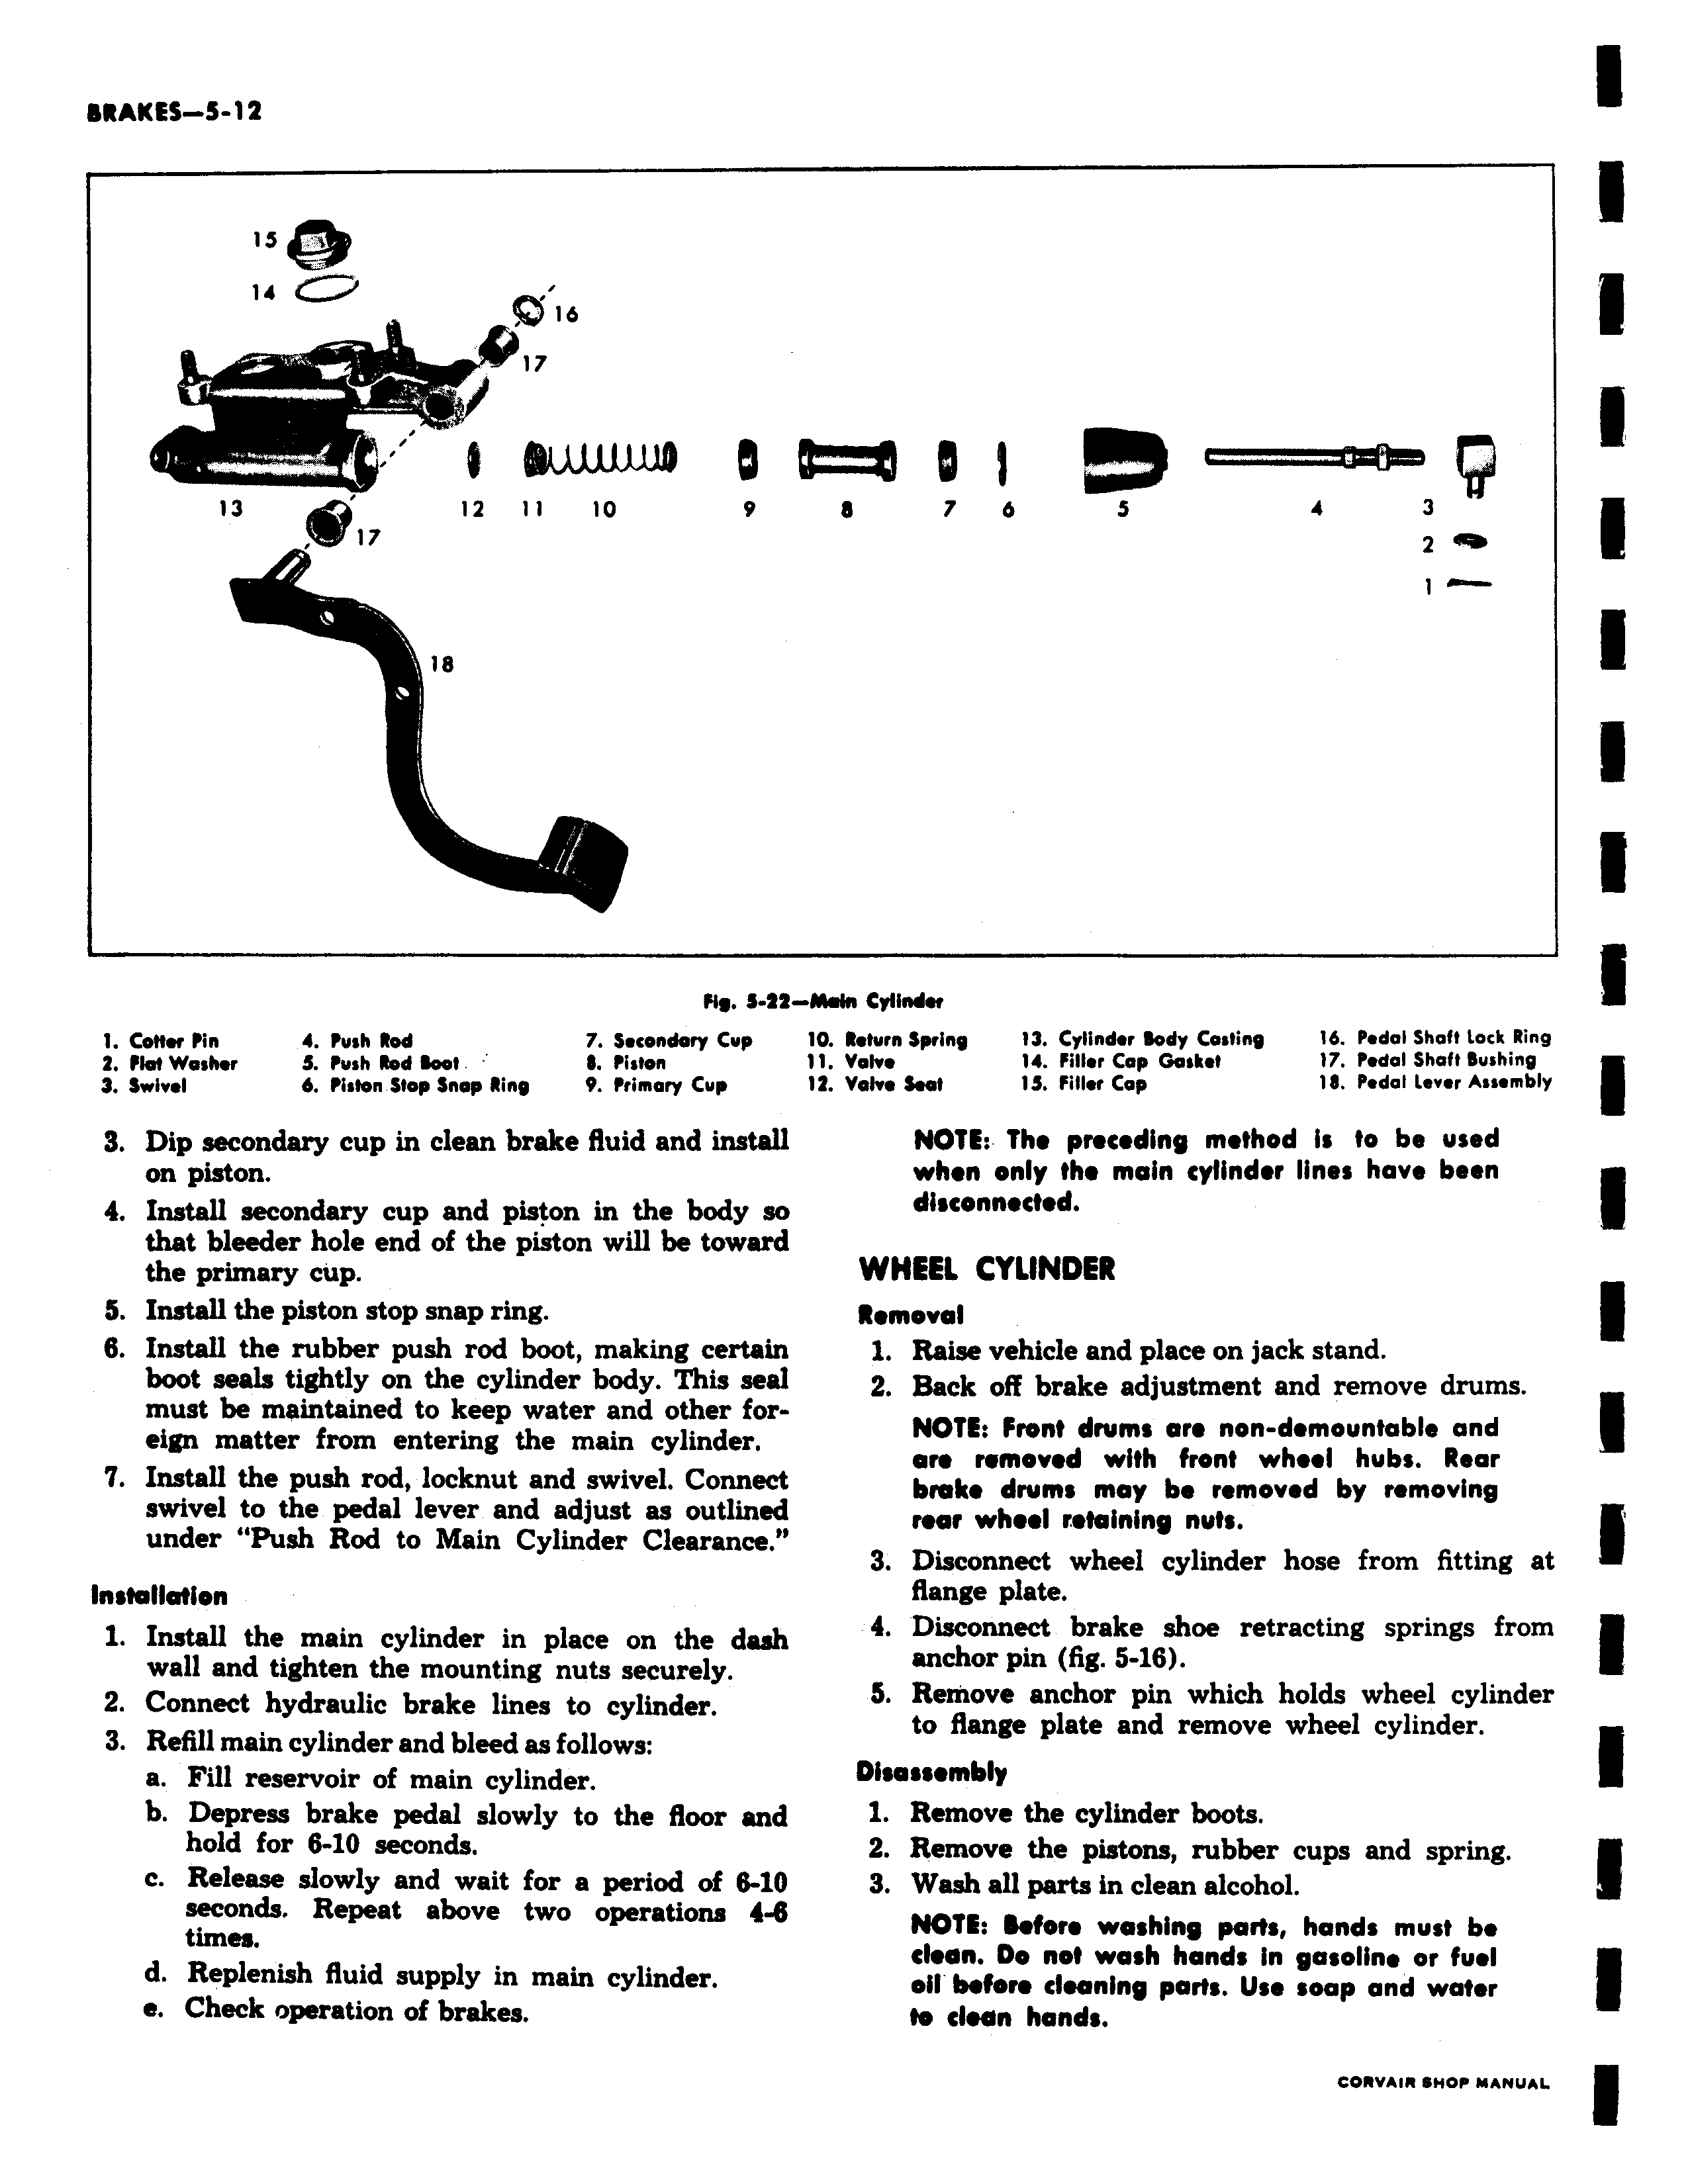
ls 14 16 17 13 12 11 10 9 17 18 Fig S l21 Cotter Pin 4 Push Rod 7 Secondary Cup 2 Fiat Washer 3 Push Rod Boat 1 Piston 3 Swivel 6 Piston Stop Snap Ring 9 Primary Cup 3 Dip secondary cup in clean brake fluid and install on piston 4 Install secondary cup and piston in the body so that bleeder hole end of the piston will be toward the primary cup 5 Install the piston stop snap ring 6 Install the rubber push rod boot making certain boot seals tightly on the cylinder body This seal must be maintained to keep water and other foreign matter from entering the main cylinder 7 Install the push rod locknut and swivel Connect swivel to the pedal lever and adjust as outlined under Push Rod to Main Cylinder Clearance Installation 1 Install the main cylinder in place on the dash wall and tighten the mounting nuts securely 2 Connect hydraulic brake lines to cylinder 3 Refill main cylinder and bleed as follows a Fill reservoir of main cylinder b Depress brake pedal slowly to the floor and hold for 6 10 seconds c Release slowly and wait for a period of 6 10 seconds Repeat above two operations 4 6 times d Replenish fluid supply in main cylinder e Check operation of brakes 8 7 6 5 4 3 2 ARAfn 0ylindm 10 Return Spring 13 Cylinder Body Costing 16 Pedal Shaft Lack Ring 11 Volvo 14 Filler Cop Gasket 17 Pedal Shaft Bushing 12 Volvo Seat 13 Filler Cap IS Pedal Lever Assembly NOTE The preceding method is to be used when only the main cylinder lines have been disconnected WHEEL CYLINDER Removal 1 Raise vehicle and place on jack stand 2 Back off brake adjustment and remove drums NOTE front drum ore non demountable and an removed with front wheel hubs Rear broke drum may be removed by removing roar wheel retaining nuts 3 Disconnect wheel cylinder hose from fitting at flange plate 4 Disconnect brake shoe retracting springs from anchor pin fig 5 16 5 Remove anchor pin which holds wheel cylinder to flange plate and remove wheel cylinder Disassembly 1 Remove the cylinder boots 2 Remove the pistons rubber cups and spring 3 Wash all parts in clean alcohol NOTE Before washing part hands must be clean Do not wash hands in gasoline or fuel oil before cleaning port Use soap and water to clean hands

 Next
Next