Jeep Parts Wiki | Ford Parts Wiki
Home | Search | Browse
Prev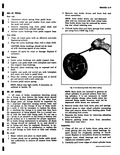
 Next
Next
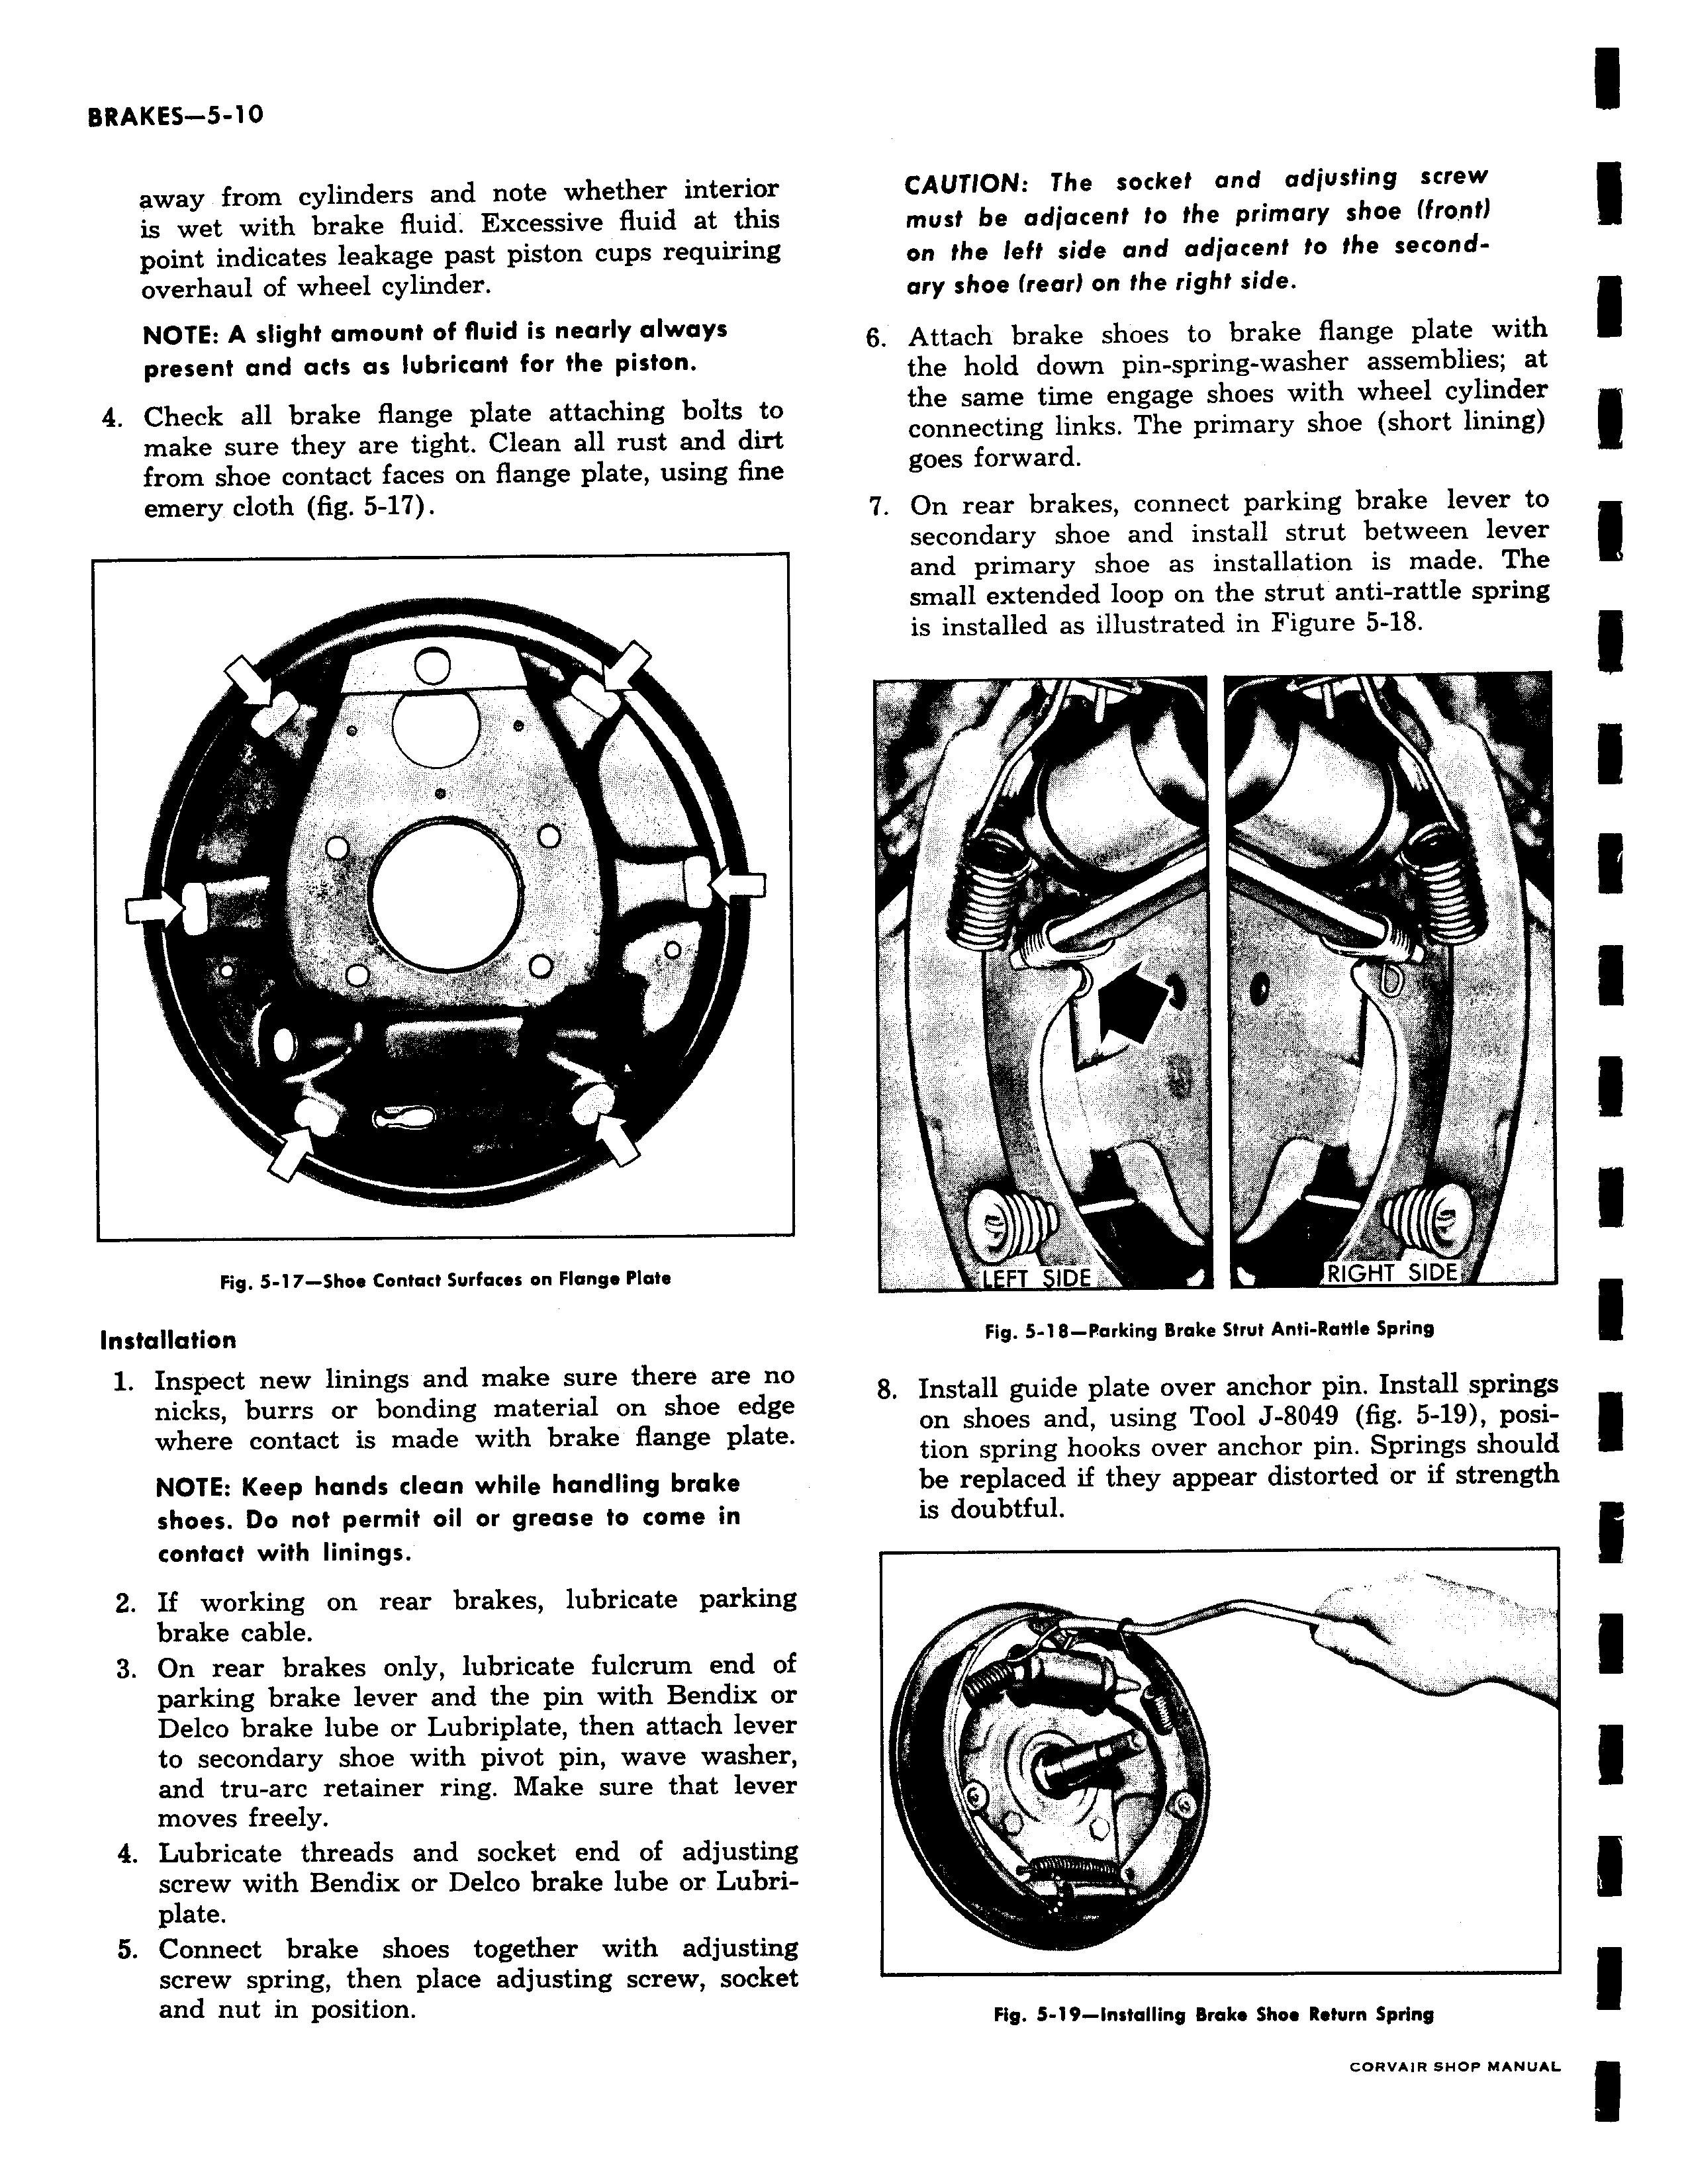
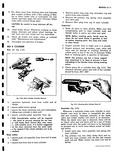
away from cylinders and note whether interior is wet with brake fluid Excessive fluid at this point indicates leakage past piston cups requiring overhaul of wheel cylinder NOTE A slight amount of fluid is nearly always present and acts as lubricant for the piston 4 Check all brake flange plate attaching bolts to make sure they are tight Clean all rust and dirt from shoe contact faces on flange plate using fine emery cloth fig 5 17 0 o O O Fig 5 17 Shoe Contact Surfaces on Flange Plate Installation 1 Inspect new linings and make sure there are no nicks burrs or bonding material on shoe edge where contact is made with brake flange plate NOTE Keep hands dean while handling brake shoes Do not permit oil or grease to come in contact with linings 2 If working on rear brakes lubricate parking brake cable 3 On rear brakes only lubricate fulcrum end of parking brake lever and the pin with Bendix or Delco brake lube or Lubriplate then attach lever to secondary shoe with pivot pin wave washer and tru arc retainer ring Make sure that lever moves freely 4 Lubricate threads and socket end of adjusting screw with Bendix or Delco brake lube or Lubriplate 5 Connect brake shoes together with adjusting screw spring then place adjusting screw socket and nut in position CAUTION The socket and adjusting screw must be adjacent to the primary shoe front on the left side and adjacent to the secondary shoe rear on the right side 6 Attach brake shoes to brake flange plate with the hold down pin spring washer assemblies at the same time engage shoes with wheel cylinder connecting links The primary shoe short lining goes forward 7 On rear brakes connect parking brake lever to secondary shoe and install strut between lever and primary shoe as installation is made The small extended loop on the strut anti rattle spring is installed as illustrated in Figure 5 18 T i a I FT All iDE RIGHT SIDEFig 5 18 Parking Brake Strut Anti Rattle Spring 8 Install guide plate over anchor pin Install springs on shoes and using Tool J 8049 fig 5 19 position spring hooks over anchor pin Springs should be replaced if they appear distorted or if strength is doubtful t sa s Fig 5 19 Installing Broke Shoe Return Spring