Jeep Parts Wiki | Ford Parts Wiki
Home | Search | Browse
Prev
 Next
Next
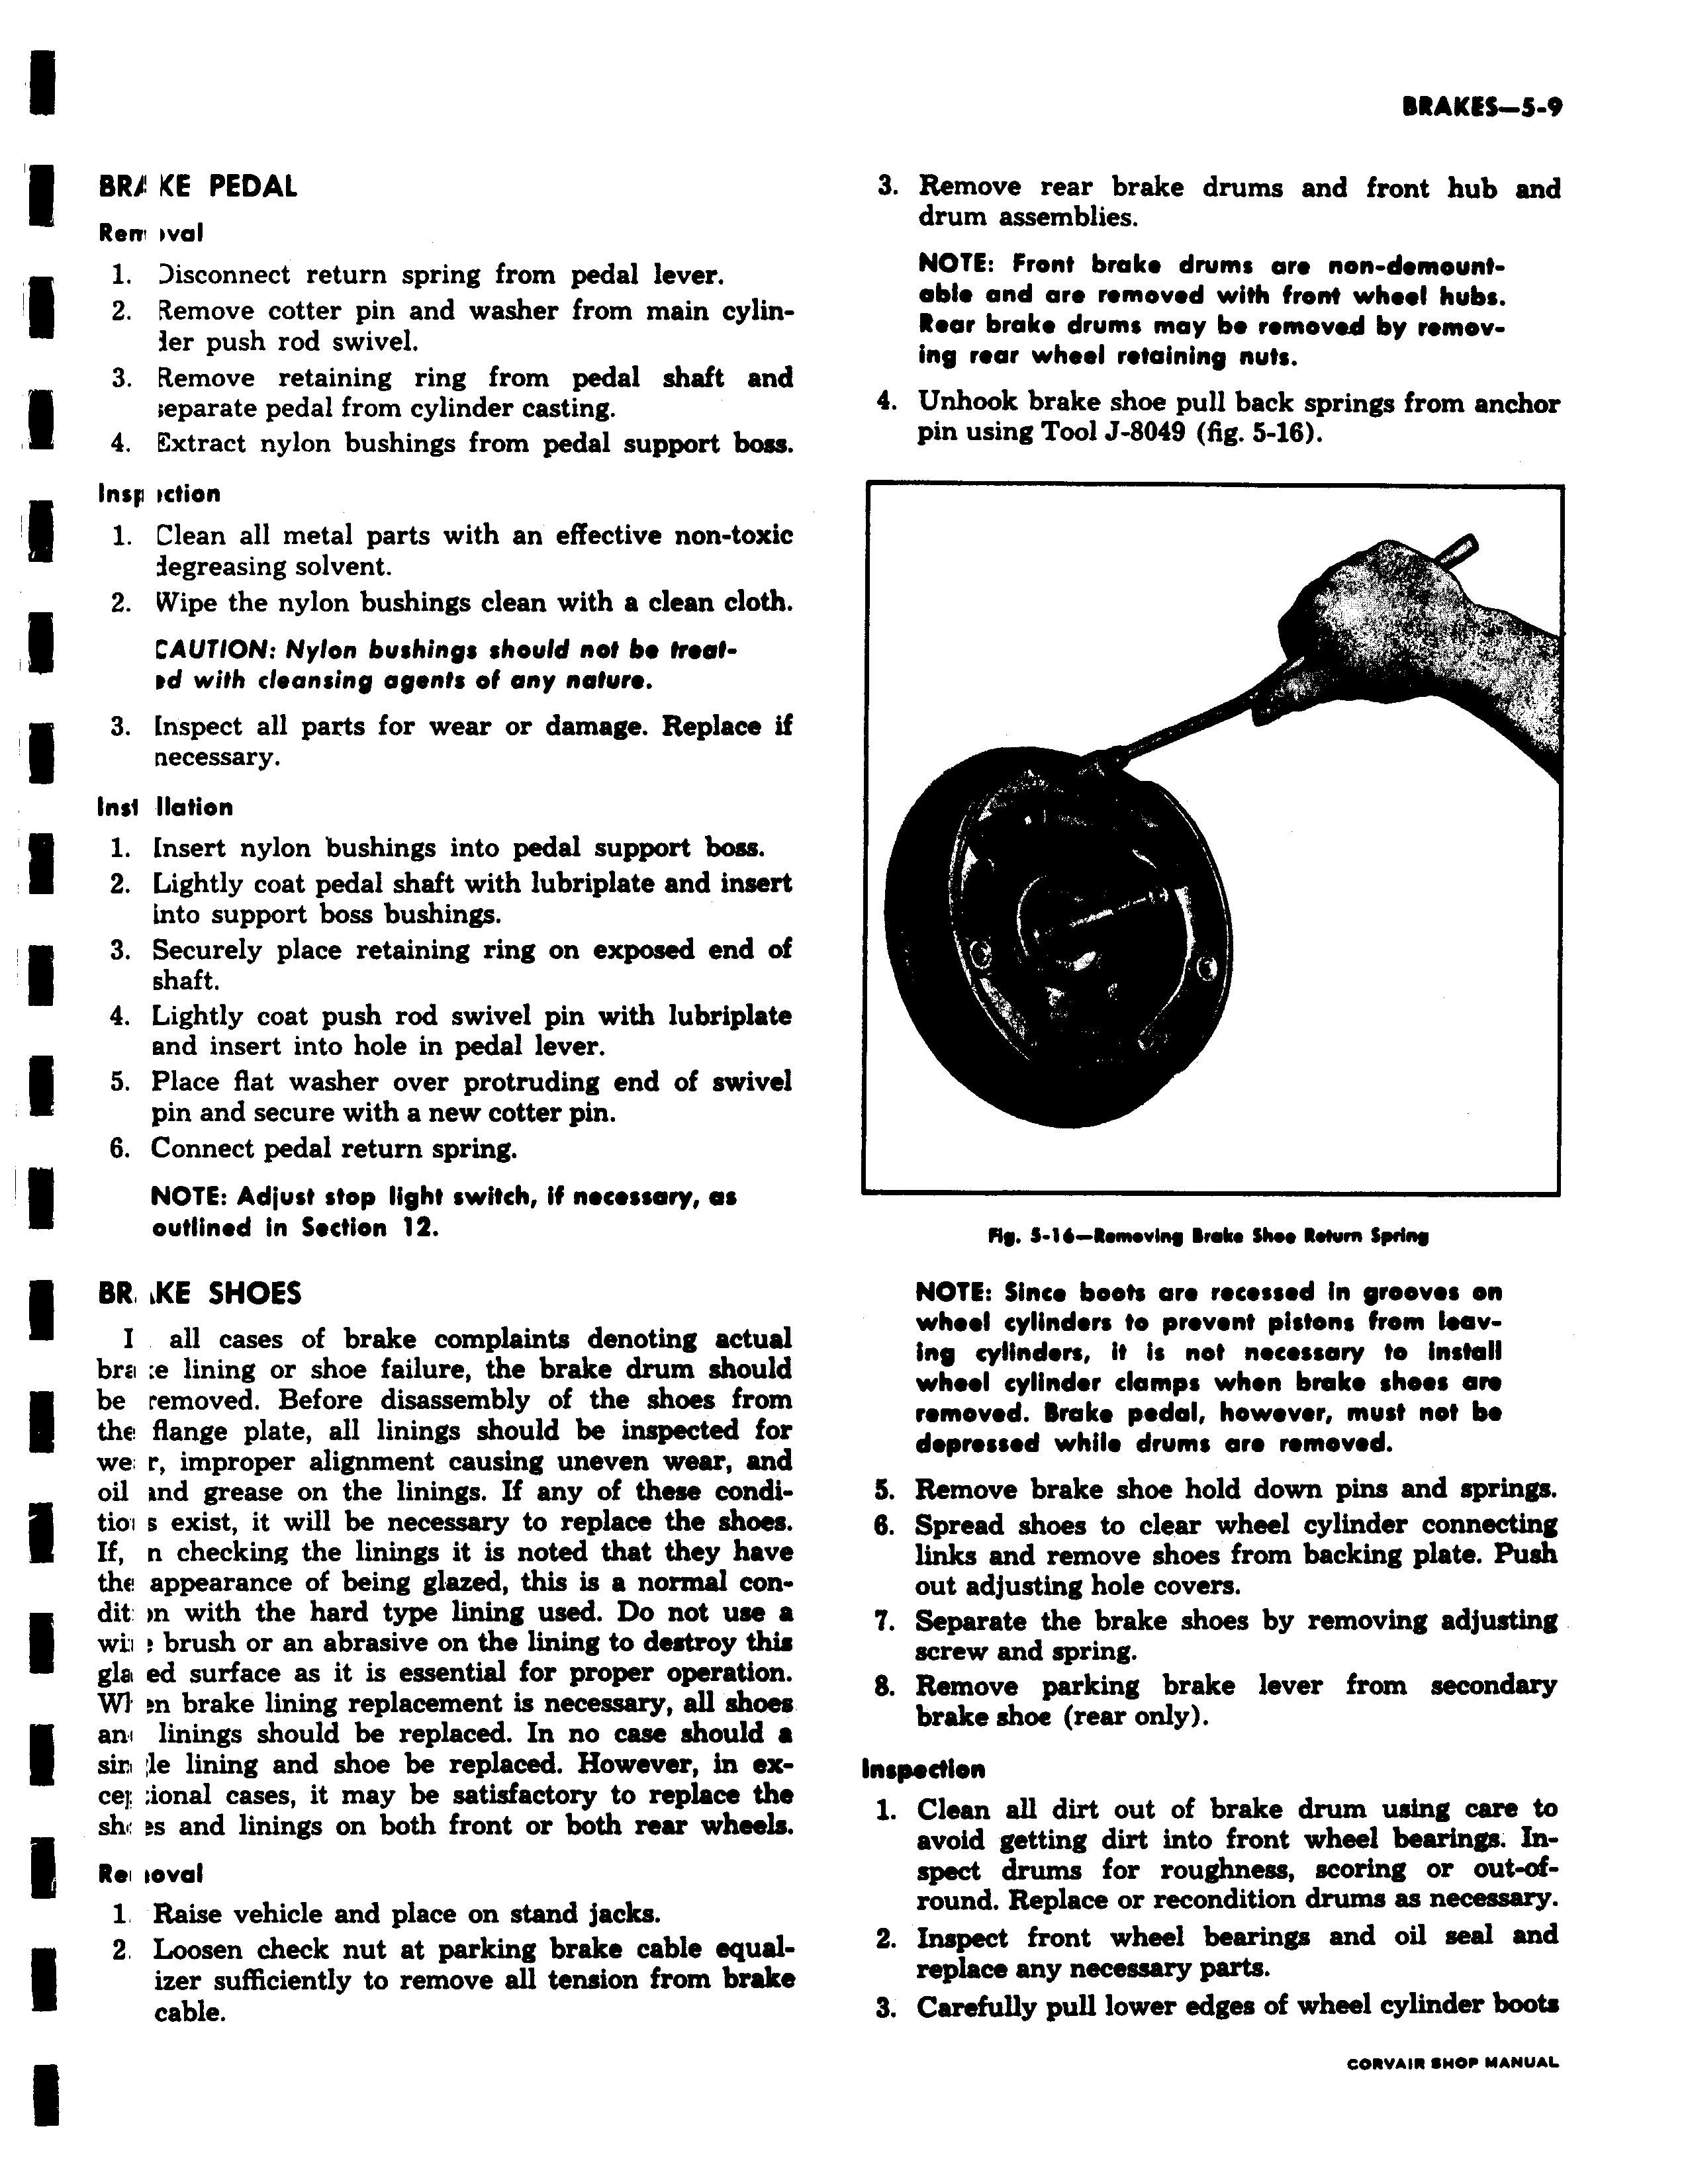
BRA KE PEDAL L Reni oval 1 isconnect return spring from pedal lever 2 Remove cotter pin and washer from main cylinler push rod swivel 3 Remove retaining ring from pedal shaft and ceparate pedal from cylinder casting 4 Extract nylon bushings from pedal support boss Insp ction 1 Clean all metal parts with an effective non toxic 3egreasing solvent 2 Wipe the nylon bushings clean with a clean cloth CAUTION Nylon bushings should not be Nest td with cleansing agent of any nature 3 Inspect all parts for wear or damage Replace if necessary In i Ilation 1 Insert nylon bushings into pedal support boss 2 Lightly coat pedal shaft with lubriplate and insert into support boss bushings 3 Securely place retaining ring on exposed end of shaft 4 Lightly coat push rod swivel pin with lubriplate and insert into hole in pedal lever 5 Place flat washer over protruding end of swivel pin and secure with a new cotter pin 6 Connect pedal return spring r NOTE Adjust stop light switch if necessary as f outlined in Section 12 BR vKE SHOES I all cases of brake complaints denoting actual bre e lining or shoe failure the brake drum should be removed Before disassembly of the shoes from the flange plate all linings should be inspected for we r improper alignment causing uneven wear and oil tnd grease on the linings If any of these condi I tioi s exist it will be necessary to replace the shoes If n checking the linings it is noted that they have the appearance of being glazed this is a normal condit on with the hard type lining used Do not use a wii brush or an abrasive on the lining to destroy this gla ed surface as it is essential for proper operation Wl en brake lining replacement is necessary all shoes ani linings should be replaced In no case should a sin le lining and shoe be replaced However in excel ional cases it may be satisfactory to replace the sh s and linings on both front or both rear wheels Rel loval 1 Raise vehicle and place on stand jacks 2 Loosen check nut at parking brake cable equal izer sufficiently to remove all tension from brake cable i r Pf Bowl