Jeep Parts Wiki | Ford Parts Wiki
Home | Search | Browse
|
Corvair Chassis Shop Manual December 1964 |
|
Prev

 Next
Next
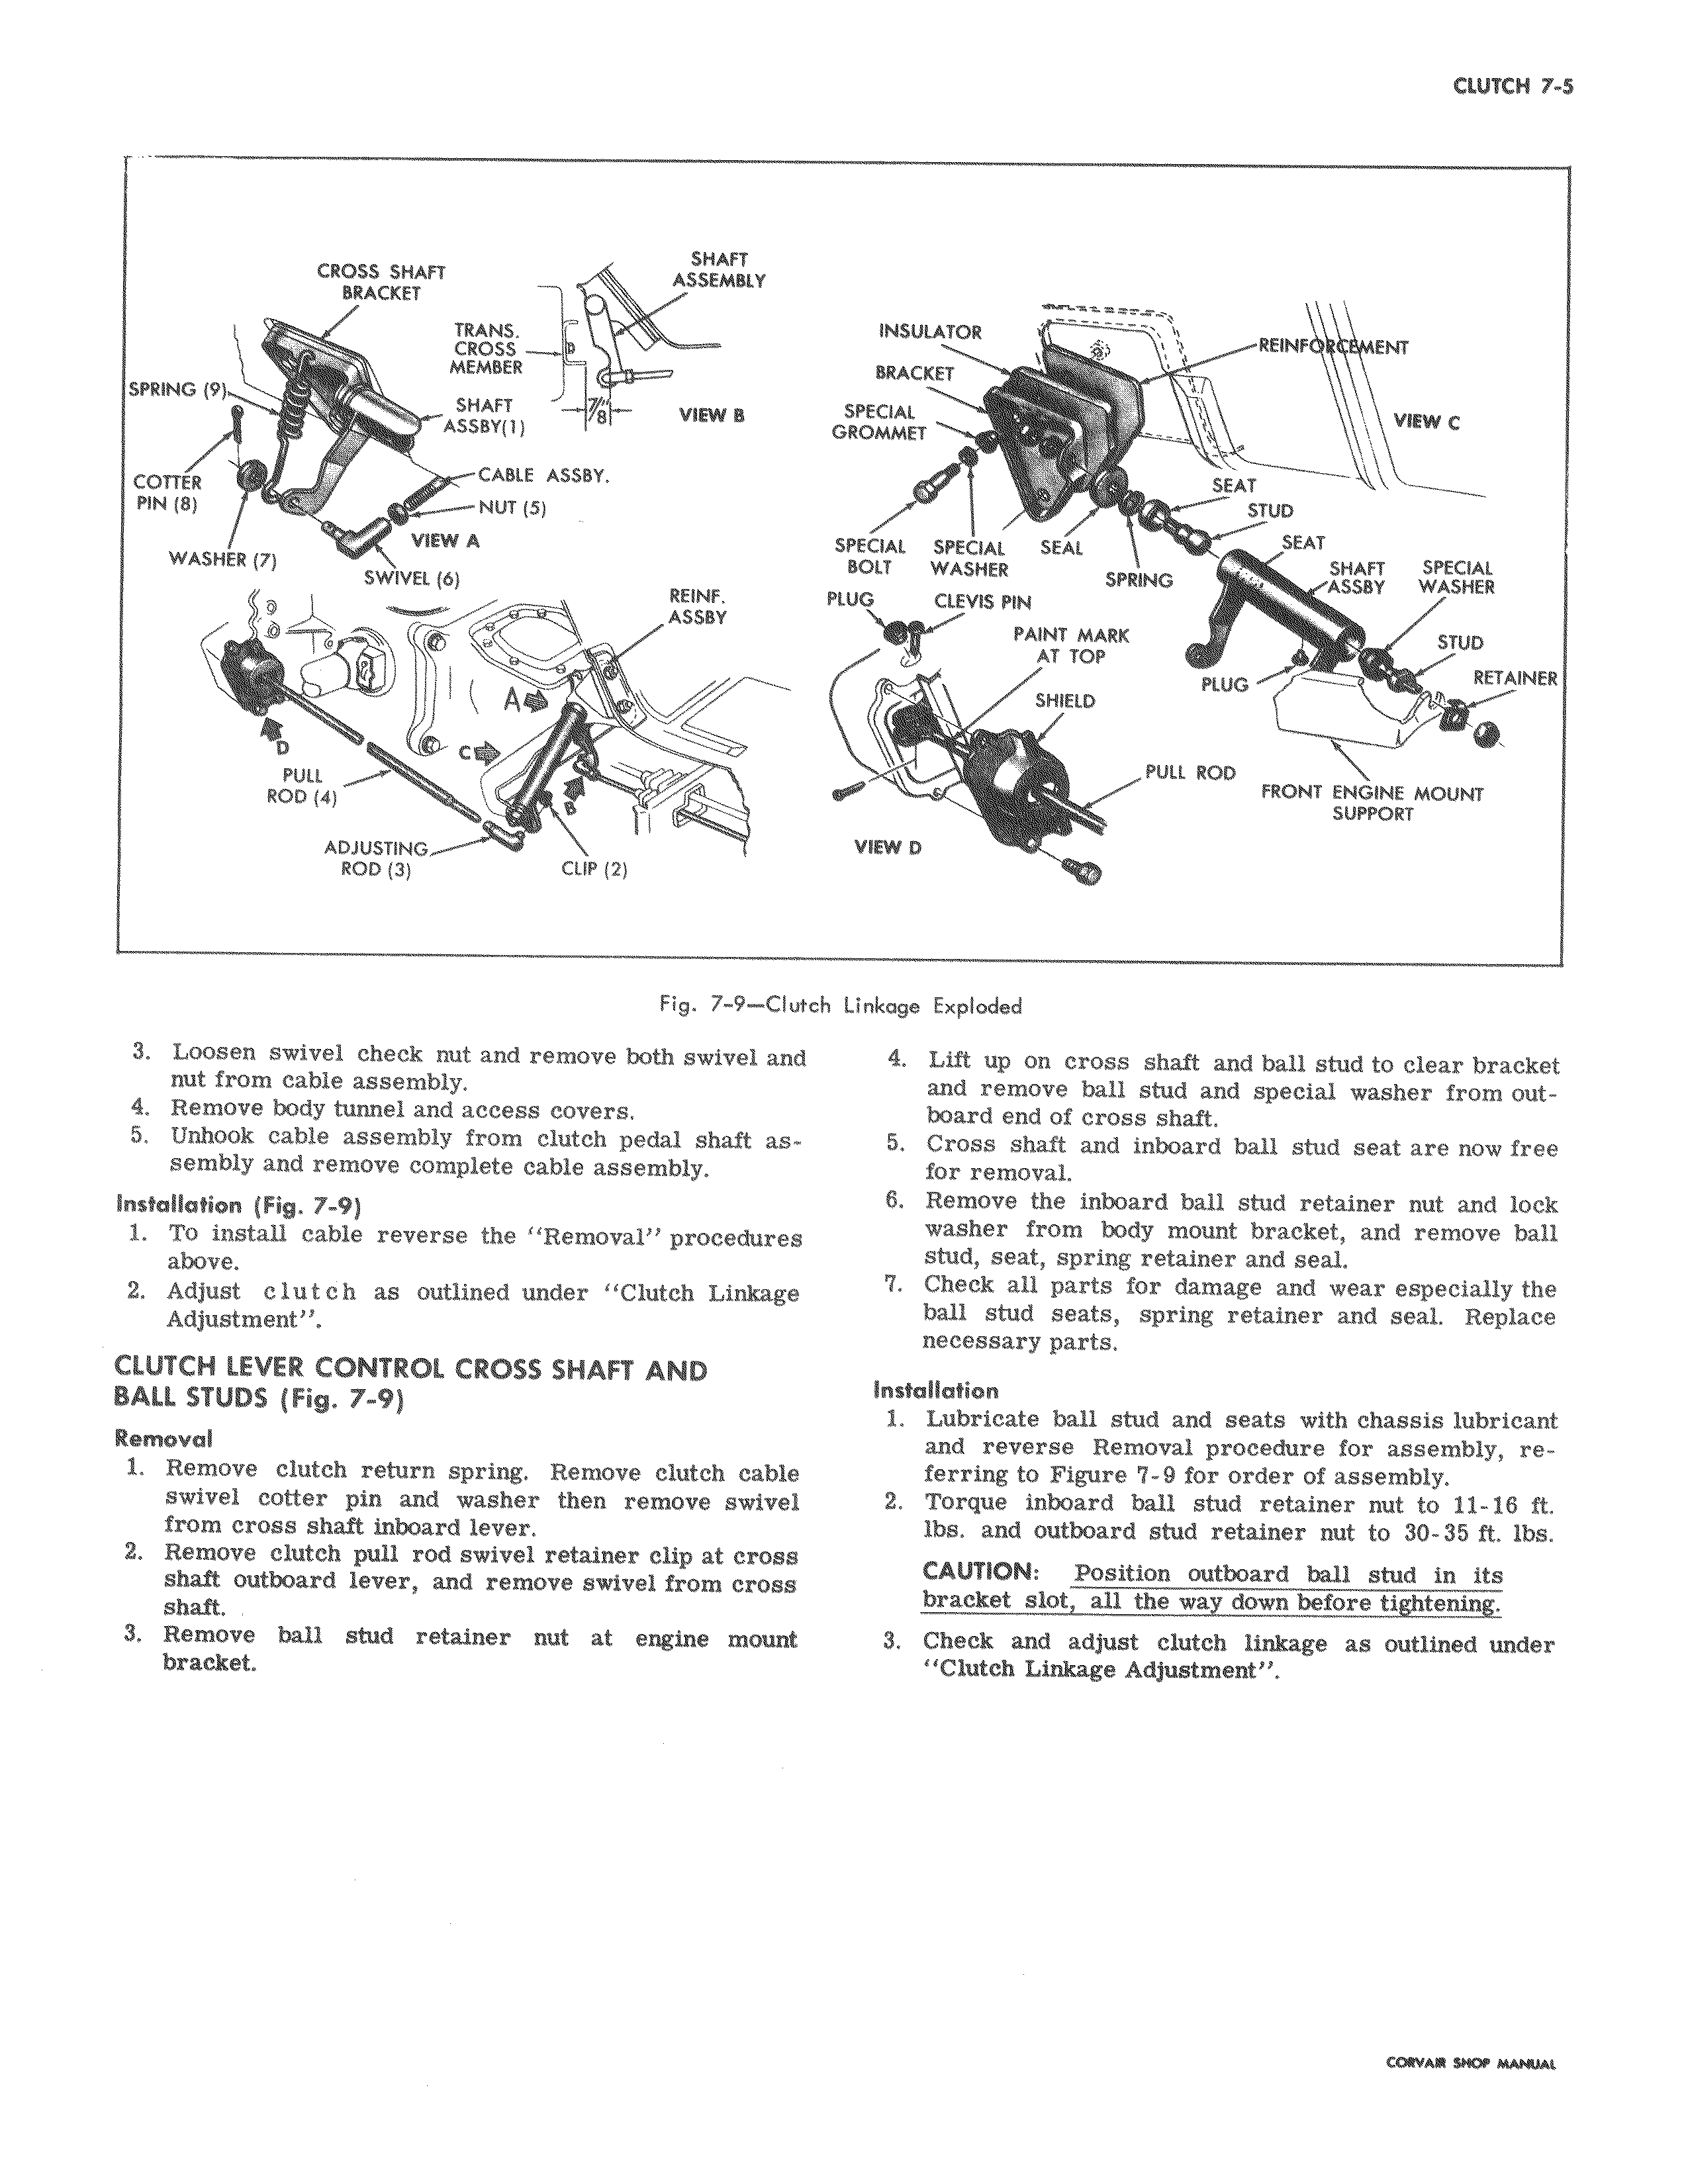
SHAFT CROSS SHAFT ASSEMBLY BRACKET CRC u ME MEMBER SPRING 9 SHAFT VIEW g ASSBY 1 P COTTER CABLE ASSBY PIN 8 NUT 5 VIEW A WASHER 7 SWIVEL 6 REINF ASSAY u PULL ROD ADJUSTING ROD 3 CLIP 2 Fig 7 9 Clut 3 Loosen swivel check nut and remove both swivel and nut from cable assembly 4 Remove body tunnel and access covers 5 Unhook cable assembly from clutch pedal shaft assembly and remove complete cable assembly Installation Fig 7 9 1 To install cable reverse the Removal procedures above 2 Adjust clutch as outlined under Clutch Linkage Adjustment CLUTCH LEVER CONTROL CROSS SHAFT AND BALL STUDS Fig 7 9 Removal 1 Remove clutch return spring Remove clutch cable swivel cotter pin and washer then remove swivel from cross shaft inboard lever 2 Remove clutch pull rod swivel retainer clip at cross shaft outboard lever and remove swivel from cross shaft 3 Remove bail stud retainer nut at engine mount bracket z s INSULATOR REINF ENT BRACKET SPECIAL VIEW C GROMMET SEAT STUD SPECIAL SPECIAL SEAL SEAT SHAFT SPECIAL BOLT WASHER SPRING ASSBY WASHER PLUG CLEVIS PIN PAINT MARK STUD AT TOP PLUG RETAINER SHIELD PULL ROO FRONT ENGINE MOUNT SUPPORT VIEW D eh Linkage Exploded 4 Lift up on cross shaft and ball stud to clear bracket and remove ball stud and special washer from outboard end of cross shaft 5 Cross shaft and inboard ball stud seat are now free for removal 6 Remove the inboard ball stud retainer nut and lock washer from body mount bracket and remove ball stud seat spring retainer and seal 7 Check all parts for damage and wear especially the ball stud seats spring retainer and seal Replace necessary parts Installation 1 Lubricate ball stud and seats with chassis lubricant and reverse Removal procedure for assembly referring to Figure 7 9 for order of assembly 2 Torque inboard ball stud retainer nut to 11 16 ft lbs and outboard stud retainer nut to 30 35 ft lbs CAUTION Position outboard ball stud in its bracket slot all the way down before tightening 3 Check and adjust clutch linkage as outlined under Clutch Linkage Adjustment cowAM SHOP u

 Next
Next