Jeep Parts Wiki | Ford Parts Wiki
Home | Search | Browse
|
Corvair Chassis Shop Manual December 1964 |
|
Prev

 Next
Next
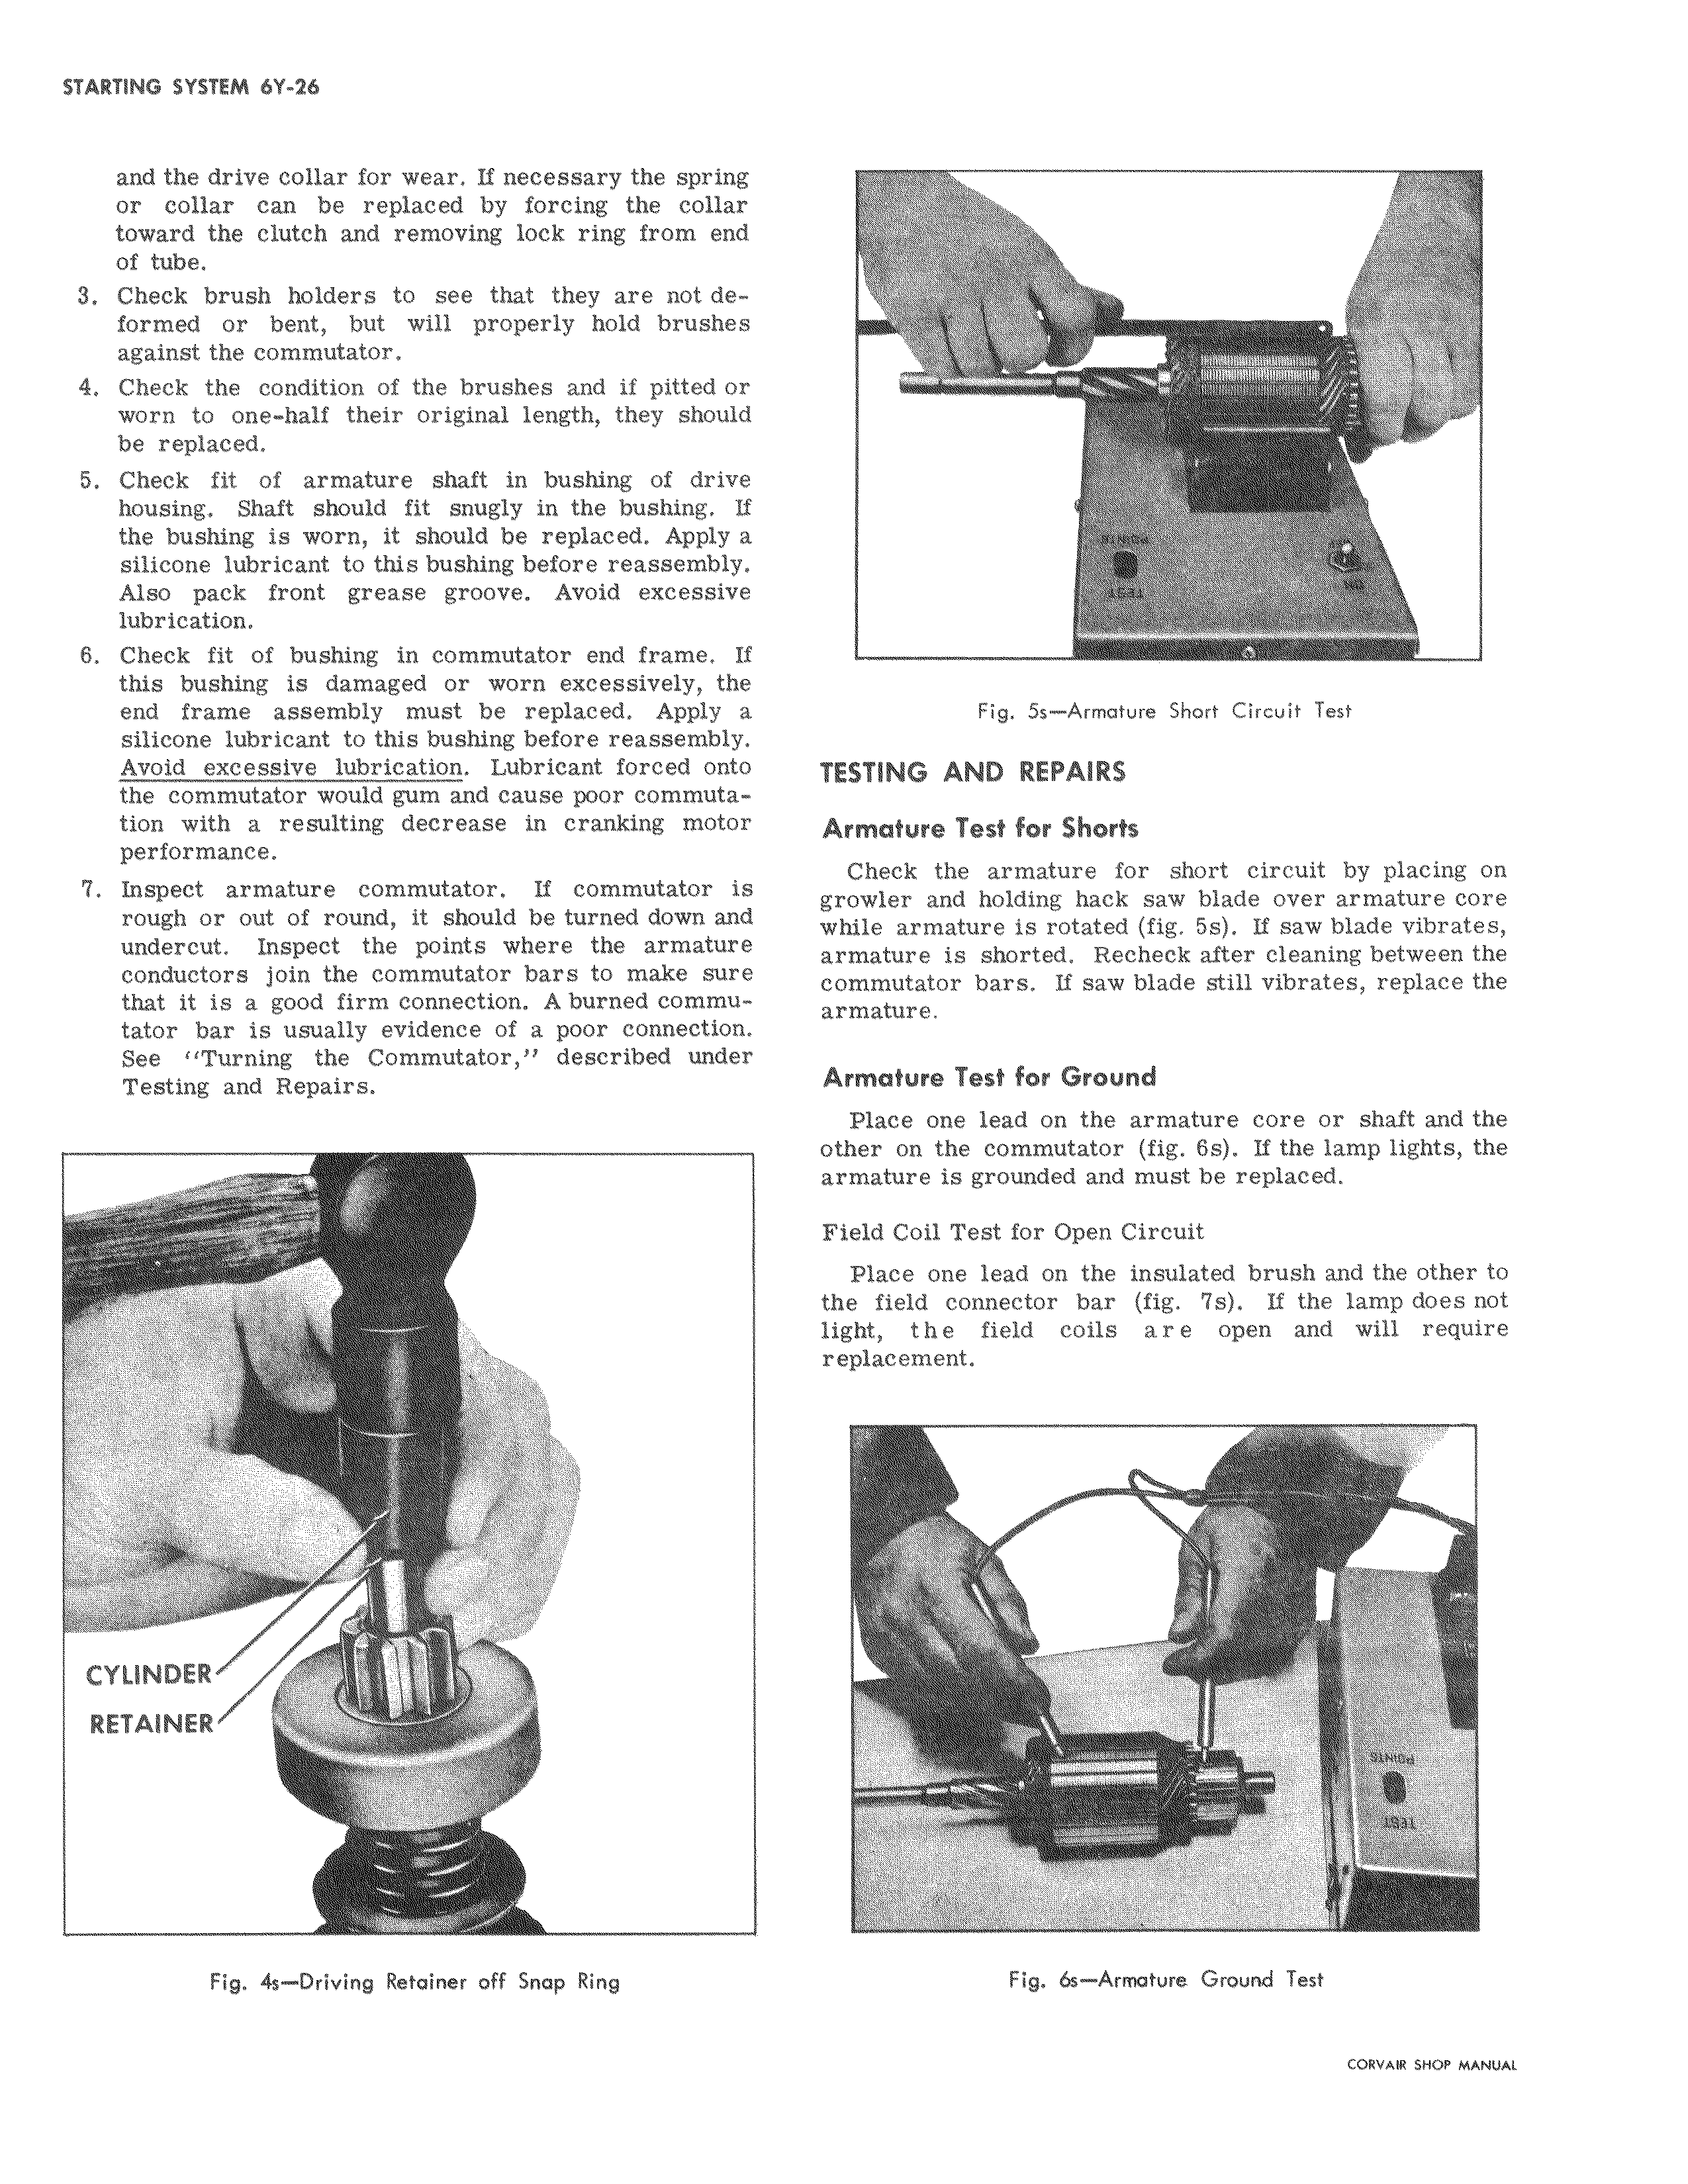
and the drive collar for wear 1f necessary the spring or collar can be replaced by forcing the collar toward the clutch and removing lock ring from end of tube 3 Check brush holders to see that they are not deformed or bent but will properly hold brushes against the commutator 4 Check the condition of the brushes and if pitted o worn to one half their original length they shoul be replaced 5 Check fit of armature shaft in bushing of drive housing Shaft should fit snugly in the bushing If the bushing is worn it should be replaced Apply a silicone lubricant to this bushing before reassembly Also pack front grease groove Avoid excessive lubrication 6 Check fit of bushing in commutator end frame this bushing is damaged or worn excessively thk end frame assembly must be replaced Apply al silicone lubricant to this bushing before reassembly Avoid excessive lubrication Lubricant forced onto the commutator would gum and cause poor commutation with a resulting decrease in cranking motor performance 7 Inspect armature commutator If commutator i rough or out of round it should be turned down an undercut Inspect the points where the armatur conductors join the commutator bars to make sur that it is a good firm connection A burned commu tator bar is usually evidence of a poor connection See Turning the Commutator described under Testing and Repairs Fig Ss Armature Short Circuit Test TESTING AND REPAIRS Armature Test for Shorts Check the armature for short circuit by placing on growier and holding hack saw blade over armature core while armature is rotated fig 5s If saw blade vibrates armature is shorted Recheck after cleaning between the commutator bars If saw blade still vibrates replace the armature Armature Test for Ground Place one lead on the armature core or shaft and the other on the commutator fig 6s If the lamp lights the armature is grounded and must be replaced Field Coil Test for Open Circuit Place one lead on the insulated brush and the other to the field connector bar fig 7s If the lamp does not light the field coils are open and will require replacement

 Next
Next