Jeep Parts Wiki | Ford Parts Wiki
Home | Search | Browse
|
Corvair Chassis Shop Manual December 1964 |
|
Prev

 Next
Next
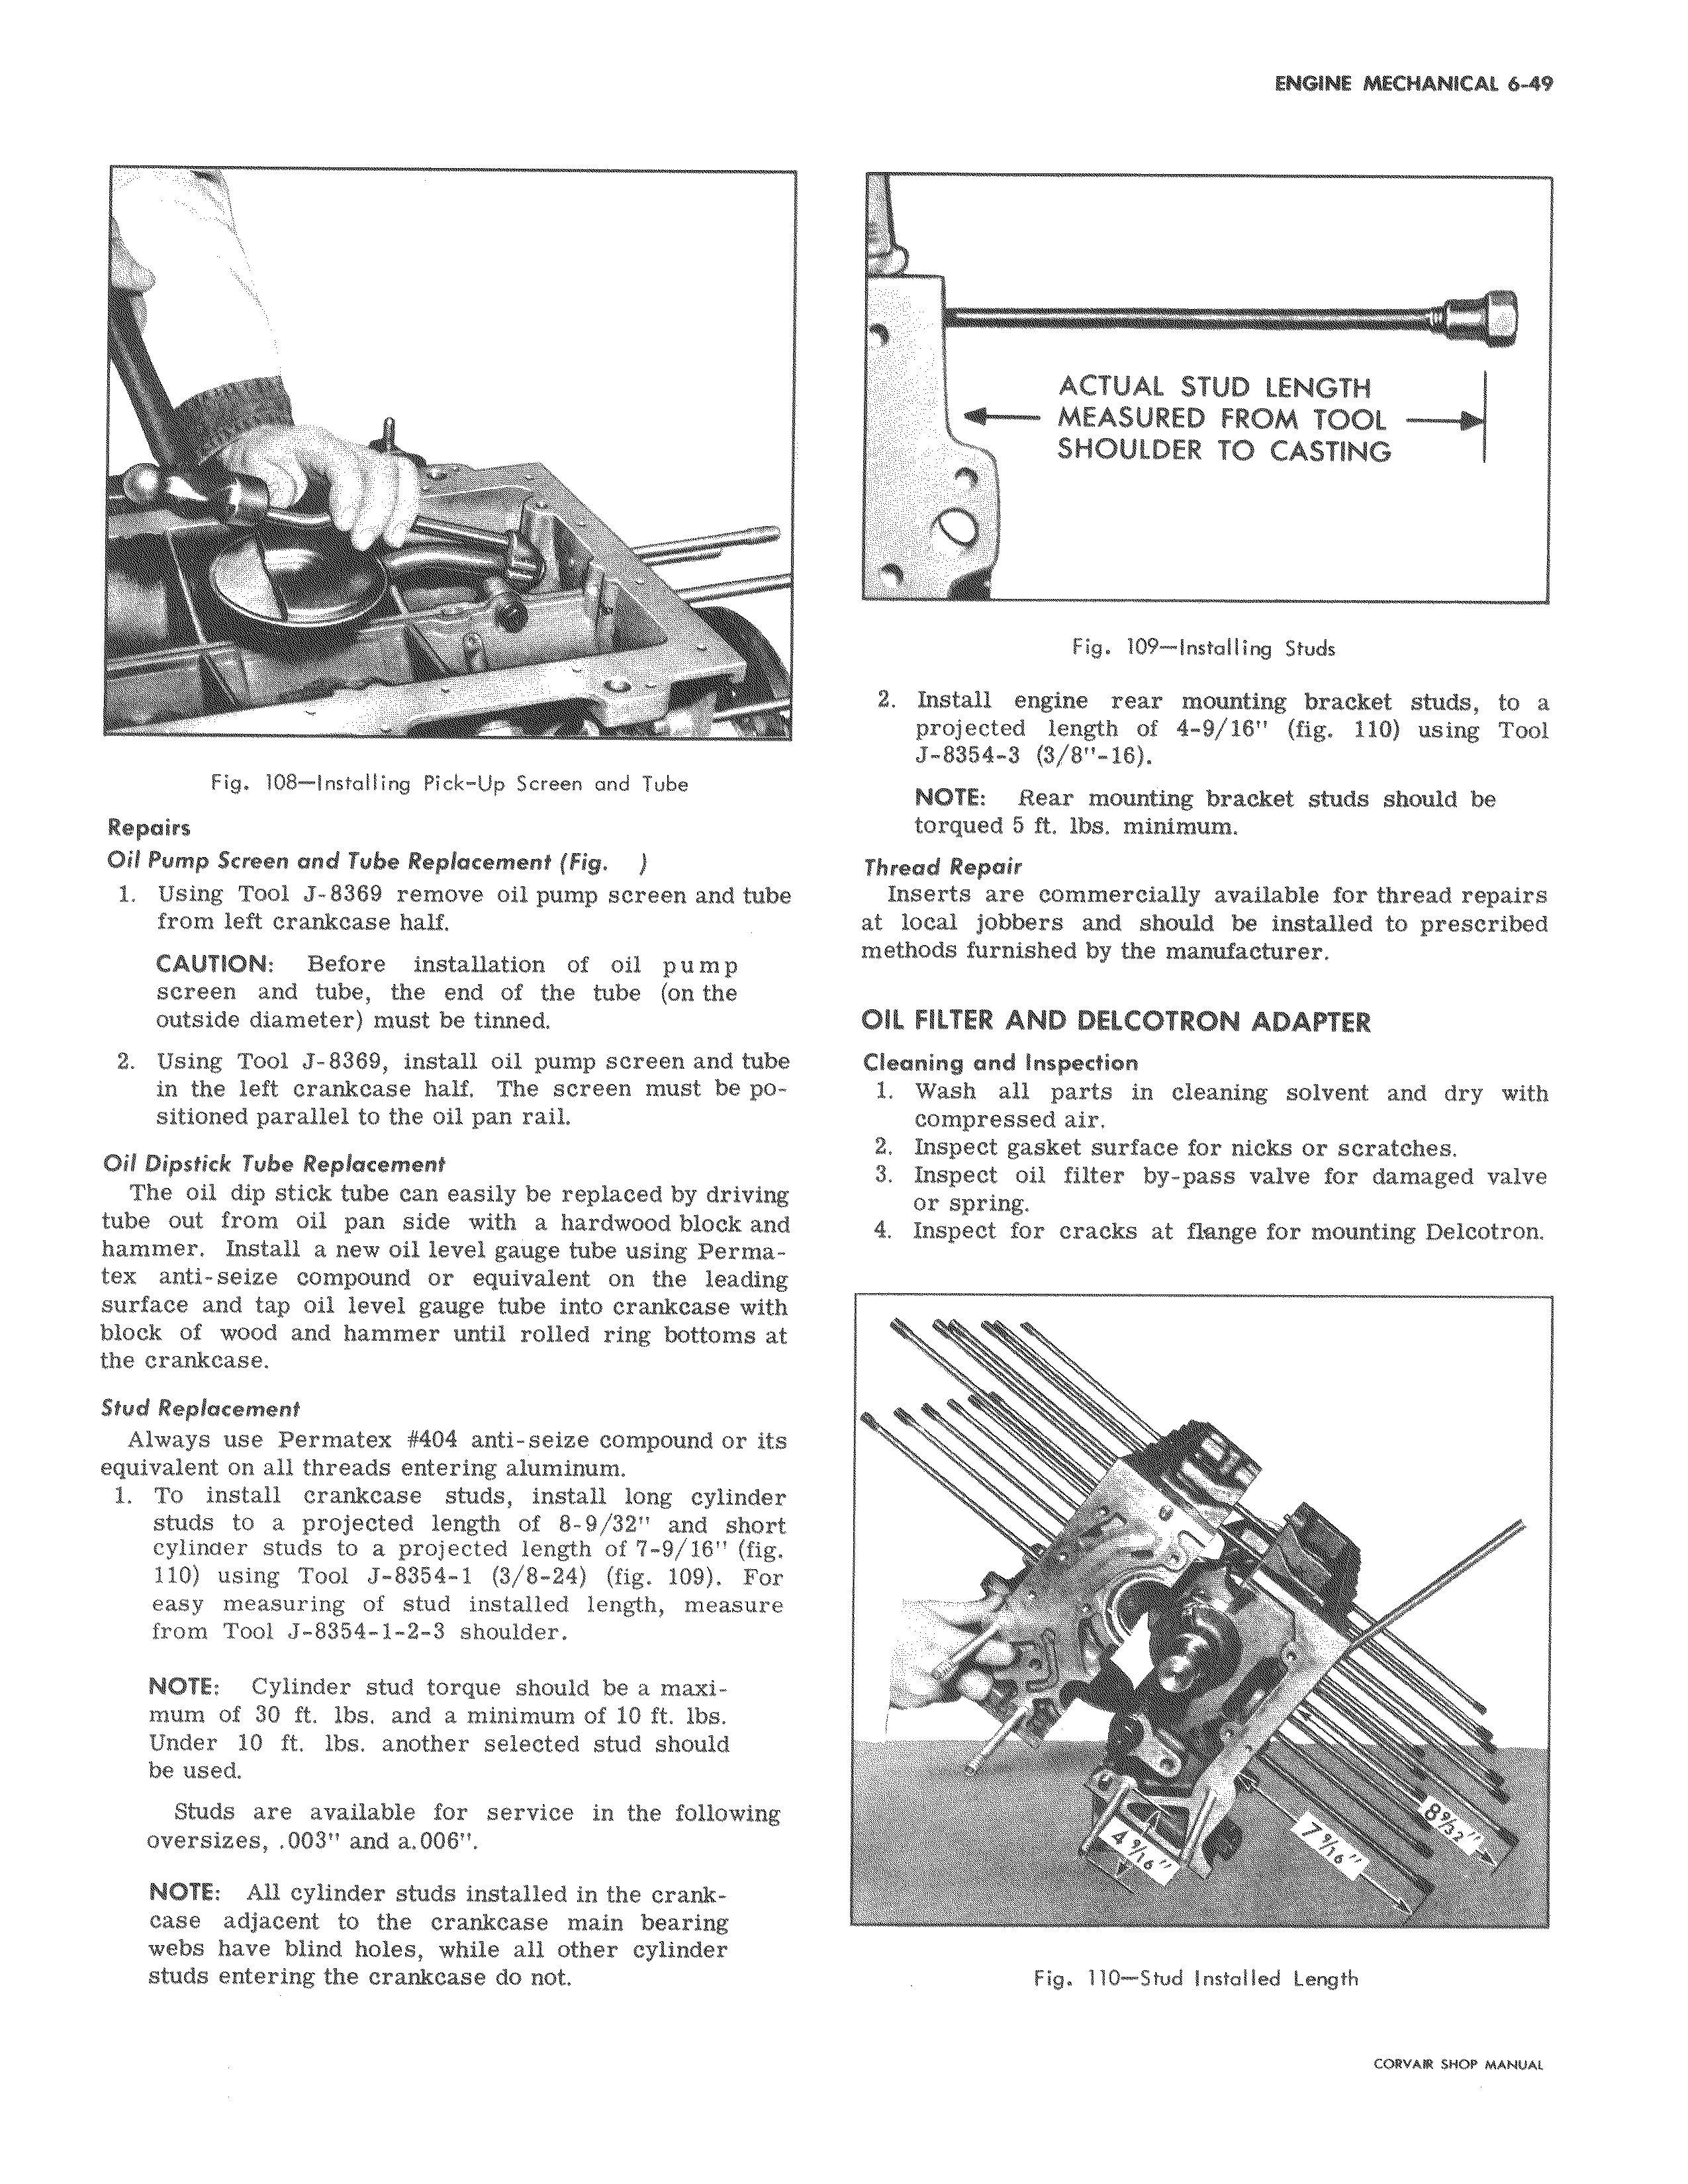
i aa Fig 108 Installing Pick Up Screen and Tube Repairs Oil Pump Screen and Tube Replacement Fig 1 Using Tool J 8369 remove oil pump screen and tube from left crankcase half CAUTION Before installation of oil pump screen and tube the end of the tube on the outside diameter must be tinned 2 Using Tool J 8369 install oil pump screen and tube in the left crankcase half The screen must be positioned parallel to the oil pan rail Oil Dipstick Tube Replacement The oil dip stick tube can easily be replaced by driving tube out from oil pan side with a hardwood block and hammer Install a new oil level gauge tube using Permatex anti seize compound or equivalent on the leading surface and tap oil level gauge tube into crankcase with block of wood and hammer until rolled ring bottoms at the crankcase Stud Replacement Always use Permatex 404 anti seize compound or its equivalent on all threads entering aluminum 1 To install crankcase studs install long cylinder studs to a projected length of 8 9 32 and short cylinaer studs to a projected length of 7 9 16 fig 110 using Tool J 8354 1 3 8 24 fig 109 For easy measuring of stud installed length measure from Tool J 8354 1 2 3 shoulder NOTE Cylinder stud torque should be a maximum of 30 ft lbs and a minimum of 10 ft lbs Under 10 ft lbs another selected stud should be used Studs are available for service in the following oversizes 003 and a 006 NOTE All cylinder studs installed in the crankcase adjacent to the crankcase main bearing webs have blind holes while all other cylinder studs entering the crankcase do not ACTUAL STUD LENGTH f MEASURED FROM TOOL SHOULDER TO CASTING Fig 109 Installing Studs 2 Install engine rear mounting bracket studs to a projected length of 4 9 16 fig 110 using Tool J 8354 3 3 811 16 NOTE Rear mounting bracket studs should be torqued 5 ft lbs minimum Thread Repair Inserts are commercially available for thread repairs at local jobbers and should be installed to prescribed methods furnished by the manufacturer OIL FILTER AND DELCOTRON ADAPTER Cleaning and Inspection 1 Wash all parts in cleaning solvent and dry with compressed air 2 Inspect gasket surface for nicks or scratches 3 Inspect oil filter by pass valve for damaged valve or spring 4 Inspect for cracks at flange for mounting Delcotron w 1 F I 1 4 3 Fig 110 Stud Installed Length

 Next
Next