Jeep Parts Wiki | Ford Parts Wiki
Home | Search | Browse
|
Corvair Chassis Shop Manual Supplement December 1966 |
|
Prev

 Next
Next
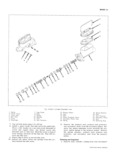
BRAKES 5 6 the bore for corrosion pits and foreign matter Be and the protector against the flange on the piston sure that the outlet ports are clean and free of brass which contains the compensating holes cuttings from the tube seat removal operation 7 Assemble the spring retainer in one end of the pri 2 Inspect the fluid reservoirs for foreign matter mary piston spring and the secondary piston stop in Check the bypass and compensating ports to the cyl the other end Place the end of the spring over the inder bore to insure that they are not restricted end of the primary piston with the spring retainer Do not use wire to check ports seats inside of the lips of the primary seal 8 Remove all cleaning liquid from the threaded hole in NOTE Before weshme pertS hends must be the primary piston Place the piston extension screw deem DO Pet Wash hands m eeselme Or 011 be down through the secondary piston stop and the pri mm Clsenms parte Use Soap end Water Only mary spring retainer and screw it into the primary 3 Use Declene or equivalent to clean all metal parts piston until it bottoms out thoroughly Immerse parts in the cleaning fluid and 9 Coat the bore of the main cylinder with clean brake brush with hair brush to remove foreign matter fluid Coat the primary and secondary seals on the Blow out all passages orifices and valve holes secondary piston with clean brake fluid Insert the Air dry the parts and place on clean paper or lint secondary piston spring retainer into the secondary free clean cloth piston spring Place the retainer and spring down NOTE BE Sure to keep parts clean mlm T over the end of the secondary piston until the re tainer locates inside of the lips of the primary cup assembly Reeash parts lf there IS any Occasion 10 Hold the master cylinder with the open end of the te deubt eleenlmess bore down Push the secondary piston into the bore 4 Check pistons for scratches or other visual damage until the spring seats against the closed end of the replace if necessary bore 1 l Position the main cylinder in a vise with the open end of the bore up Coat the primary and secondary seal A e b Y F 9 6 on the primary piston with clean brake fluid Push Use care when reassembling the main cylinder check the primary piston assembly spring end first into valves Improper assembly of the check valve seats will tho bgrg gf tho main Cylinder Hold the piston down result in distortion of the seats If this occurs there will and soap the lock ring into position in the small be no check valve action and a loss of brake pedal travel groove in the l D of the bo o iifiii Yesoiii the pedal Wiii have to be Pumped 0 6 OY m0I 12 Push the primary piston down to move the secondary t1m S before actual CM braking Occurs piston forward far enough to clear the stop Screw 1 Piece the mein eYiiiidei in ii vise with the Outlet hole in the bottom of the front fluid reservoir Install holes facing up Place the check valve springs in the the Stgp Screw Outlet hoies BG Sore the Springs are Seated in the 13 Install reservoir diaphragm in the reservoir cover bottom of the holes Place new rubber check valves and lhstall the cover oh the math Cylinder posh ball over the sPi iogS being careful Het tv dispieee the wire into position to secure the reservoir cover springs from the spring seats 2 Place new brass tube seats in the outlet holes Be I si i sure seats are not cocked as this would cause burrs 1 Assemble the push red through the push red retamelo to be turned up as the tube seats are pressed in if it has been eisassembleci Thread d shore brake line tube nut lute the outlet 2 Push the retainer over the end of the mam cylinder hole ehd turh the hut down uutll the tube seat Assemble new boot over push rod and press it down bottoms Remove the tube nut and check the outlet over the push rod retainer Slide new mounting gas hole for loose burrs which might have been turned kei into position hp when the tube seat was pressed down Repeat thls 3 Secure the main cylinder to the firewall with mount process to bottom the second seat ing belts 3 Put new secondary seals in the two grooves in the 4 Comieot the push rod eievis to the brake pedal with end of the secondary piston assembly The seal Dio and i eteioei which is nearest the end win have its lips facing te 5 C t the brake 1i S t the mm v1i d ward that nd The seal lh the Second groove should 6 Fill main cylinder reservoirs to within 1 4 of res have its lips facing toward the portion ofthe second ei Voii i ee i rims Bleed the broke System as out ary piston which contains the small compensating iioeo io this section holeS 7 If necessary adjust the brake pedal free play as out 4 Assemble a new primary seal protector and primary iiiieo iii the ieoo Coi Veii Chassis shop Meii ei seal over the end of the secondary piston with the flat section 5 side of the seal seats against the seal protector and the protector against the flange of the piston which BRAKE PIPE DISTRIBUTION AND SWITCH contains the small compensating holes ASSEMBLY Fig 2 5 Assemble the new secondary seal into the groove on the push rod end of the primary piston The lips of Removal this seal should face toward the small compensating 1 Disconnect battery cable holes in the opposite end of the primary piston 2 Disconnect electrical lead from switch assembly 6 Assemble the new primary seal protector and pri 3 Place dry rags below the switch to absorb any fluid mary seal on the end of the primary piston with the spilled during removal of switch flat side of the seal seated against the seal protector 4 Disconnect four hydraulic lines from connections at CORVAIR SHOP MANUAL SUPPLEMENT

 Next
Next