Jeep Parts Wiki | Ford Parts Wiki
Home | Search | Browse
|
Corvair Chassis Shop Manual Supplement December 1965 |
|
Prev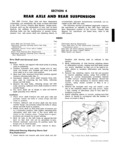
 Next
Next
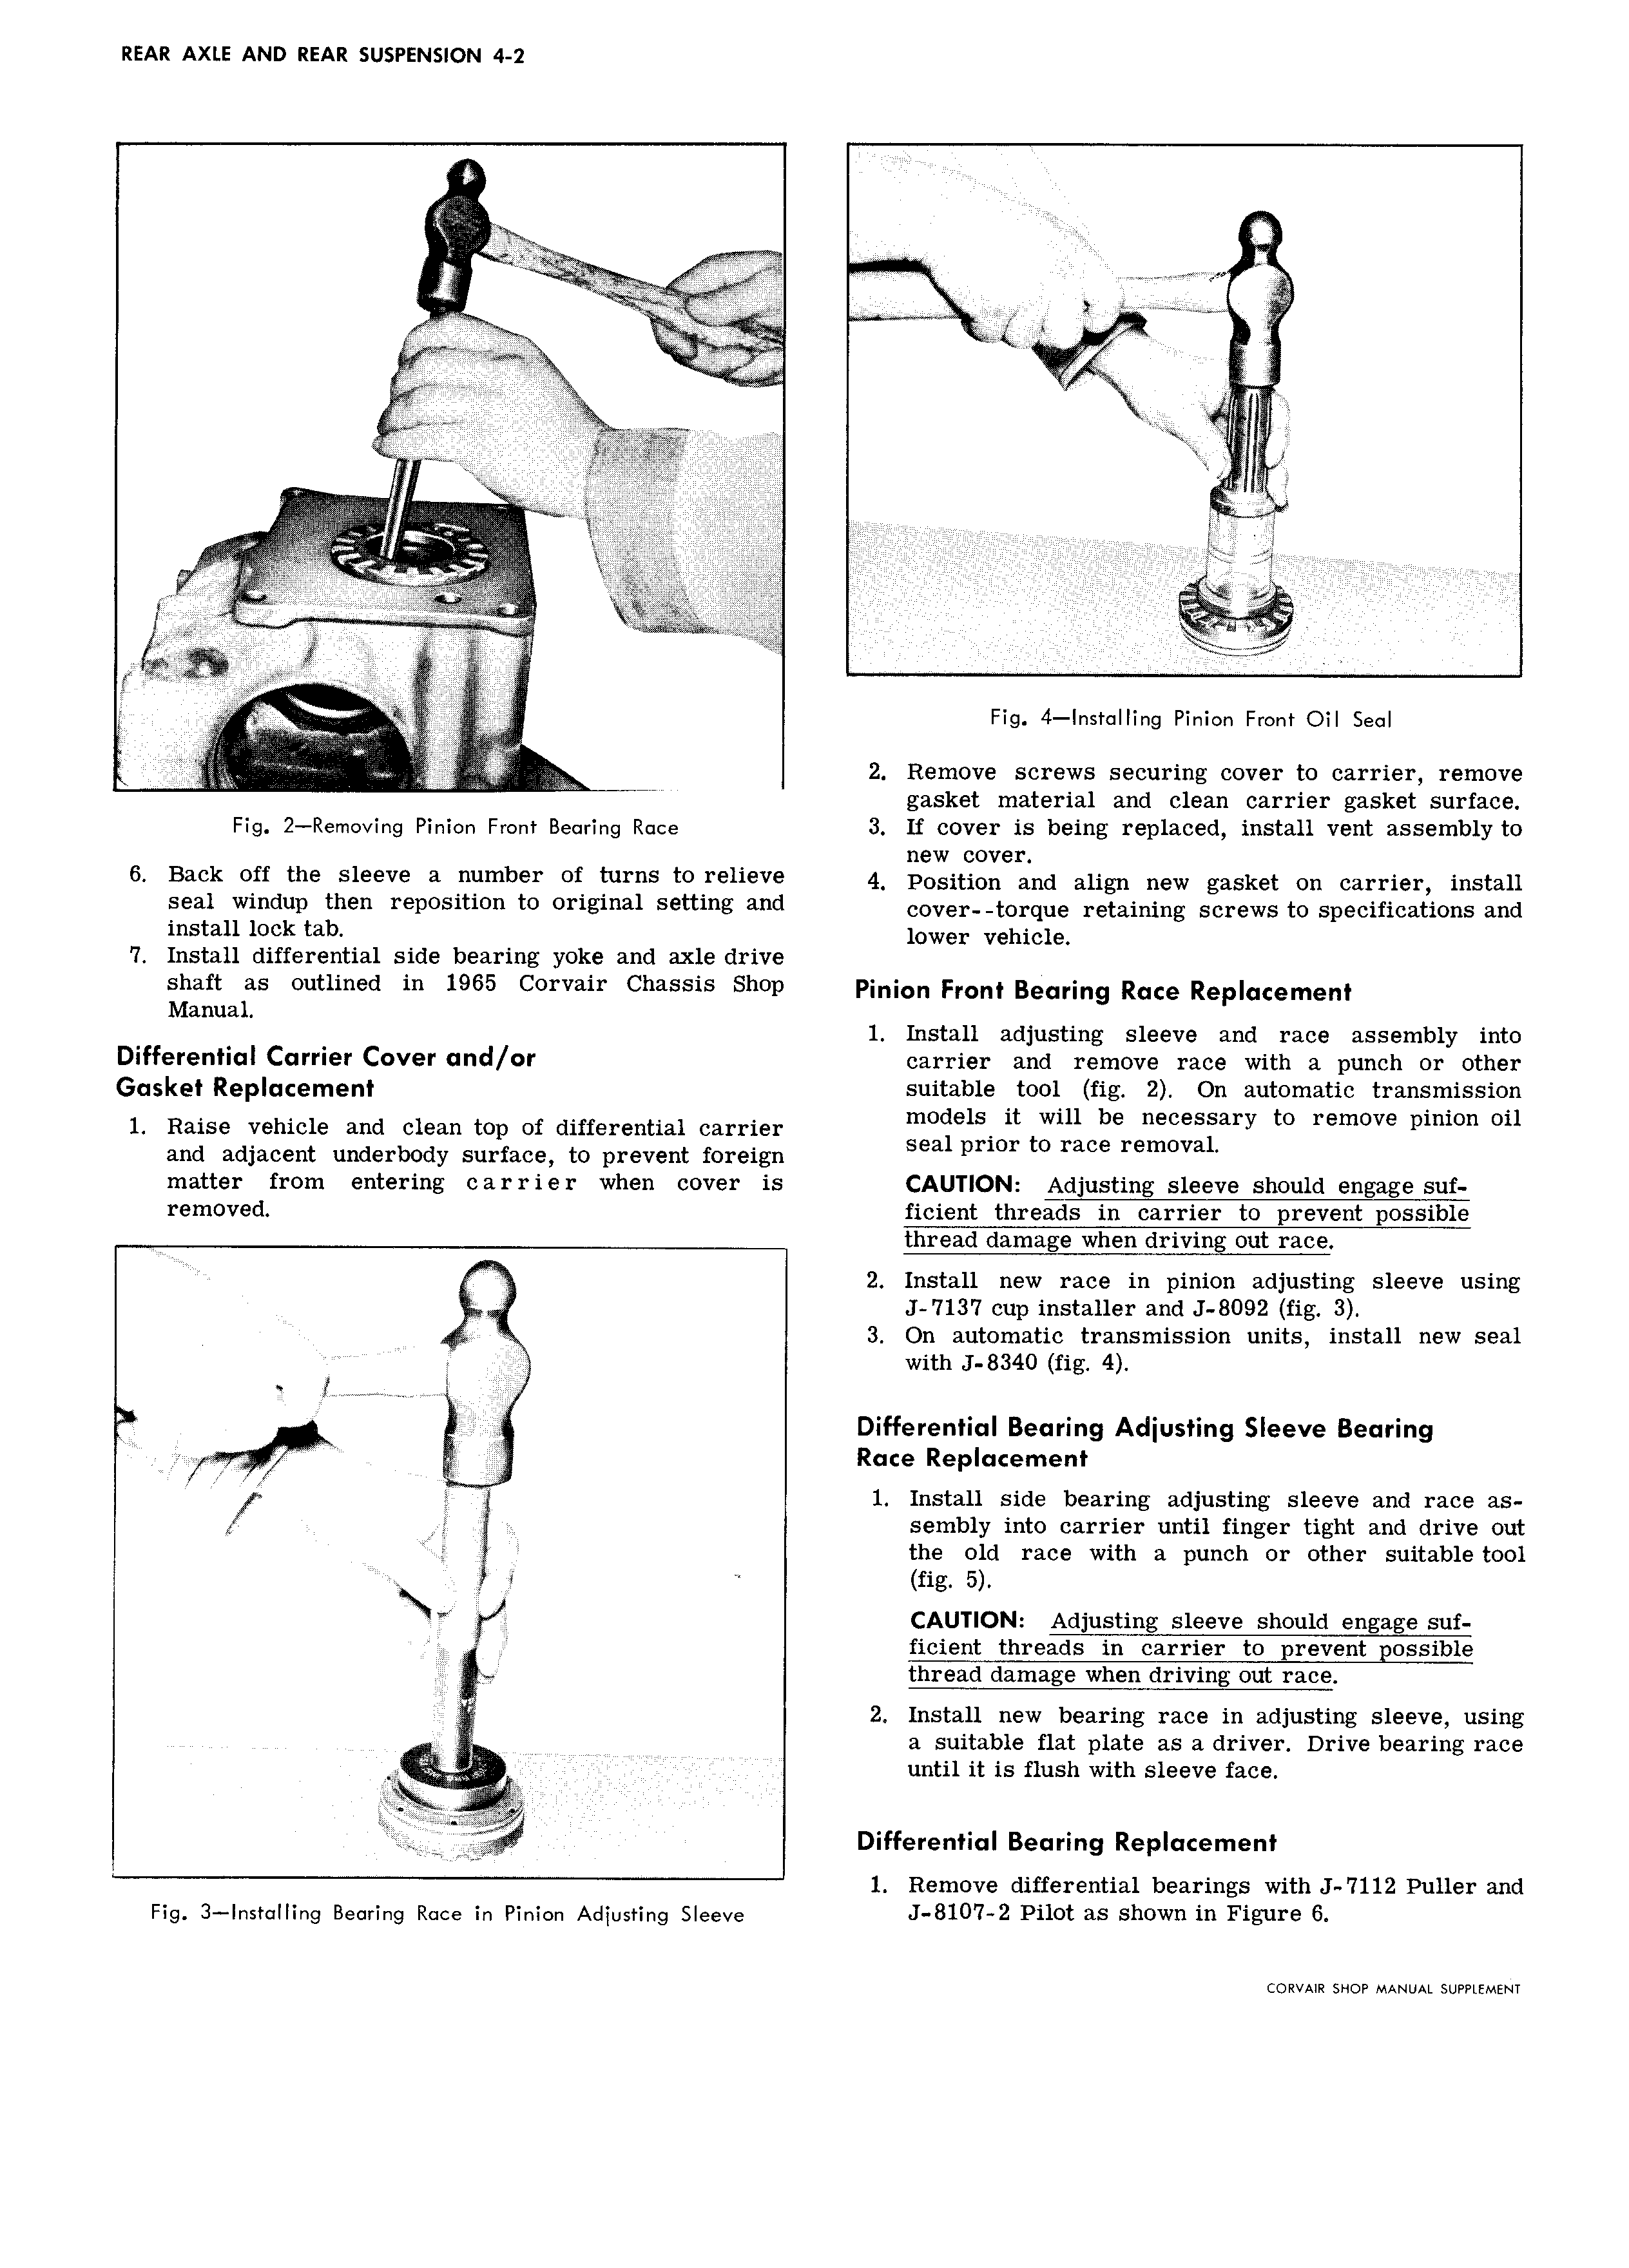
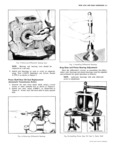
REAR AXLE AND REAR SUSPENSION 4 2 Xx S R S Qi N I W M g W l A SSSS if REE E z f QT Y i i j rr rr n i L ii EE S S SS A S at ai SSSSSS W I I Ii 4 I J SSS c v i I RSR ES S I I if I 2i T i 1 E RSSS x R R I 2 ra i E i ER Q T p MSJSSh S i S I R V 2 R SRE S c A Fig 4 Insiaiiing Pinion Front on seen V i r 4 I gz 2 Remove screws securing cover to carrier remove I R W gasket material and clean carrier gasket surface Fig 2 Rem ing Pinion Front Bearing Race 3 If cover is being replaced install vent assembly to new cover 6 Back Off the Sleeve 3 m mb I Of turns t r 1i v 4 Position and align new gasket on carrier install Seal wmdup then YQPOSIUOH to Omgmal Setting and cover torque retaining screws to specifications and install lock tab lower vehicig 7 Install differential side bearing yoke and axle drive shaft as outlined in 1965 Corvair Chassis Shop pinion Front Bearing Race Replacement Manual 1 Install adjusting sleeve and race assembly into Differential Carrier Cover and or carrier and remove race with a punch or other Gasket Replacement suitable tool fig 2 On automatic transmission 1 Raise vehicle and clean top of differential carrier n 0 e1S O tgu11 ge negeiary to remove pmwn 011 and adjacent underbody surface to prevent foreign S a pm me mm V matter from entering carrier when cover is CAUTION Adjusting sleeve should engage suf removed ficient threads in carrier to prevent possible thread damage when driving out race N Q 2 Install new race in pinion adjusting sleeve using i J 7137 cup installer and J 8092 fig 3 3 On automatic transmission units install new seal i with J 8340 fig 4 V i Differential Bearing Acliusting Sleeve Bearing if Race Replacement I if 1 Install side bearing adjusting sleeve and race as i sembly into carrier until finger tight and drive out the old race with a punch or other suitable tool fig 5 X CAUTION Adjusting sleeve should engage suf i ficient threads in carrier to prevent possible Q thread damage when driving out race 2 Install new bearing race in adjusting sleeve using M n a suitable flat plate as a driver Drive bearing race 3 Mvjfg 4 until it is flush with sleeve face Differential Bearing Replacement 1 Remove differential bearings with J 7112 Puller and Fig 3 lnstalling Bearing Race in Pinion Adiusting Sleeve J 81O7 2 Pilot 3 S shown in Fi uI 6 CORVAIR SHOP MANUAL SUPPLEMENT