Jeep Parts Wiki | Ford Parts Wiki
Home | Search | Browse | Marketplace | Messages | FAQ | Guest
Prev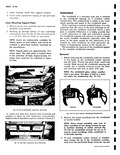
 Next
Next
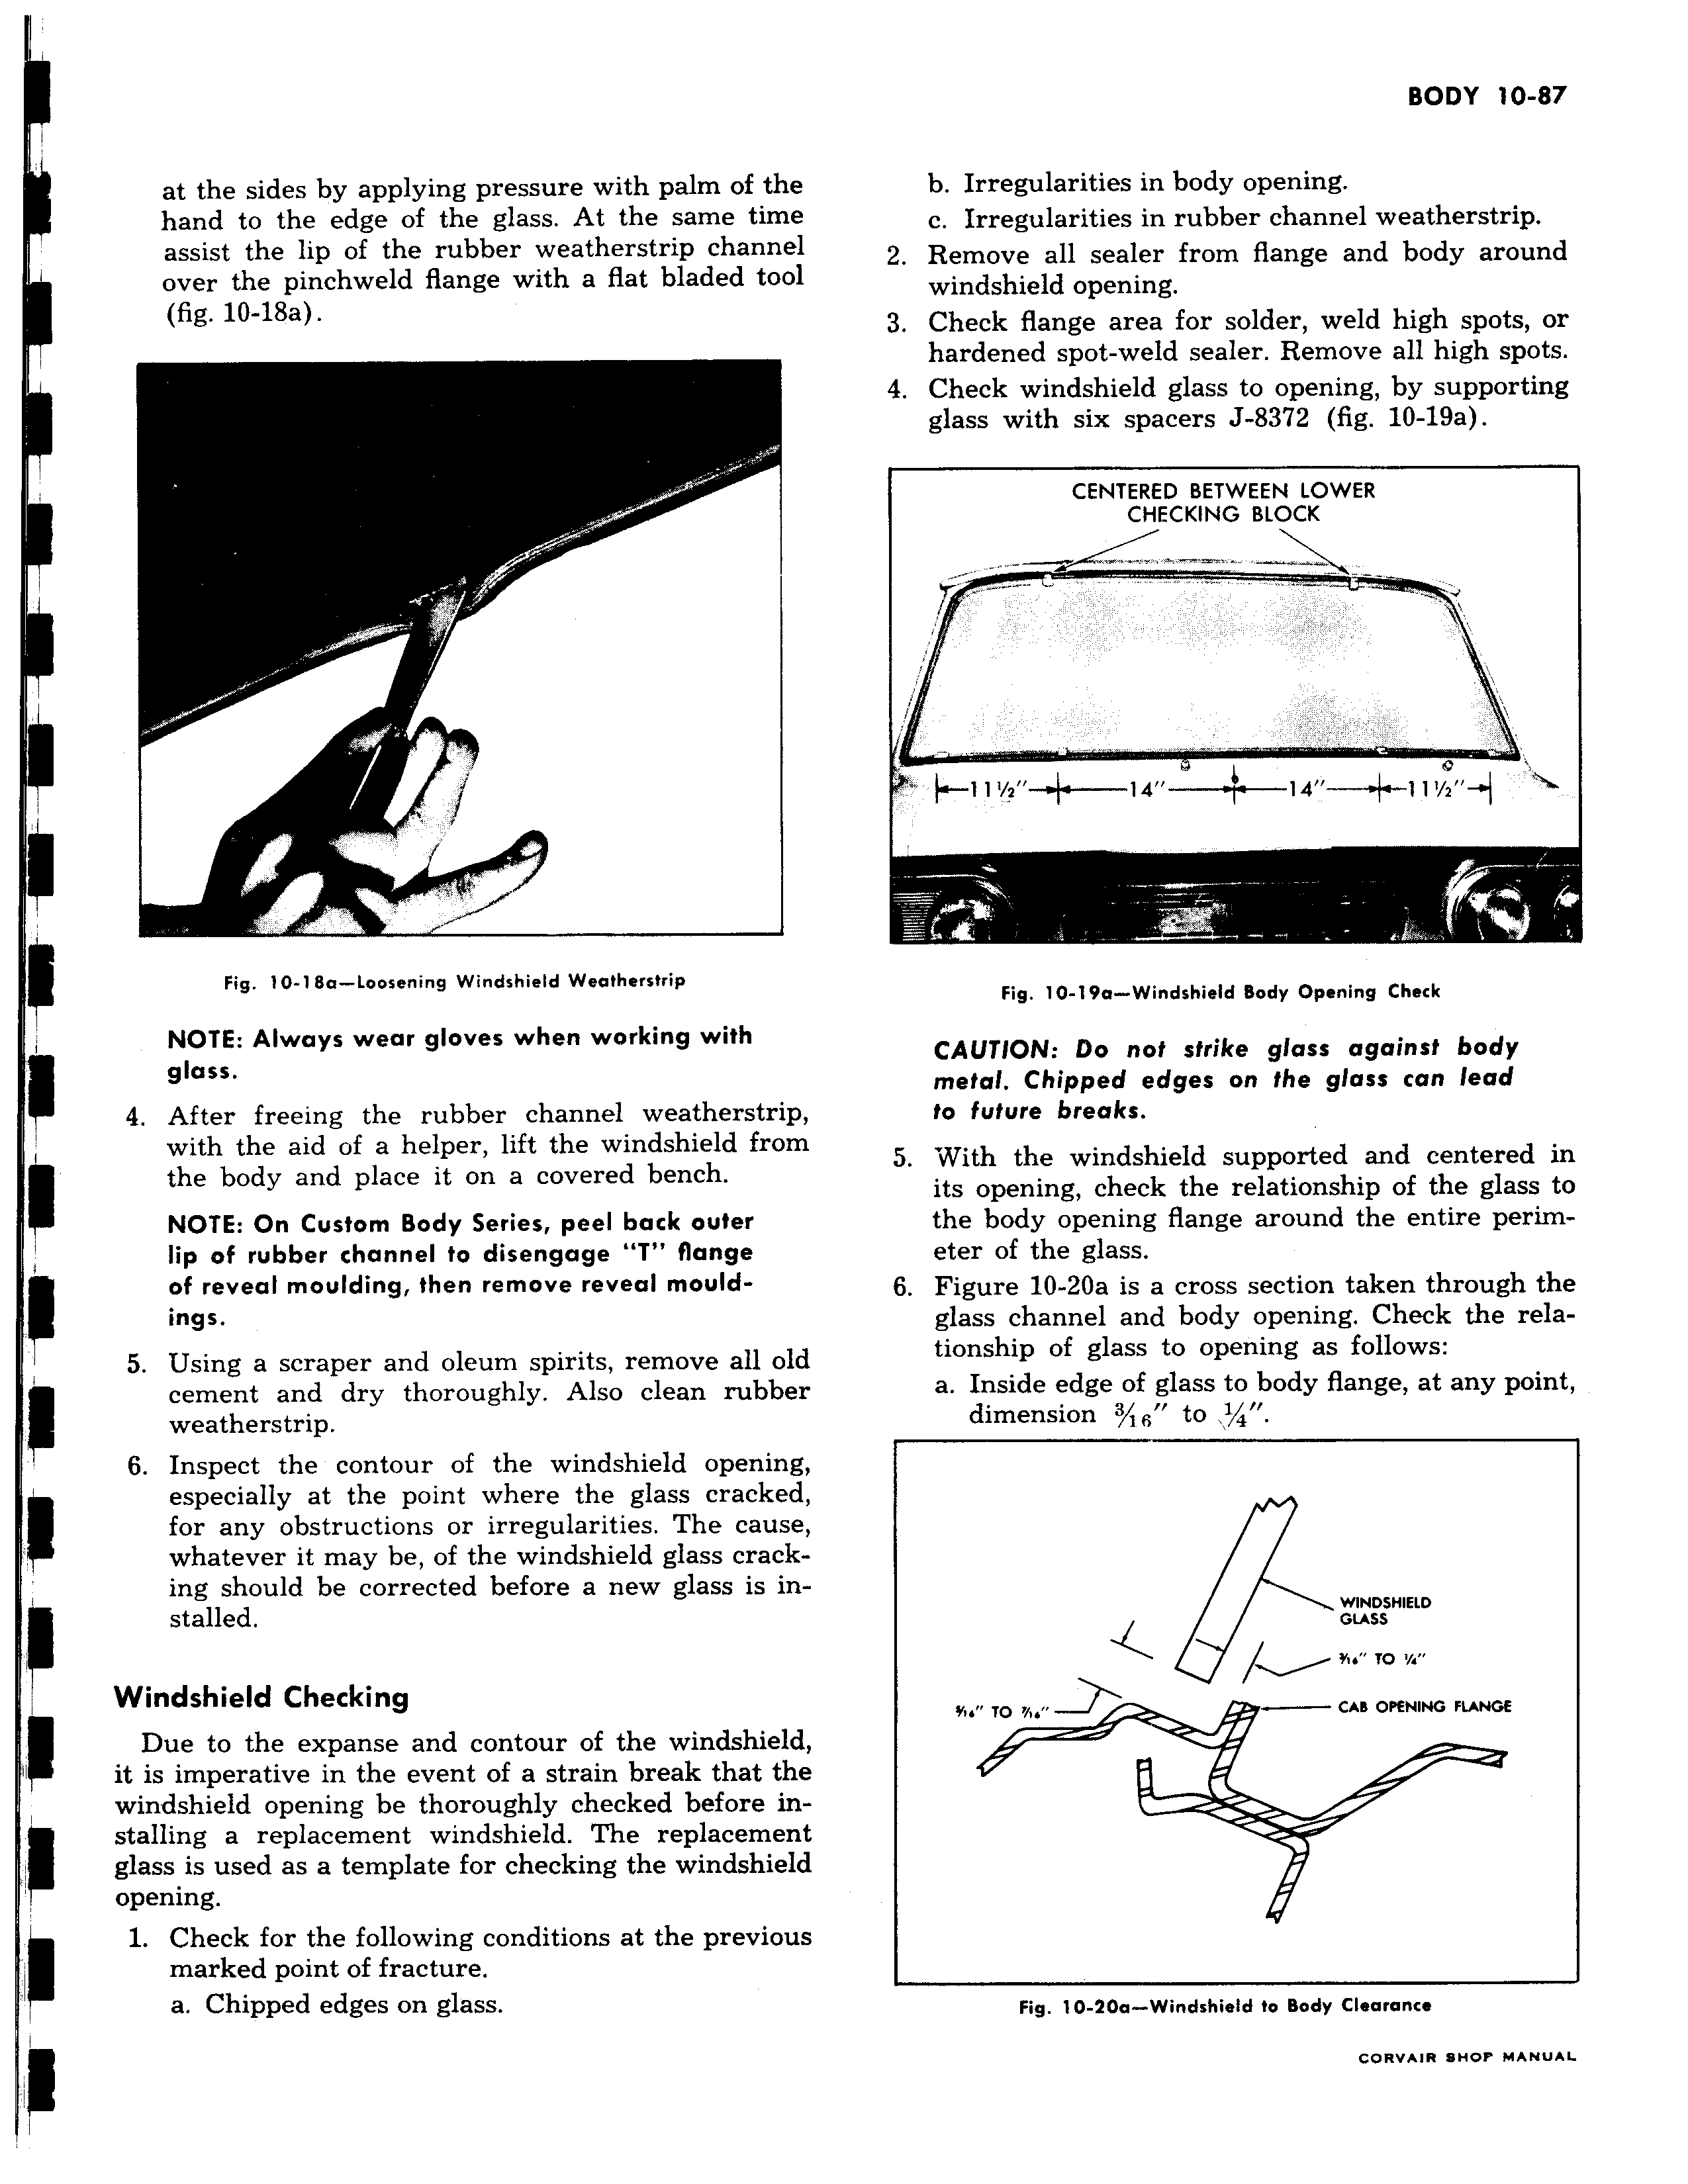
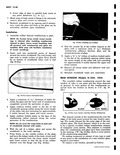
at the sides by applying pressure with palm of the hand to the edge of the glass At the same time assist the lip of the rubber weatherstrip channel over the pinchweld flange with a flat bladed tool fig 10 18a i Fig 10 18a Loosening Windshield Weafherstrip NOTE Always wear gloves when working with glass 4 After freeing the rubber channel weatherstrip with the aid of a helper lift the windshield frorr the body and place it on a covered bench NOTE On Custom Body Series peel back outer lip of rubber channel to disengage T flange of reveal moulding then remove reveal mouldings 5 Using a scraper and oleum spirits remove all olc cement and dry thoroughly Also clean rubbel weatherstrip 6 Inspect the contour of the windshield opening especially at the point where the glass cracked for any obstructions or irregularities The cause whatever it may be of the windshield glass crack ing should be corrected before a new glass is in stalled Windshield Checking Due to the expanse and contour of the windshield f it is imperative in the event of a strain break that tht windshield opening be thoroughly checked before in stalling a replacement windshield The replacemen glass is used as a template for checking the windshielc opening 1 Check for the following conditions at the previou marked point of fracture a Chipped edges on glass b Irregularities in body opening c Irregularities in rubber channel weatherstrip 2 Remove all sealer from flange and body around windshield opening 3 Check flange area for solder weld high spots or hardened spot weld sealer Remove all high spots 4 Check windshield glass to opening by supporting glass with six spacers J 8372 fig 10 19a CENTERED BETWEEN LOWER CHECKING BLOCK l y m 1 1 Ys I 14 14 1 7 w Fig 10 19a Windshield Body Opening Check CAUTION Do not strike glass against body metal Chipped edges on the glass can lead to future breaks 5 With the windshield supported and centered in its opening check the relationship of the glass to the body opening flange around the entire perimeter of the glass 6 Figure 10 20a is a cross section taken through the glass channel and body opening Check the relationship of glass to opening as follows a Inside edge of glass to body flange at any point dimension 3 r to 4 WINDSHIELD GLASS V To y TO 4 CAB OPENING FLANGE l Fig 10 20a Windshield to Body Clearance e o o e w