Jeep Parts Wiki | Ford Parts Wiki
Home | Search | Browse | Marketplace | Messages | FAQ | Guest
Prev

 Next
Next
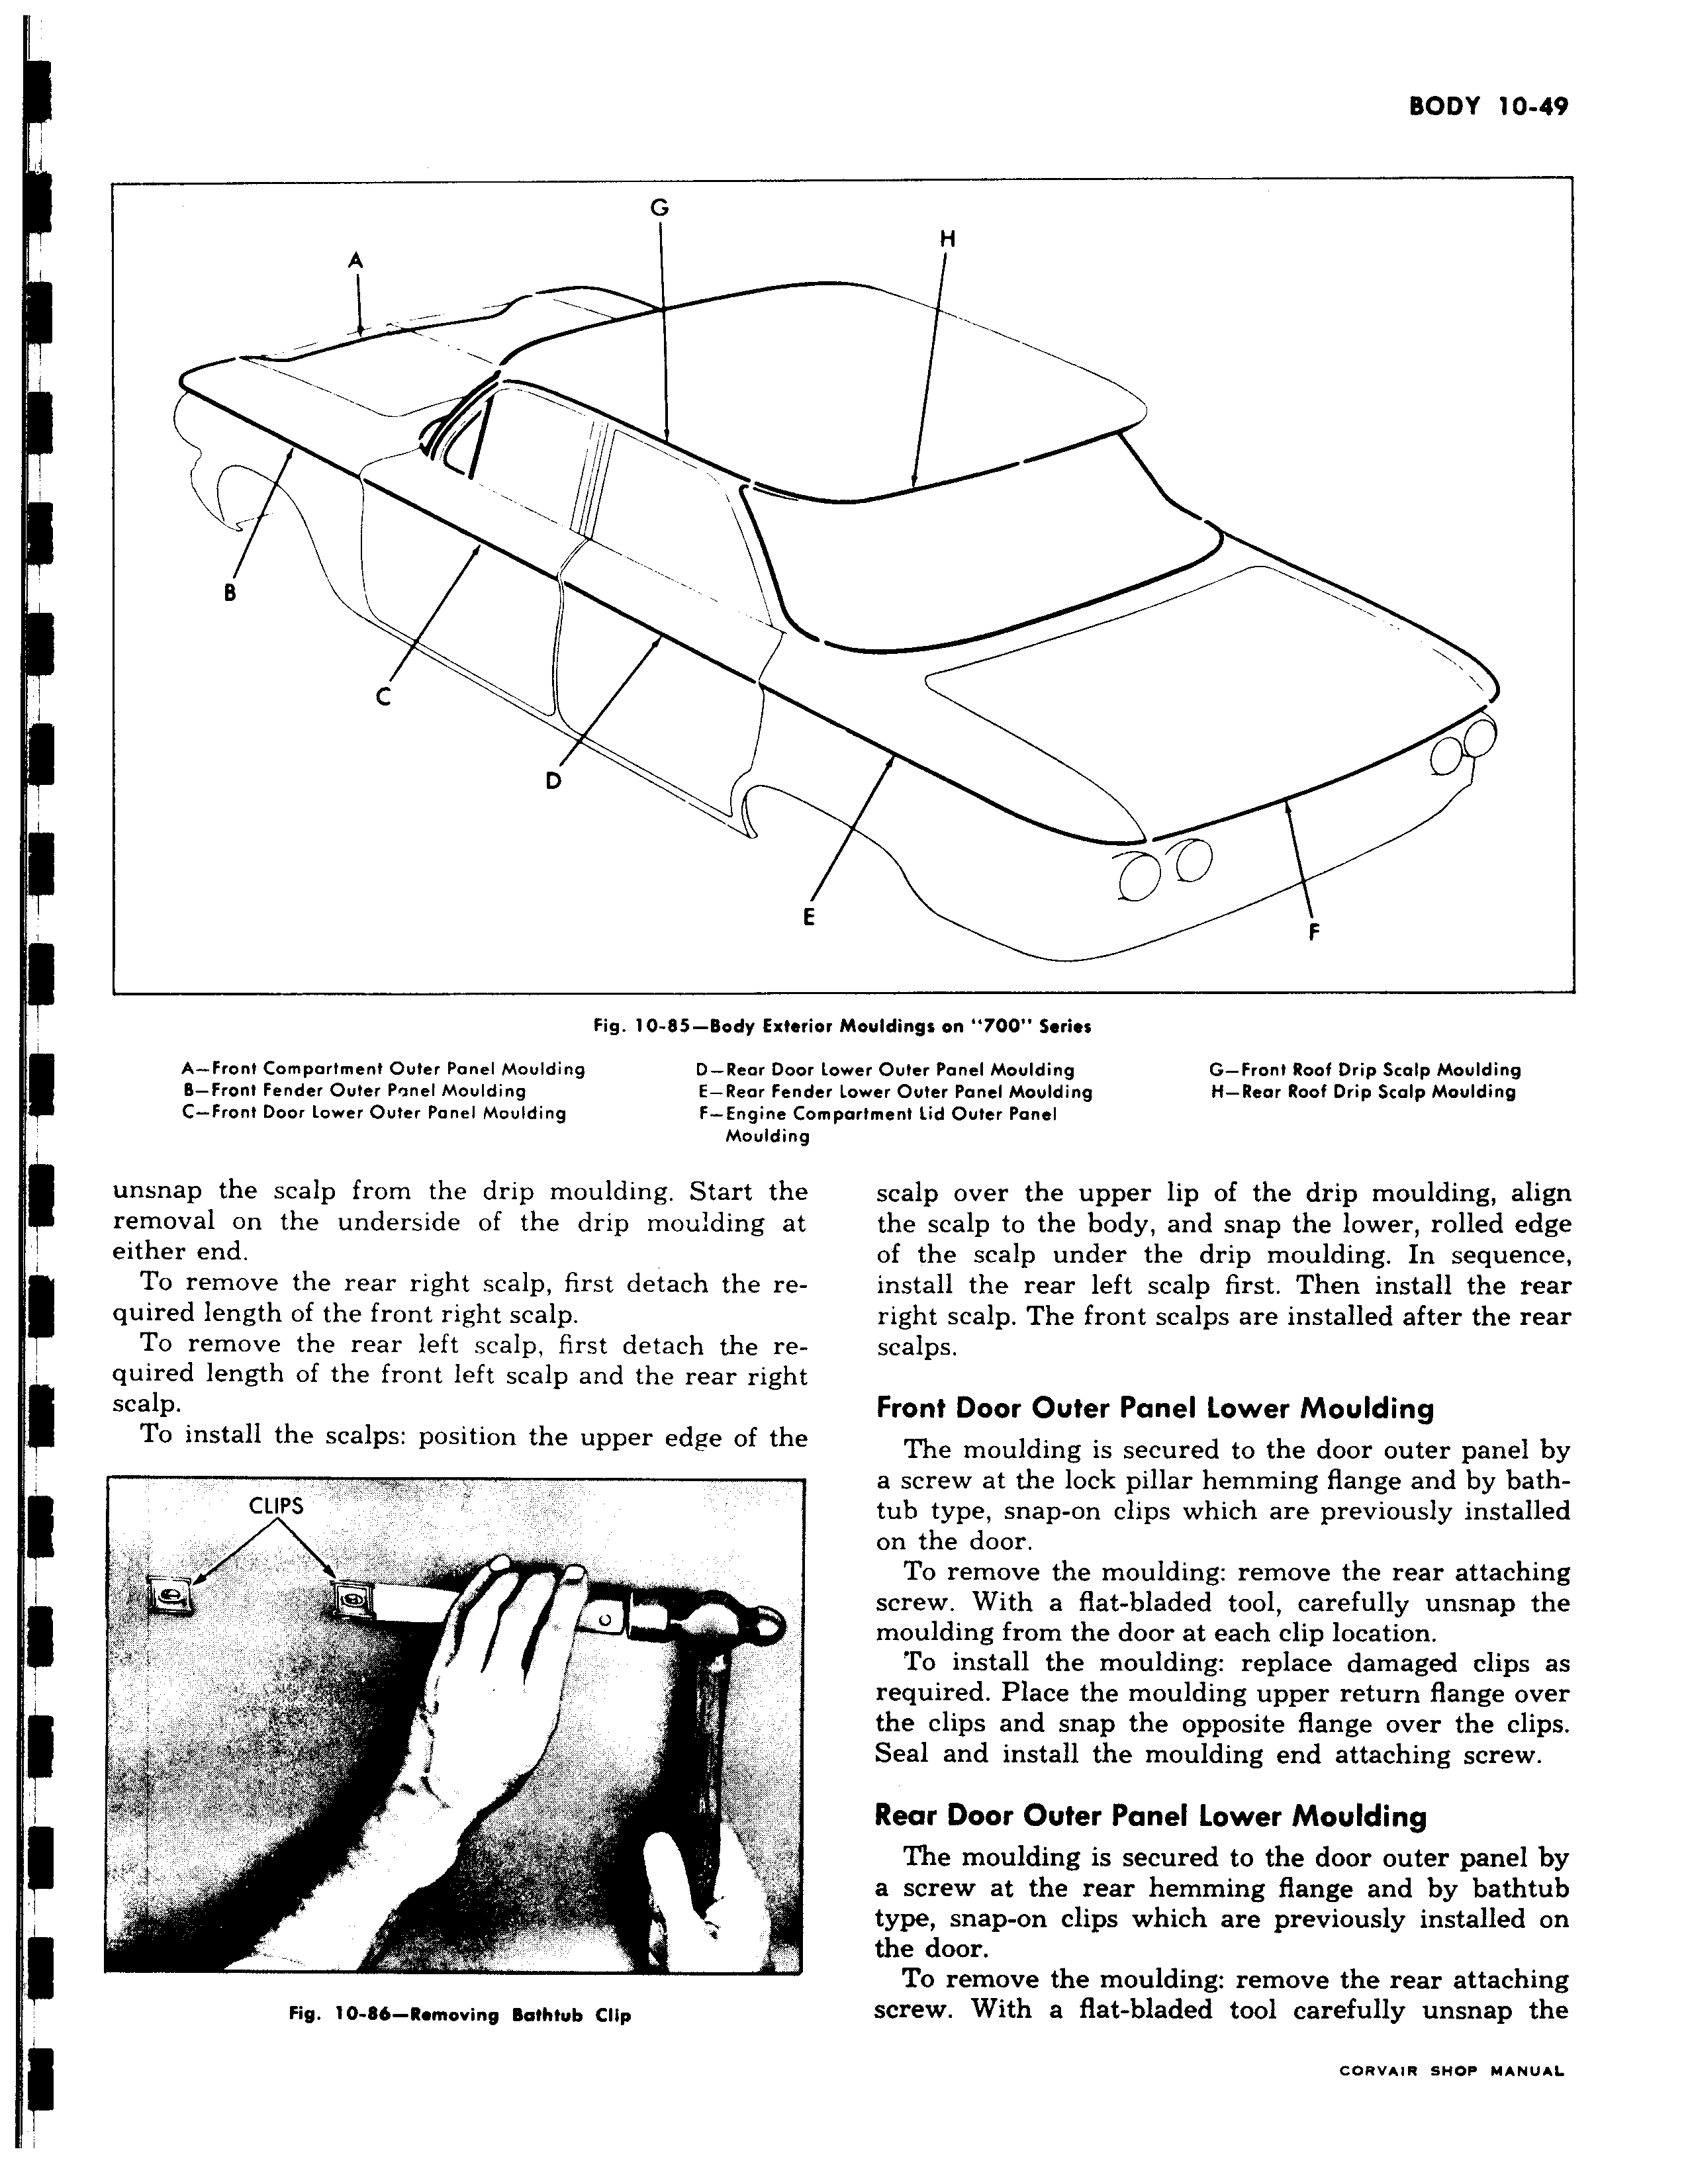
G A y W w i I B i D Fig 10 85 Body Extol A Front Compartment Outer Panel Moulding D Rear Doc B Front Fender Outer Pjnel Moulding E Rear Fen C Front Door Lower Outer Panel Moulding F Engine C Mouldin i unsnap the scalp from the drip moulding Start the removal on the underside of the drip moulding at either end i To remove the rear right scalp first detach the required length of the front right scalp To remove the rear left scalp first detach the required length of the front left scalp and the rear righl i scalp To install the scalps position the upper edge of the CLIPS E F 51 Fig 10 86 Removing Bathtub Cllp H v F ior Mouldings on 700 Series r Lower Outer Panel Moulding G Front Roof Drip Scalp Moulding ler Lower Outer Panel Moulding H Roar Roof Drip Scalp Moulding ompartment Lid Outer Panel I scalp over the upper lip of the drip moulding align the scalp to the body and snap the lower rolled edge of the scalp under the drip moulding In sequence install the rear left scalp first Then install the rear right scalp The front scalps are installed after the rear scalps Front Door Outer Panel Lower Moulding The moulding is secured to the door outer panel by a screw at the lock pillar hemming flange and by bathtub type snap on clips which are previously installed on the door To remove the moulding remove the rear attaching screw With a flat bladed tool carefully unsnap the moulding from the door at each clip location To install the moulding replace damaged clips as required Place the moulding upper return flange over the clips and snap the opposite flange over the clips Seal and install the moulding end attaching screw Rear Door Outer Panel Lower Moulding The moulding is secured to the door outer panel by a screw at the rear hemming flange and by bathtub type snap on clips which are previously installed on the door To remove the moulding remove the rear attaching screw With a flat bladed tool carefully unsnap the

 Next
Next