Jeep Parts Wiki | Ford Parts Wiki
Home | Search | Browse
Prev

 Next
Next
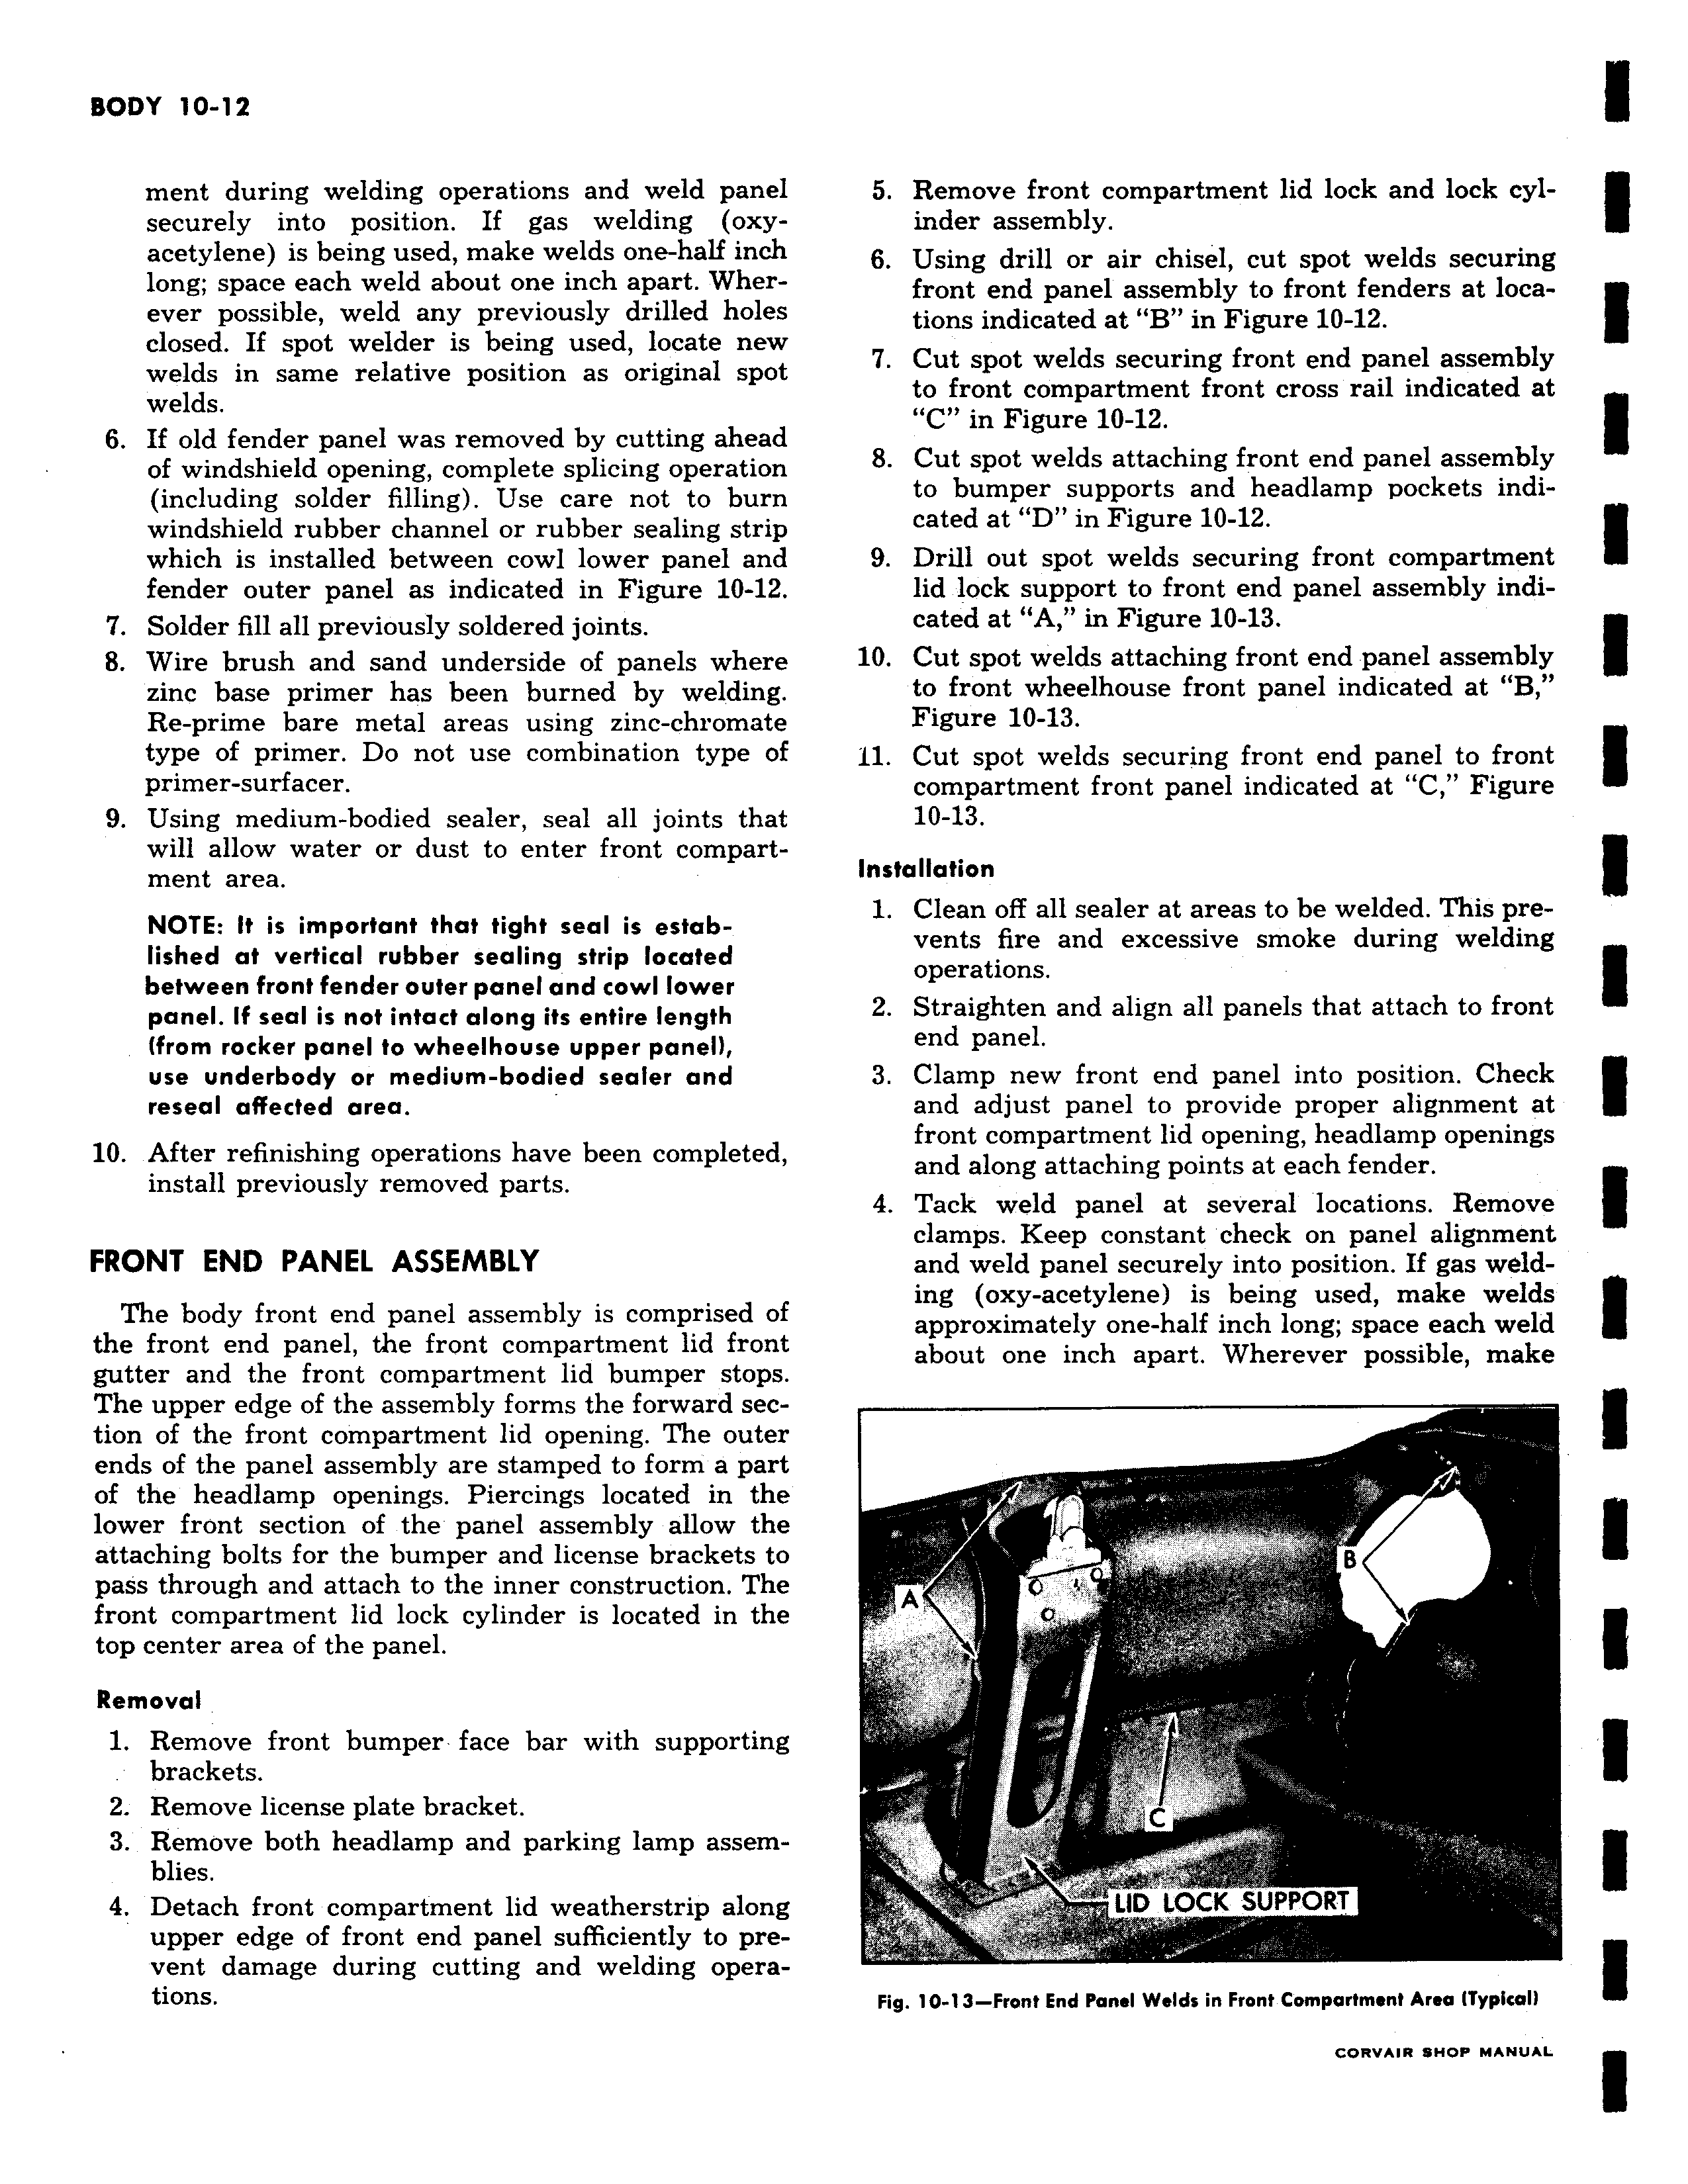
ment during welding operations and weld panel securely into position If gas welding oxyacetylene is being used make welds one half inch long space each weld about one inch apart Wherever possible weld any previously drilled holes closed If spot welder is being used locate new welds in same relative position as original spot welds 6 If old fender panel was removed by cutting ahead of windshield opening complete splicing operation including solder filling Use care not to burn windshield rubber channel or rubber sealing strip which is installed between cowl lower panel and fender outer panel as indicated in Figure 10 12 7 Solder fill all previously soldered joints 8 Wire brush and sand underside of panels where zinc base primer has been burned by welding Re prime bare metal areas using zinc chromate type of primer Do not use combination type of primer surfacer 9 Using medium bodied sealer seal all joints that will allow water or dust to enter front compartment area NOTE It is important that tight seal is established at vertical rubber sealing strip located between front fender outer panel and cowl lower panel If seal is not intact along its entire length from rocker panel to wheelhouse upper panel use underbody or medium bodied sealer and reseal affected area 10 After refinishing operations have been completed install previously removed parts FRONT END PANEL ASSEMBLY The body front end panel assembly is comprised of the front end panel the front compartment lid front gutter and the front compartment lid bumper stops The upper edge of the assembly forms the forward section of the front compartment lid opening The outer ends of the panel assembly are stamped to form a part of the headlamp openings Piercings located in the lower front section of the panel assembly allow the attaching bolts for the bumper and license brackets to pass through and attach to the inner construction The front compartment lid lock cylinder is located in the top center area of the panel Removal 1 Remove front bumper face bar with supporting brackets 2 Remove license plate bracket 3 Remove both headlamp and parking lamp assemblies 4 Detach front compartment lid weatherstrip along upper edge of front end panel sufficiently to prevent damage during cutting and welding operations 5 Remove front compartment lid lock and lock cylinder assembly 6 Using drill or air chisel cut spot welds securing front end panel assembly to front fenders at locations indicated at B in Figure 10 12 7 Cut spot welds securing front end panel assembly to front compartment front cross rail indicated at C in Figure 10 12 8 Cut spot welds attaching front end panel assembly to bumper supports and headlamp pockets indicated at D in Figure 10 12 9 Drill out spot welds securing front compartment lid lock support to front end panel assembly indicated at A in Figure 10 13 10 Cut spot welds attaching front end panel assembly to front wheelhouse front panel indicated at B Figure 10 13 11 Cut spot welds securing front end panel to front compartment front panel indicated at C Figure 10 13 Installation 1 Clean off all sealer at areas to be welded This prevents fire and excessive smoke during welding operations 2 Straighten and align all panels that attach to front end panel 3 Clamp new front end panel into position Check and adjust panel to provide proper alignment at front compartment lid opening headlamp openings and along attaching points at each fender 4 Tack weld panel at several locations Remove clamps Keep constant check on panel alignment and weld panel securely into position If gas weld ing oxy acetylene is being used make welds approximately one half inch long space each weld about one inch apart Wherever possible make r X 1 C LID LOCK SUPPORT Fig 10 1 3 Front End Panel Welds in Front Compartment Area Typical CORVAIR SHOP MANUAL

 Next
Next