Jeep Parts Wiki | Ford Parts Wiki
Home | Search | Browse
Prev

 Next
Next
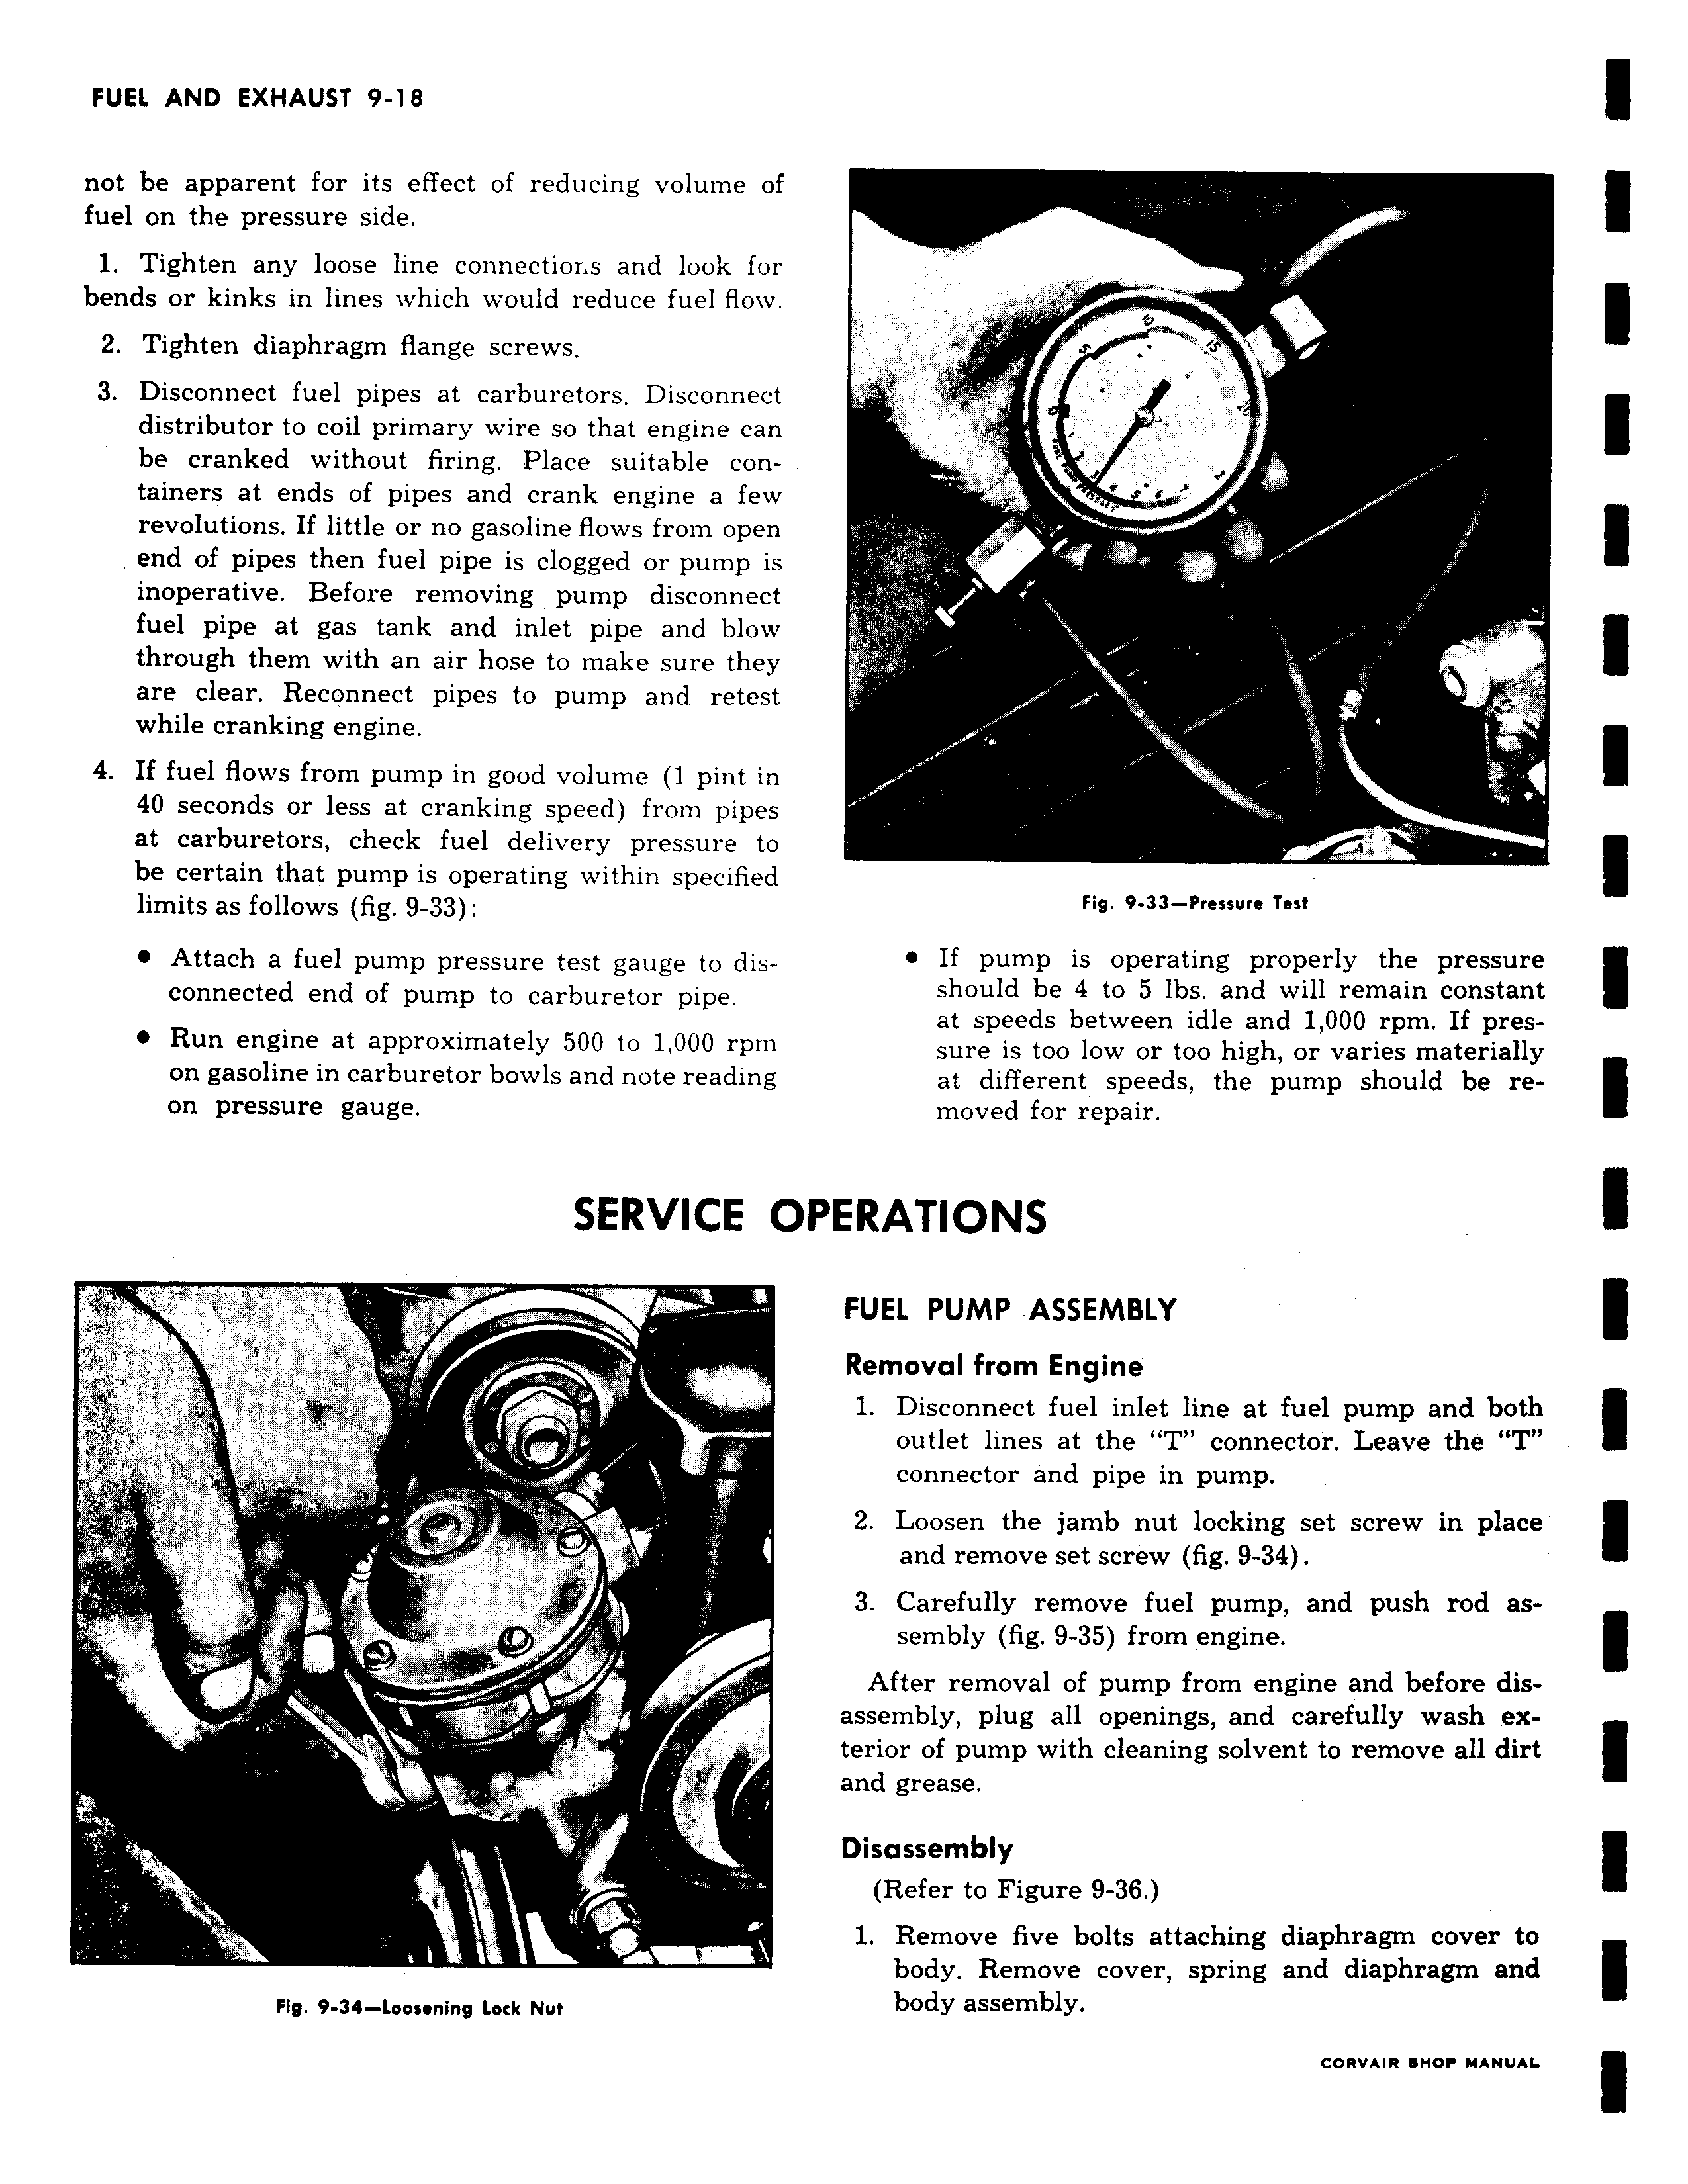
not be apparent for its effect of reducing volume of fuel on the pressure side 1 Tighten any loose line connections and look for bends or kinks in lines which would reduce fuel flow 2 Tighten diaphragm flange screws 3 Disconnect fuel pipes at carburetors Disconnect distributor to coil primary wire so that engine can be cranked without firing Place suitable containers at ends of pipes and crank engine a few revolutions If little or no gasoline flows from open end of pipes then fuel pipe is clogged or pump is inoperative Before removing pump disconnect fuel pipe at gas tank and inlet pipe and blow through them with an air hose to make sure they are clear Reconnect pipes to pump and retest while cranking engine 4 If fuel flows from pump in good volume 1 pint in 40 seconds or less at cranking speed from pipes at carburetors check fuel delivery pressure to be certain that pump is operating within specified limits as follows fig 9 33 Attach a fuel pump pressure test gauge to disconnected end of pump to carburetor pipe Run engine at approximately 500 to 1 000 rpm on gasoline in carburetor bowls and note reading on pressure gauge SERVICE O T x Y I 4 l Fig 9 34 loosening lock Nut o s m T 1 Fig 9 33 Pressure Test If pump is operating properly the pressure should be 4 to 5 lbs and will remain constant at speeds between idle and 1 000 rpm If pressure is too low or too high or varies materially at different speeds the pump should be removed for repair PERATIONS FUEL PUMP ASSEMBLY Removal from Engine 1 Disconnect fuel inlet line at fuel pump and both outlet lines at the T connector Leave the T connector and pipe in pump 2 Loosen the jamb nut locking set screw in place and remove set screw fig 9 34 3 Carefully remove fuel pump and push rod assembly fig 9 35 from engine After removal of pump from engine and before disassembly plug all openings and carefully wash exterior of pump with cleaning solvent to remove all dirt and grease Disassembly Refer to Figure 9 36 1 Remove five bolts attaching diaphragm cover to body Remove cover spring and diaphragm and body assembly

 Next
Next