Jeep Parts Wiki | Ford Parts Wiki
Home | Search | Browse
|
Body Service Manual August 1964 |
|
Prev

 Next
Next
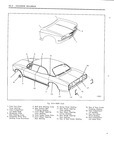
EXTERIOR MOLDINGS SK 1 CORVAIR The exterior moldings are secured to the body 2 Proper tools and care should be employed to by any one or a combination of the following guard against molding damage attachments SEALING OPERATION la attaching screws Although detailed sealing operations tor each in b bolt and clip assemblies with attaching nuts dividual molding are not described in the Molchng Removal Chart the following information is given tc integral studs with attaching nuts to permit a satisfactory sealing operation td snap in studs to pre installed retainers Medium bo lied sealer or body caulking compound are the sealers most frequently used to provide a e snap in clips watertight seal or for anti rattle measures Figure 5K2 illustrates typical attachments for Holes in body panels for screws bolts or clips body side moldings that would permit water to enter the interior of the body should be sealed with body caulking compound Before using the molding charts the following preSE 1 ds r WS nuts Or hpS mfmimfmon Tmu be helpful whe mstaumg Or rev Drip moldings require a 1i v4 bead of medium moving exterior moldings r bodied sealer along the full length of the inner attaching surface The rear quarter pinchweld on l Screw locations the exact location for each convertible styles requires waterproof tape over screw is not shown or mentioned but when hidden the entire pinchweld prior to clip installation the general location is indicated by naming the molding or other part which conceals the screw and therefore must be removed to gain access to the TOOLS AND CARE screw For ease of molding removal it is sometimes 2 When a molding is overlapped the overlapping important to start the removal at a particular molding is indicated in the Engages with other location which is generally the front or rear molding column and must be removed first of the molding This position is indicated when necessary in the Starting Location column of GENERAL PRECAUTIONS the molding chart The following groups of moldings are listed with When removing or installing any body exterior the name or description of the tool which is suitable molding certain precautions should be exercised for molding removal Roof Drip Scalps ointed hook tool P 1 Adjacent finishes should be protected with masking tape to prevent damage to finish Snap on Clips thin flat bladed tool putty knife

 Next
Next