Jeep Parts Wiki | Ford Parts Wiki
Home | Search | Browse
|
Body Service Manual August 1964 |
|
Prev
 Next
Next
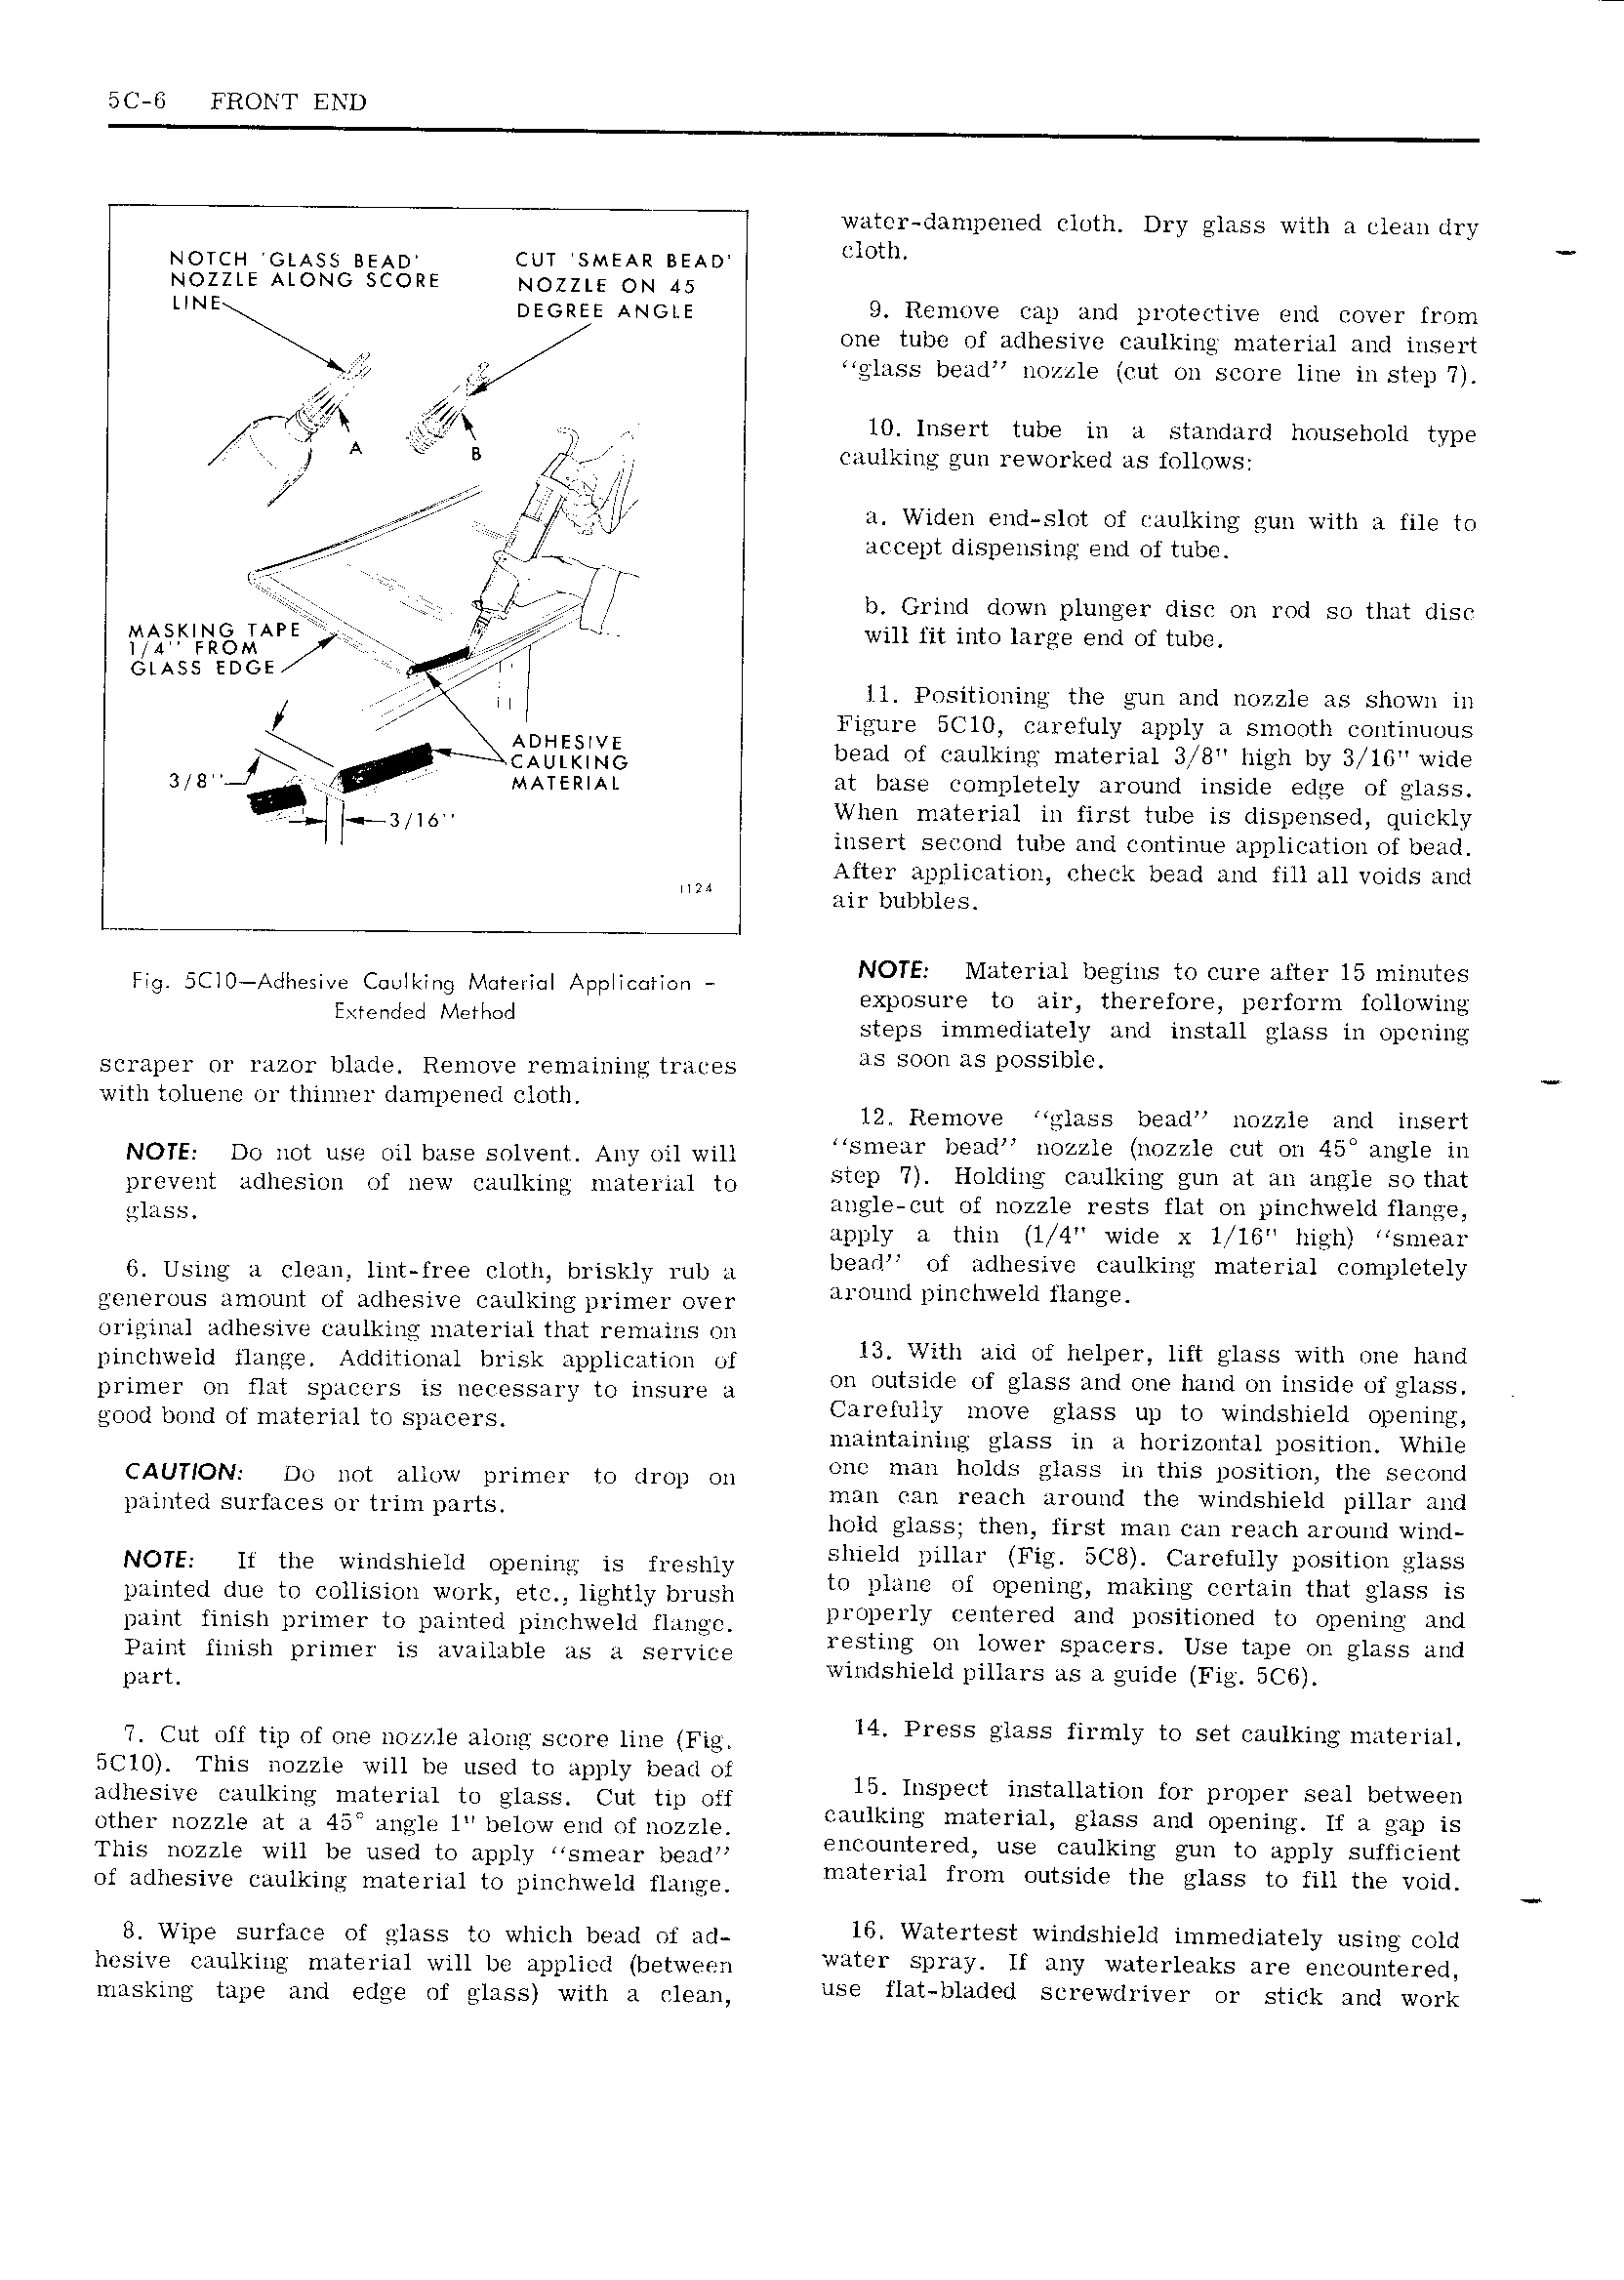
5C 6 FRONT END water dampened cloth Dry glass with a clean dry cloth Notcn cuss and CUT SMEAR BEAD NOZZLE ALONG SCORE NOZZLE ON 45 LlNE DEGREE ANGLE 9 Remove eap and protective end cover from one tube of adhesive caulking material and insert Mglass bead nozzle nut on score line in step 7 Z 7 i ti Q 10 Insert tube in a standard household type A B y caulking sun reworked as follows tt 4 Ht a Widen end slot of raulknig gun with a fnle to fi aeoept dispensing end of tube V i 4 wg V J b Grind down plunger disc 011 rod so that dise MAs n rAPz L V will fit into large end of tube M4 F M GLASS EDGE wt M Il Positioning the gun and nozzle as shown in Figure 5ClO earetuly apply a smooth continuous Q VQESEEME bead of eaulkine material 3 8 high by 3 lt wide 3 ig MATERIAL at base completely around inside edqe of glass 3 16 When material in first tube is dispensed quickly insert second tube and continue application of bead After application cheek bead and fill all voids and I air bubbles C Us M r I A F NOTE Material begins to cure after 15 minutes F DC 0 Hdh S C dma Latina www Mm exposure to air therefore perform following wreme etior steps immediately and install glass in opening seraper or razor blade Remove reinainine traces us 00 1 as P SS1b w tl twluo r thinner dam iened cloth M I em U I 12 Remove gilass bead nozzle and insert NOTE Do not use oil base solvent Any oil will U Su E ttF bgudll HOMIE tmjzzle Cut OH 4 mlglelm prevent adhesion of new eaulkini material to bmp 7 H M e C dkmg guH 1 mt 1E tmt WIWSQ angle cut of nozzle rests flat on pinchweld flange bww apply a thin l 4 wide x li l6 high smear 6 Using a clean lint free rloth briskly rub a lkml 1 Ut itdhiitga tdulkmg mdtwul Cumplctely o 1 v r generous amount of adhesive eanlking primer over NOUN pmt me mee original adhesive caulkins material that remains on Y E f i I pinchweld flange Additional brisk application ol i 3 t X fh m1U helpflh lag E l S mF 1f d primer on flat spaeers is nevessary to insure a U TW 51 lm we tum 1l 1 5 U e 5 iii v vw oi U g Oa1 1 ma1 rmnei i l1ieepaeeie tf wie e S l O i t i mam 1 nnng g ass in a iorizon a posi ion ll e CAUTION DU not auvw primm to drop Ou one man holds glass in this position the second V man can reach around the windshield pillar and painted suifaces oi tiim paits h H h IG f t I 1 1 o c a ss c 1 n irs man can reaci arounc winc NOTE lt the windshield opening is freshly img mlltr Hg D 8 L CLu mui1 DEEHIW gags 1 1 2 1 ov 1 z 1 W2 painted due to collision work etc lightly brusn P UT U Fl Bu u ini Ut Ninn 1 ij lsq lb 1 t so o iio paint finish primer to painted pinchweld flange mtlpm B Eu md mt DO l Umm to Opemng me Paint finish primer is available as a Service ESt g i 1 i i SP 1 S USG tape on glass and p u t i windshield pillars as a guide Fig 5C6 I4 I 1 U Cut ufl tip of one nozzle along score line Fig Pxkbs gigs fumly to Set Cdulkmg m HEIHL 5Cl0 This nozzle will be used to apply bead of 15 I t t u t r I r adhesive caulking material to glass Cut tip off gmk H mn Ol p1UD l i1 betfv n other nozzle at 1 angle l below end of nozzle Ugg l ltuT l1 glif nil Op mng H L gdlils This nozzle will be used to apply Usmear bead nn tUul 1 uw sw lag gl tO ipp1y Sufuutlm 11 ri o of adhesive caulking material to pinehweld flange H1 Ujm Ou bug le B SQ to flu the OKL B Wipe Surface Of MMS to which bend DI M 16 Watertestpwindshield inirnediately using cold hesive caulking material will be applied between t SPmY U MW W t i 1 kS HN 9 0U11t 1 9 1 muskmg tape and edge Of ghsg with A dem use flat bladed screwdriver or stick and work